How to Prevent a Dryer Fire: A Practical Safety Guide
Learn practical steps to prevent a dryer fire with lint removal, vent checks, and safe operation. Easy DryVent guides homeowners and DIYers through a thorough maintenance routine to protect homes and keep dryers running safely.

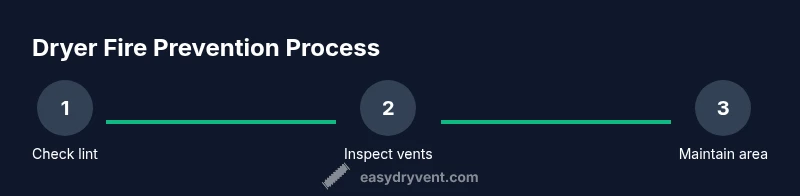
By following a steps-based plan, you can prevent a dryer fire and protect your home. Focus on lint removal, proper venting, and routine inspections, plus safer startup habits. This quick answer previews the exact steps you’ll follow in the full guide to reduce fire risk and keep your dryer running safely.
What causes dryer fires
Dryer fires most often start inside the home’s venting path where lint accumulates and heat builds. When lint blocks airflow, the dryer runs hotter to dry clothes, increasing ember risk. Over time, damaged or restricted ductwork can trap hot air, ignite lint ash, and spread flames to nearby fabrics or walls. According to Easy DryVent, a clear path for air and a clean lint filter are your first lines of defense. Note that even new appliances can overheat if installed incorrectly or if the vent is undersized. Regular checks reduce these risks and keep your system running efficiently.
Your daily and weekly maintenance routine
A simple routine goes a long way. After every load, empty the lint screen and wipe away lint from around the filter housing. Weekly, vacuum the lint trap housing and the interior of the dryer’s exhaust opening to remove hidden lint. Monthly, inspect the vent hose for kinks, wear, or crushing and ensure the exterior vent cap opens fully when the dryer is running. Maintaining a tidy area around the dryer also minimizes the chance of combustibles nearby and helps heat dissipate safely.
Clean lint properly: how and when
Lint is the primary fuel for a dryer fire when it accumulates. Clean the lint screen after every load, and run a vacuum or brush through the housing behind the screen to remove lint that escapes. Use a flexible brush or a shop vac with a brush attachment to reach inside the cabinet. Avoid using compressed air, which can push lint deeper into the system. Periodic deep cleans, especially after multi-load days or high-heat cycles, reduce buildup and improve airflow.
Venting and installation best practices
Ventilation quality is critical. Use a rigid metal duct rather than flexible foil or vinyl, and keep duct length as short and straight as possible. Secure joints with metal foil tape (not cloth tape) to prevent leaks. Ensure the exterior vent is free of obstructions like snow, debris, or bird nests, and install a backdraft damper to prevent outside air from entering the system. A correctly installed vent decreases heat buildup and lowers fire risk substantially.
Safety devices and monitoring
Install and maintain smoke alarms in adjacent areas and near living spaces. A functioning heat detector or smart sensor can provide early warnings of abnormal temperatures. Regularly test alarm batteries and ensure a fire extinguisher rated for ordinary combustibles is accessible. Simple devices, when maintained, add a critical safety layer without complicating daily routines.
Common mistakes that create risk
Avoid overloading the drum, which increases tumble heat and lint production. Don’t run the dryer while you’re asleep or away from home, and never leave a running dryer unattended for long periods. Don’t use the appliance if the exterior becomes unusually hot or if you notice a burning smell. Finally, do not rely on foil ducts or uninsulated flex ducts, which trap heat and pose a serious fire hazard.
When to call a pro
If you notice persistent overheating, unusual odors, or burning smells, stop using the dryer immediately and consult a professional. A licensed HVAC or appliance technician can inspect the vent run, fix leaks, replace damaged ducts, or recommend a vent cleaning schedule. Investing in a professional assessment saves time, protects property, and reduces long-term maintenance costs.
Tools & Materials
- Vacuum with flexible nozzle(Vacuum the lint trap housing and dryer cabinet interior; use a hose attachment to reach tight spaces)
- Lint brush or microfiber cloth(For manual removal around the lint filter and housing)
- Rigid metal vent duct(Prefer rigid metal duct over foil alternatives; ensure proper fit)
- Metal foil tape(Seal joints securely; avoid fabric tapes)
- Exterior vent cap with damper(Prevents backdrafts and pests)
- Flashlight(Inspect hard-to-see sections of ductwork)
- Fire extinguisher (class ABC or BC)(Accessible location; know how to use)
- Screwdriver set(If parts are loose or panels need removing)
Steps
Estimated time: 60-90 minutes for initial thorough check and cleaning
- 1
Inspect lint screen after every load
Remove and check the lint screen for clogs. If lint is visible on the edge of the screen, clean it with a brush. Ensure the screen seats fully to restore airflow and drying performance.
Tip: Make it a habit to check during the cool-down phase of each cycle. - 2
Vacuum the lint trap housing
Power off the dryer, unplug it, and use a vacuum with a narrow attachment to remove lint from the housing behind the lint screen. This prevents buildup that reduces airflow and increases heat.
Tip: Work slowly and avoid pressing lint deeper into the cabinet. - 3
Inspect the vent hose for damage
Disconnect the vent hose at both ends and look for cracks, crushing, or kinks. Replace damaged sections with rigid metal ducting and secure with foil tape.
Tip: Check for crushed sections behind the dryer or in the wall cavity. - 4
Clean the exterior vent and cap
Go outside and remove debris from the vent cap. Clear any bird nests or lint buildup so air can exit freely when the dryer runs.
Tip: Use a long brush or tubing to reach inside the vent opening. - 5
Verify duct length and routing
Aim for the shortest, most direct duct run with as few elbows as possible. Excessive length or many bends create resistance and heat buildup.
Tip: Avoid metal foil ducts; favor rigid metal for safer airflow. - 6
Test for air leaks and backdrafts
With the dryer running, feel for air escaping at joints and inspect taped seams. Re-tape any loose joints to maintain an airtight path for exhaust.
Tip: Run a test cycle and verify full airflow both indoors and outdoors. - 7
Clear the surrounding area
Move flammable items at least three feet away from the dryer and vent. Keep detergents, solvents, and fabrics away from heat sources.
Tip: Use a dedicated laundry space with good clearance. - 8
Know when to seek professional help
If you notice persistent heat, burning odors, or suspect a compromised vent, contact a pro for an inspection and potential vent cleaning.
Tip: Document any issues with photos for the technician.
Common Questions
What is the most common cause of dryer fires?
Lint buildup and vent obstructions are the leading causes. Regular cleaning and vent inspections dramatically reduce this risk.
Lint buildup and blocked vents are the top causes of dryer fires; regular cleaning helps prevent them.
How often should I clean my lint screen?
Clean the lint screen after every load. Perform a deeper clean of the surrounding housing at least once a month to remove hidden lint.
Clean the lint screen after every load and deep-clean the housing monthly.
Can foil ducts cause fires?
Yes. Foil ducts can crush or kink easily and trap heat. Replace with rigid or semi-rigid metal ducting for safer operation.
Foil ducts are a fire hazard; replace with rigid metal ducting.
Is vent cleaning worth it?
Regular vent cleaning improves airflow, reduces drying times, and lowers fire risk. It’s a smart investment for safety and efficiency.
Vent cleaning helps airflow and safety; it’s worth doing.
What should I do if I smell burning from the dryer?
Stop the dryer, unplug it, and evacuate if necessary. Do not operate again until a professional inspects the vent and system.
If you smell burning, stop, unplug, and call for professional help.
Watch Video
Key Points
- Inspect lint filters after every load.
- Maintain a clean, direct vent path with proper ducts.
- Schedule professional vent maintenance regularly.
- Monitor for signs of overheating and burning odors.
- Create a safety routine with detectors and accessible extinguishers.