How to Dry Hair Without Frizz: Step-by-Step Guide
Learn a practical, step-by-step method to dry hair without frizz using low heat, a microfiber towel, and a diffuser. Easy DryVent shares expert tips for frizz-free shine and healthier hair.

Goal: Learn a proven, step-by-step method to dry hair without frizz. You’ll need a soft microfiber towel or cotton T‑shirt, a heat protectant, and a diffuser or low-heat setting. The approach emphasizes gentle handling, low heat, and strategic product use to reduce frizz, boost shine, and maintain natural texture. This quick guide aligns with Easy DryVent's practical dryer guidance principles for safe, efficient routines at home.
Understanding frizz dynamics
Frizz happens when the hair shaft's cuticle lifts in response to moisture, humidity, or heat damage. When humidity is high, water molecules push against the outer layer, causing frizz and a dull appearance. People with porous or damaged hair see frizz more quickly because their cuticles are lifted or uneven. The goal of frizz-free drying is to minimize heat exposure while maintaining effective drying, so the cuticle stays sealed and light reflects off the surface for smooth, shiny results. According to Easy DryVent, small changes in how you dry hair can dramatically reduce frizz. Gentle handling, avoiding aggressive rubbing, and choosing airflow-directing tools make a noticeable difference. The method also respects your hair type—what works for straight strands can differ from curls, waves, or coils, so adapt pressure, speed, and product use accordingly.
Prep: Wash, Condition, and Detangle
A solid foundation matters. Start with a gentle cleanse and a hydrating conditioner that suits your hair type. Detangle hair when it's damp using a wide-tooth comb to reduce breakage. Rinse with cool water enough to close the cuticle before you begin drying. Apply a lightweight leave-in conditioner or anti-frizz serum designed for your texture, focusing on mid-lengths to ends. This prep helps seal the cuticle and prepares your hair to respond to low heat without becoming overly weighted. Remember, the goal is to minimize friction and maximize smooth surface reflection for a frizz-free finish.
Tools and products that help minimize frizz
Choosing the right tools supports a gentle, effective dry. A microfiber towel or soft cotton T‑shirt reduces friction versus a regular towel. A heat-protectant spray or lotion guards against cuticle damage during heat exposure. Use a lightweight serum or anti-humidity cream, especially on mid-lengths and ends, to seal cuticles. A hair dryer with a diffuser attachment and multiple heat settings gives you control over airflow and temperature, allowing you to direct mist toward the roots without overheating the lengths. A wide-tooth comb or detangling brush helps keep strands aligned, so air can flow smoothly without tangling. Finally, keep a cool shot setting handy to set the style once moisture levels drop.
Drying strategies: Diffuser vs. Air-Drying
Air-drying minimizes heat exposure but can invite humidity-driven frizz in damp climates. If you must use a dryer, a diffuser is your ally, especially for curly or wavy textures. A diffuser distributes air evenly, reduces direct heat on one spot, and helps lift roots for natural volume. When you choose air-drying, place hair in loose sections and fluff minimally to avoid inducing frizz from friction. For most textures, combining micro-fiber blotting with a diffuser yields the most consistent results: you get even dryness, controlled frizz, and a healthier look overall. Easy DryVent’s guidance emphasizes patience and precision over forceful blow-drying.
Finishing touches: Post-dry care to lock in smoothness
Once hair is dry, apply a small amount of smoothing serum or a light oil to the ends to seal the cuticle and add shine. Avoid heavy products that can weigh hair down or cause buildup. If you have flyaways, lightly mist with a humidity-resistant spray and comb through with a wide-tooth comb. A quick cool-down blast helps set the style and minimizes heat-induced frizz. Keep styling tools at a safe distance from the scalp to prevent overheating the roots, which can create unwanted volume or a crispy texture. Small, deliberate steps create a lasting, polished finish without sacrificing natural texture.
Troubleshooting common frizz causes and fixes
Frizz can pop up for a few reasons: excessive towel friction, using high heat, or relying on products that don’t suit your hair’s porosity. If frizz persists, switch to gentler blotting, reduce heat, or adjust product layering—thin, silicone-free leave-ins for fine hair, or light serums for coarser textures. Humidity can start a frizz cycle; combat it with anti-humidity sprays or serums that form a flexible film around strands. Breakage or damage from over-processing also invites frizz; in that case, consider a restorative routine with shorter washing intervals and deeper conditioning.
Maintenance and safety tips for everyday routine
Protect your hair and scalp by avoiding extreme heat exposure. Always use a heat protectant and keep the dryer’s heat at a low-to-medium level. Clean your diffuser screen regularly to prevent buildup that reduces airflow. If you notice unusual brittleness or shedding, give your hair a break from heavy styling and consult a professional. A safe drying environment includes away from open flames or heat sources, no wet hands near hot appliances, and proper cable management to prevent trips or accidental pulls. Easy DryVent emphasizes consistent practice—small, repeatable steps yield durable frizz reduction over time.
Tools & Materials
- Microfiber towel or cotton T-shirt(Patience: blot hair, don’t rub.)
- Heat protectant(Apply to lengths and ends before drying.)
- Leave-in conditioner or anti-frizz serum(Lightweight formula for fine hair; creamier for thick hair.)
- Hair dryer with diffuser attachment(Low-heat setting; avoid high heat.)
- Wide-tooth comb or detangling brush(Use on damp hair to minimize breakage.)
- Hair clips or hair ties(Section hair for even drying.)
- Cool shot option on dryer(Finish with cool air to set.)
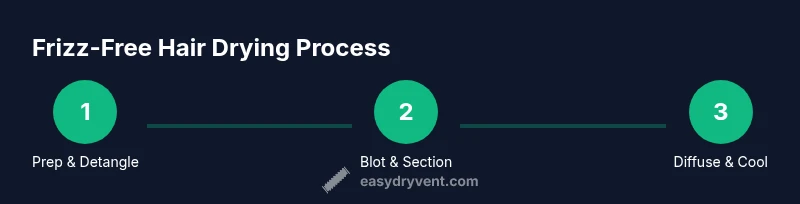
Steps
Estimated time: 20-30 minutes
- 1
Prepare hair for drying
Begin with clean, conditioned hair. Gently blot excess water with a microfiber towel or T‑shirt. Apply a lightweight heat-protectant and a small amount of anti-frizz serum to mid-lengths and ends, avoiding the roots to reduce grease and weigh-down.
Tip: Sectioning hair before drying makes it easier to control heat exposure and prevent tangling. - 2
Detangle and part
Use a wide-tooth comb to detangle while hair is damp. Part hair into 4 sections to manage air distribution. Avoid aggressive brushing that creates friction and static.
Tip: Start at the ends and work upward to minimize breakage. - 3
Blot, don’t rub
Gently blot hair with the towel to remove moisture without rough friction. Do not rub vigorously, which can roughen the cuticle and induce frizz. Let the majority of moisture transfer without tugging the strands.
Tip: A blotting technique reduces swelling around the shaft and helps maintain smoothness. - 4
Direct heat with diffuser
Attach the diffuser and use low heat/low speed. Cup sections of hair and lift at the roots to encourage natural volume while drying the lengths gradually. Move the diffuser in slow circular motions to distribute heat evenly.
Tip: Keep the dryer about 3-4 inches away from the scalp to prevent scorch and scalp irritation. - 5
Use cool air to set
When most of the moisture is gone, switch to cool air to seal the cuticle and lock in shine. Continue diffusing or air-drying until hair feels dry to the touch but not brittle. Cool air helps reduce lingering frizz.
Tip: A final cool blast can dramatically improve smoothness and perceived shine. - 6
Finish and style softly
Apply a small amount of smoothing serum or a light-reflective oil to the ends, then comb gently for an even finish. If you prefer more structure, set with a light-hold spray at a distance and avoid touching hair while it cools.
Tip: Less product equals less buildup and less risk of frizz over time. - 7
Evaluate and adjust for next time
Assess the result and note any persistent frizz areas. Adjust heat level, product amount, or section size for future sessions. Consistency matters; refine your routine to match climate and hair texture.
Tip: Keep a simple drying log to track what works best for your hair type.
Common Questions
Can I air-dry to prevent frizz?
Air-drying can reduce heat damage, but it may invite frizz in humid environments. Use a leave-in conditioner and anti-frizz product to promote smoother texture, and consider a diffuser or cool air finish if you live in a humidity-prone area.
Air-drying reduces heat damage, but humidity can still cause frizz; apply a light leave-in and finish with cool air to help smooth the texture.
Is a diffuser necessary for frizz-free results?
A diffuser is not strictly necessary for all hair types, but it helps distribute heat evenly and minimize direct airflow, reducing frizz for curly or wavy textures. If you have straight hair, a diffuser can still improve volume control and dryness without roughness.
A diffuser isn’t mandatory for everyone, but it helps many hair types dry evenly and reduce frizz.
What settings should I use on the hair dryer?
Use a low heat setting with low or medium airflow. Save high heat for occasional quick drying only if your hair is very resistant to moisture. Finish with a cool shot to seal the cuticle.
Keep heat low, airflow moderate, and finish with a cool blast to lock in smoothness.
Can I rub my hair with a towel to speed up drying?
Rubbing hair with a towel increases friction and frizz. Always blot or squeeze gently with a microfiber towel or T‑shirt instead.
Don’t rub; blot gently with a microfiber towel to avoid frizz.
Which products best resist frizz?
A lightweight heat-protectant, followed by a small amount of anti-humidity serum or smoothing cream, works well for most hair types. Avoid heavy waxy products that can weigh hair down.
Heat protectant plus a light serum or smoothing cream helps most people resist frizz.
How long does it take to dry hair without frizz?
Dry times vary by hair type, length, and climate. With a diffuser, expect around 20-30 minutes for medium-length hair; longer, thicker hair may require additional cycles. Patience and consistent technique matter more than speed.
Drying times depend on hair type, but a diffuser routine often takes about 20 to 30 minutes for medium-length hair.
Watch Video
Key Points
- Dry with low heat and gentle pressure.
- Use the right tools to minimize friction.
- Finish with cool air to set the cuticle.
- Protect hair with heat protection and light serums.