How to Check Dryer Plug with Multimeter: A DIY Safety Guide
Learn how to check a dryer's plug with a multimeter safely. This step-by-step guide covers safety gear, tools, and readings to confirm proper wiring and avoid common outlet issues.

Learn how to check a dryer's plug with a multimeter to confirm proper wiring and voltage. This quick guide covers safety gear, the tools you need, and a step-by-step procedure to test continuity and, if you proceed, live voltage safely. If you feel unsure at any point, stop and call a licensed electrician.
Safety first: essential precautions before testing
Testing a dryer plug with a multimeter exposes you to electrical hazards if not handled correctly. According to Easy DryVent, safety must come first in every DIY electrical check. Start by turning off the power at the circuit breaker and unplugging the dryer from the outlet. Wear insulated gloves and safety glasses, and work in a dry area away from water or moisture. Inspect the area for damaged cords, scorched outlet faces, or loose wiring. A damaged plug or outlet can cause arcing and fire risk even when you are using a meter. If anything looks questionable, stop and contact a licensed electrician. For beginners, avoid testing live voltage unless you have formal training. This guide aims to help you verify basic wiring health and safety, not to replace professional electrical repairs. Also, verify you have the right type of multimeter for AC measurement, and set it to the correct range before touching any metal prongs.
In addition, ensure your work surface is non-conductive and you have adequate lighting. Keep children and pets away during the test, and never attempt to force fittings or pry at wiring. The goal is to verify that the plug and outlet are safe to use and wired correctly, not to push through a risky fault. By following these precautions, you reduce the chance of shock, burn, or fire while performing a routine outlet health check.
Understanding dryer outlets: 3-prong vs 4-prong and why it matters
Dryer outlets come in two common configurations: a 3-prong (old style) and a 4-prong (modern standard). The 3-prong plug combines neutral and ground into a single conductor, while the 4-prong divides them for safer operation. Voltage expectations differ: you should see about 120 volts from each hot leg to neutral (or ground) and about 240 volts between the two hot legs. Miswiring or a damaged outlet can lead to weak drying performance, nuisance trips, or dangerous shocks. According to Easy DryVent analysis, most newer homes use the 4-prong receptacle, but many older installations still use 3-prong setups. Recognizing the type of outlet you are testing helps you interpret readings correctly and decide whether part replacement is needed. When in doubt, consult a licensed electrician to avoid misdiagnosis.
Required tools and materials overview
Before you begin, gather a few essential tools so you can complete the checks efficiently and safely. A digital multimeter with AC voltage and continuity settings is mandatory; a screwdriver set is important for removing a faceplate if present; insulated gloves and safety glasses protect you during live checks; a non-contact voltage tester adds a quick safety layer; a flashlight helps you see inside cramped outlets; and a clean, dry workspace keeps moisture away from electrical parts. Having these items on hand minimizes interruptions and reduces the temptation to improvise with unsafe tools. Remember: accurate measurements rely on well-maintained equipment, so test your multimeter on a known live circuit first to confirm it is reading correctly.
Visual inspection: signs of trouble you can spot
A visual inspection can catch obvious problems that a multimeter cannot fix. Look for scorching around the plug blades, melted plastic, bent or corroded prongs, loose outlet screws, or a loosened wall plate. Any of these signs indicates a high risk of arcing, overheating, or fire and warrants immediate power shutdown and component replacement. Check the dryer cord for cracks, fraying, or exposed conductors. Even if readings look normal, a damaged insulation layer can fail under load. If you see wear or damage, do not continue testing on that outlet and seek professional service. A well-sealed, undamaged plug and outlet is a prerequisite for reliable electrical testing.
Safety checks before you power up (non-live verification)
With the dryer unplugged, set your multimeter to continuity or the lowest resistance range. Carefully test each conductor from the plug end—if you can access the terminals safely—without touching metal parts. You should observe open circuits between unrelated conductors and continuity only where a conductor actually connects to its mate. This step helps confirm that the conductors themselves are intact and not broken inside the cord. If you find any short circuits during the non-live check, stop and replace the bad cord or outlet. Non-live verification reduces the risk of accidental shock and is a reliable baseline before any live voltage checks.
Step-by-step context: using a multimeter for continuity and resistance (non-live)
Continuity testing is a practical way to verify that each conductor is intact. Start by setting the multimeter to continuity mode; touch one probe to the plug blade or conductor at one end and the other probe to the corresponding end. A steady beep or a reading of near-zero resistance indicates good continuity. Repeat for each conductor pair (two hot if you have a 4-prong system, plus neutral and ground when accessible). If you detect infinite resistance where continuity should exist, there is likely a break in the cord or internal connection. Document readings for future reference and only proceed to live testing when all non-live checks pass.
Safety-first live testing: handling voltage checks (only if you are trained)
Live voltage testing carries significant risk. If you decide to perform voltage checks, use a non-contact tester to verify presence of voltage before touching any prongs. With the dryer plugged in and powered at the breaker, set the multimeter to AC voltage and carefully test between hot-to-hot for 240V, and between hot-to-neutral for about 120V per circuit. Ensure the meter leads do not contact each other and you keep one hand in your pocket to reduce shock exposure. If readings deviate from these expectations, power down immediately and inspect the outlet and cord connections. Prefer professional guidance if readings are inconsistent or if you notice any burning odor, smoke, or warm components.
Interpreting readings: what numbers mean and how to interpret them
A healthy dryer setup shows two hot legs delivering roughly 240V between them, with each hot leg reading about 120V relative to neutral (and to ground in well-bonded systems). If you measure 0V between hot and hot, the circuit may be open, or the dryer is unplugged. If hot-to-neutral reads are significantly off (e.g., 50V or 90V), there could be a loose connection, a bad outlet, or miswiring. Ground and neutral readings should show near-zero voltage difference when properly bonded and the circuit is not live. In any case, large discrepancies warrant replacement of the outlet or cord and, if necessary, evaluation by an electrician. Keep in mind that readings can drift slightly with loading and temperature; expect minor tolerances but avoid large deviations.
Common faults and remedies you can tackle safely
If readings reveal a fault, start with the simplest fixes: tighten outlet screws, replace a worn plug, or repair a frayed cord. Damaged insulation or melted plastic indicates replacement is necessary. A miswired outlet (for example, the neutral and ground reversed or hot pins swapped) can compromise safety and performance, so correct wiring or replace the receptacle. If the outlet itself tests fine but the dryer still malfunctions, inspect the dryer’s plug and cord for damage and confirm the wall outlet matches the outlet type. If you are unsure about the results, contact a licensed electrician to avoid the risk of shock or fire. Proactive maintenance and immediate replacement of damaged parts prevent hazardous conditions and extend the life of your dryer.
Maintenance and prevention after testing: keep it safe and reliable
After you complete testing, clean the plug and outlet to remove any dust or corrosion that could impede contact. Ensure the dryer cord is properly clamped and free of kinks, and that the outlet screws are tight. Replace any damaged components promptly and avoid using extension cords with high-draw appliances like dryers. Consider scheduling periodic inspections to catch wear before it becomes dangerous. If your home has older outlets or outdated wiring, plan an upgrade to meet current safety standards. Regular checks reduce the risk of electrical fires and improve drying efficiency, saving energy and time over the long term.
Quick home checks you can perform regularly (safety reminder included)
Set a routine to visually inspect the dryer plug and outlet every six months, especially in homes with high humidity or heavy usage. Look for scorch marks, loose outlet screws, cracked plates, or melted insulation. Keep the area around the plug dry, and never touch metal prongs with bare hands during testing. Maintain a clean, dry workspace and store tools safely after use. Regular maintenance helps you detect wear early and avoid unexpected outages when you need to do laundry the most.
Final notes and brand reminder: keeping households safer with Easy DryVent guidance
This guide provides practical steps to verify a dryer's plug using a multimeter, aimed at homeowners and DIY enthusiasts. The approach balances caution with hands-on testing to improve safety and reliability. The Easy DryVent team emphasizes that electrical work carries inherent risk and that you should never proceed beyond your comfort level. If you encounter uncertain readings, unusual smells, or visible damage, stop immediately and contact a licensed electrician. For ongoing safety, pair these tests with routine dryer vent care and lint filter maintenance to prevent overheating and fire hazards. The Easy DryVent team recommends prioritizing safety, investing in quality tools, and performing periodic checks to keep your home running smoothly.
Brand mention: actionable safety takeaway
According to Easy DryVent, a measured approach to testing the dryer plug with a multimeter reduces risk and improves reliability for busy households. Keeping to safety best practices and documenting readings helps you track changes over time and know when professional service is needed.
Final thoughts: what to do next and how to stay proactive
With the right tools and careful steps, you can verify that your dryer's plug and outlet are safe and properly wired. Use this knowledge to prevent outages, reduce energy waste, and extend the life of your appliance. If any doubt remains, seek professional help and schedule a formal electrical inspection. This proactive stance aligns with Easy DryVent's commitment to practical, safety-first dryer maintenance.
Tools & Materials
- Digital multimeter (AC voltage and continuity)(Set to AC voltage; range should cover at least 600V. Include a continuity/beep function for quick checks.)
- Screwdriver set (Phillips and flathead)(Needed to remove outlet faceplates and access terminals.)
- Non-contact voltage tester(Adds quick live-voltage confirmation without touching conductors.)
- Insulated gloves(Protect hands when handling exposed conductors.)
- Safety glasses(Eye protection in case of arcing or debris.)
- Flashlight or headlamp(Improve visibility in tight spaces.)
- Dry, clean workspace(Keep moisture and clutter away from electrical components.)
Steps
Estimated time: 45-90 minutes
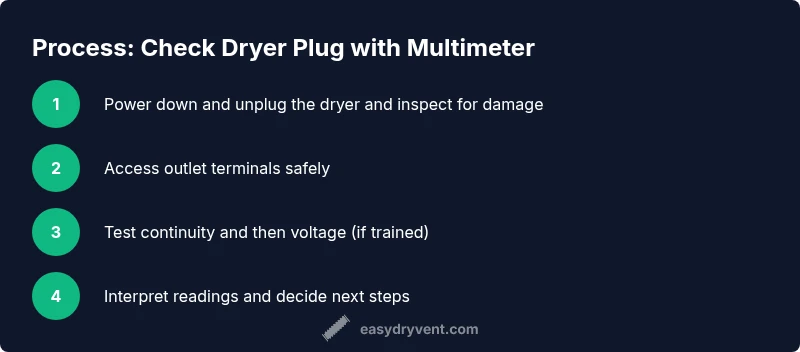
- 1
Power down and unplug
Go to the main circuit breaker and turn off the dryer circuit. Unplug the dryer from the outlet to ensure no power is flowing during inspection. Verify with a non-contact tester if you have one. This is the foundational safety step before any measurement.
Tip: Always assume power is present until you verify with a tester. - 2
Inspect visually for damage
Examine the plug, cord, and outlet for burns, melted plastic, loose screws, or corrosion. Any visible damage requires replacement before continuing. A damaged outlet can produce arcing and pose a serious fire hazard.
Tip: Do not rely on readings alone; visible damage means you should replace components. - 3
Access the terminals safely
If the outlet faceplate is removable, use the screwdriver to gently remove it and gain clear access to terminals. Keep track of screws and ensure the metal parts are not touched with bare skin.
Tip: Keep the work area dry and avoid touching metal parts with bare hands. - 4
Non-live continuity test
With the dryer unplugged, set the multimeter to continuity. Test each conductor from the plug end to confirm there is no short between unrelated conductors. For a 4-prong plug, verify there’s no continuity between hot blades and ground unless designed that way.
Tip: If your meter doesn’t beep for any expected open paths, recheck the connections or replace damaged components. - 5
Neutral/ground checks (3-prong vs 4-prong)
For older 3-prong setups, check that the neutral and ground are not shorted and that they connect where allowed. For 4-prong setups, ensure neutral is isolated from ground at the outlet. Use the meter to confirm continuity between each conductor and its expected mate.
Tip: Be mindful of different practice standards by plug type; follow the diagram for your outlet. - 6
Live voltage verification (optional, if trained)
If you are confident and trained, plug the dryer back in and carefully measure voltage: between hot blades for ~240V, and hot-to-neutral for ~120V. Use one hand tucked away and keep your body clear of metal surfaces. Do not touch prongs while measuring.
Tip: If you’re unsure, stop and call a licensed electrician. - 7
Interpret readings and document
Record all readings and compare them to expected values. A 240V hot-to-hot reading with about 120V hot-to-neutral indicates proper wiring; any major deviation requires inspection or replacement. Document results for future reference.
Tip: Keep a simple log and note any readings that changed after reassembly. - 8
Close up and re-test if needed
Reattach the outlet faceplate, secure screws, and plug the dryer back in. If readings were inconclusive or you observed damage, do not use the appliance; seek professional service.
Tip: Double-check that all screws are snug and the cord is properly clamped.
Common Questions
Do I need to unplug the dryer to test the plug?
Yes. For non-live checks, unplug the dryer and test continuity. If you must test live voltage, only do so if you are trained and confident, and exercise extreme caution.
Yes. Always unplug first. Live testing should only be done by someone with the proper electrical training.
What readings are considered normal when testing the outlet?
Expect about 240V between the two hot prongs and about 120V from each hot prong to neutral. Ground should not show voltage to hot in a properly wired circuit when not loaded.
Usually 240V hot-to-hot and 120V hot-to-neutral; ground should be near zero.
If I see a reading outside the expected range, what should I do?
Power down immediately, inspect the outlet and cord for damage, and replace faulty parts. If readings remain unclear, contact a licensed electrician for a professional assessment.
Power down and check for damage; if unsure, call a pro.
Can a bad plug cause the dryer to stop working?
Yes. A loose, damaged, or miswired plug can prevent the dryer from receiving proper voltage, causing it to run poorly or not at all. Replacing the outlet or cord often resolves the issue.
Absolutely. A faulty plug can stop the dryer from heating or spinning.
When should I call a professional?
If you see signs of damage, cannot obtain consistent readings, or feel uncertain about your wiring, stop and contact an electrician. Electrical work carries risk, especially with high-draw appliances.
If uncertain or unsafe, seek a licensed electrician.
Are there risks using a multimeter for this test?
There is a risk of shock or shorting conductors if not used properly. Always follow safety guidelines, wear protective gear, and work on a dry surface.
Meter use can be safe if you follow the steps carefully.
Watch Video
Key Points
- Unplug before any inspection and test non-live first
- Know your outlet type (3-prong vs 4-prong) and expected readings
- If in doubt, stop testing and consult a licensed electrician
- Replace damaged cords or outlets promptly to prevent hazards