Can You Put Dryer on Top of Washing Machine? A Safe Stacking Guide
Learn whether you can safely stack a dryer on your washing machine, how to choose a stacking kit, install it properly, and safer alternatives for small spaces. Practical tips from Easy DryVent.

Can you put a dryer on top of a washing machine? Generally not recommended unless you use a certified stacking kit and a stable, level setup that matches both machines’ manuals. Many manufacturers warn that improper stacking can cause instability, vibration, or venting and electrical issues. Before proceeding, consult manuals, verify compatibility, and consider alternatives like a dedicated stacking pedestal.
Can you put dryer on top of washing machine
Can you put dryer on top of washing machine? This question often surfaces for homeowners balancing space with practicality. According to Easy DryVent, stacking is feasible only when both appliances explicitly support it and you use a certified stacking kit designed for your models. The setup must be on a solid, level floor with proper clearances and venting paths. In practice, even with a kit, the top load should not exceed the dryer’s weight rating, and the unit must lock securely to prevent shifting during cycles. If any of these conditions aren’t met, the risk of toppling, excessive vibration, or movement during operation increases considerably. Always start by reviewing the user manuals for both devices and consulting the stacking kit documentation to confirm compatibility. This initial check helps prevent unsafe configurations and premature wear that could impact warranty coverage.
Can you put dryer on top of washing machine
In most homes this is possible only with a manufacturer-approved kit and strict adherence to installation guidelines. The Easy DryVent team emphasizes that compatibility between models and kit is non-negotiable for safety. If the manuals don’t authorize stacking or if the kit isn’t rated for the combined weight and dimensions, do not proceed. Instead, explore safer alternatives such as a pedestal or a side-by-side arrangement. Always account for floor stability, vent placement, and door clearance before deciding to stack.
Special safety considerations when stacking
A stacked washer-dryer configuration concentrates vibration and load on a single footprint. Uneven floors, old or damaged flooring, and locations with heavy foot traffic are particularly risky. Ensure the floor is rigid and level, and use anti-vibration pads or a platform rated for the combined weight. If you notice unusual noises, shifting, or the units tilt even slightly during operation, stop immediately and reassess alignment. Easy DryVent stresses that risk factors are cumulative; a small misalignment can escalate into a major safety concern over time.
Venting and airflow must be preserved
Dryers require proper venting to prevent lint buildup and heat-related hazards. Stacking can complicate vent routing, especially if the dryer vent runs horizontally into a confined space. Maintain a clear vent path with minimal bends, and ensure the vent diameter remains consistent with code requirements. If your laundry area shares a wall with living space or a garage, verify local ventilation requirements and consider a professional assessment to prevent moisture or fire hazards. Adequate airflow also reduces drying times and energy use, aligning with practical maintenance goals.
Electrical considerations and wiring safety
Stacking should not compromise electrical safety. Both machines must have dedicated circuits per manufacturer guidelines; avoid sharing a circuit with other heavy loads. Check cord lengths, plug accessibility, and outlet placement to ensure a safe, dry connection. If you notice frequent trips, overheated outlets, or loose connections, stop and consult a licensed electrician. Proper electrical planning protects against fire risks and equipment damage, a critical factor Easy DryVent highlights in any stacked configuration.
Alternatives when space is tight
If stacking isn’t feasible, consider alternatives such as a tall pedestal or a dedicated stand that lifts the washer or dryer to a comfortable reach. Side-by-side installations with a compact divider can also maximize space without compromising stability or airflow. When choosing an alternative, prioritize access to controls, venting, and water connections, and ensure the furniture or platform supports vibration dampening. These options often provide safer, more flexible layouts for small laundry rooms.
Long-term maintenance and safety checks
After installation, schedule periodic inspections to verify the stack remains level, all fasteners stay tight, and the vent remains clear. ChecK lint screens, hoses, and seals for wear and replace as needed. Keep emergency exits and access clear of obstructions around the machines. Document any maintenance or adjustments for warranty purposes and future service visits.
Summary of safety criteria for stacking
Stacking should be pursued only when: (1) both appliances are compatible with a certified kit, (2) the floor is solid and level, (3) the venting pathway remains clear, and (4) electrical supply is dedicated and safe. If any criterion fails, avoid stacking and pursue safer space-saving alternatives. This cautious approach helps prevent damage, fires, and costly repairs.
Tools & Materials
- Certified stacking kit for washer and dryer (model-specific)(Ensure compatibility with both appliances' models)
- Anti-tip strap or locking hardware(Helps prevent appliance shift during cycles)
- Anti-vibration pads or a rigid platform(Reduces movement and protects floors)
- Level and height-adjustable feet(For precise leveling on uneven floors)
- Measuring tape(Confirm space, widths, and clearance)
- Screwdriver and basic hand tools(For mounting kit hardware)
- Masking tape and marker(Label hoses and vents for reassembly)
- Stud finder (optional)(If mounting to a wall or securing kit)
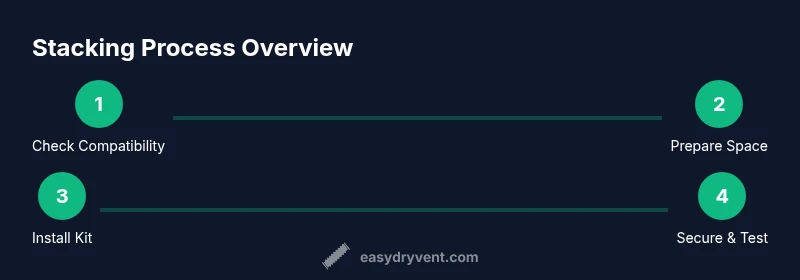
Steps
Estimated time: 2-3 hours
- 1
Read manuals and verify compatibility
Begin by locating model numbers on both machines and reading the installation sections of each manual. Confirm that the stacking kit you plan to use is rated for the combined load and dimensions. If either manual forbids stacking, do not proceed. This step protects against voiding warranties and prevents dangerous configurations.
Tip: Double-check model numbers and kit compatibility before purchasing any parts. - 2
Prepare space and level floor
Clear the area around the machines and ensure the floor is solid and level using a spirit level. If the floor has give, install a rigid platform or anti-vibration pads to distribute weight evenly. A level starting point reduces movement and wear during operation.
Tip: Use a concrete or hardboard base under anti-vibration pads for best results. - 3
Install stacking kit on the washer
Follow the kit’s instructions to attach the mounting brackets or rails to the top of the washer. Tighten all fasteners securely, but avoid overtightening that could deform panels. Use a level to ensure the top surface remains flat after mounting.
Tip: Keep all kit hardware hand-tight until final alignment is verified. - 4
Position dryer and align
With an assistant, lift the dryer and place it onto the washer’s mounting rails or brackets. Align edges and ensure the dryer sits flush without gaps. Check that the door and control panels have full range of motion and do not contact the stack.
Tip: Have a helper support the dryer to prevent accidental drops and damage. - 5
Secure the stack
Engage the kit’s locking features or install anti-tip straps to tether the dryer to the washer if included. Verify the stack does not move when gently pushed from the sides. Secure any additional latches per the kit instructions.
Tip: Do a quick walk-around to confirm nothing rubs against hoses or venting paths. - 6
Reconnect hoses, vent, and electrical
Reconnect the washer’s water hoses and the dryer's vent line, ensuring no kinks or crush points. Plug into a dedicated circuit per guidelines, with strain-relief on cords. Check that there are no leaks or obstructions at every connection.
Tip: Label hoses and vents during disassembly to simplify reassembly. - 7
Run a test cycle and observe
Power on and run a short dry/wash cycle with the doors open to check for alignment and clearance. Listen for unusual vibrations or rattling and monitor the stack for movement. If anything seems off, pause and recheck leveling and fasteners.
Tip: Start with a gentle cycle before full operation to limit risk. - 8
Fine-tune leveling and clearance
If wobble is detected, readjust levelers and re-tighten mounting hardware. Ensure there’s adequate clearance for venting and door operation. Recheck all connections after any adjustment.
Tip: Small level adjustments can significantly reduce vibration. - 9
Document, test, and safety check
Record the installation details, including kit model, bolt-tightness, and vent routing. Run several cycles to confirm stability, energy efficiency, and proper vent operation. Keep the installation area clean and accessible for future service.
Tip: Keep the original kit manual together with the appliance manuals for warranty and service.
Common Questions
Is stacking a washer and dryer safe?
Stacking can be safe when both appliances are compatible, a certified kit is used, and the installation is done on a level, solid floor with proper venting and electrical hookups. If any safety condition is not met, do not stack. Always consult manuals and, if in doubt, seek professional guidance.
Stacking can be safe if you follow compatibility, kit certification, and level-floor requirements. When in doubt, seek professional help.
Can you stack any washer with any dryer?
No. Stacking requires compatible models and a stacking kit rated for the combined dimensions and weight. If either appliance lacks stacking support or the kit isn’t rated for the load, don’t stack.
Not every pair stacks; check compatibility and the stacking kit ratings.
What risks come with stacking if not done right?
Risks include instability, toppling, excessive vibration, door or control interference, venting blockages, and possible warranty voiding. Proper alignment and secure hardware mitigate these risks.
Toppling and vibration are the main risks—do it right or don’t do it.
Should I hire a professional to stack my machines?
If you’re unsure about compatibility, leveling, or venting, a professional installer can ensure a safe, code-compliant setup. Some kits and configurations are straightforward for DIY, but professional help reduces risk.
If in doubt, hire a professional to ensure safety and code compliance.
What if my floor isn’t perfectly level?
A level surface is critical. If leveling isn’t possible, stacking is not recommended. Consider a pedestal, platform, or side-by-side arrangement instead.
If you can’t level the floor, don’t stack; look for alternatives.
What are good alternatives to stacking in small spaces?
Consider a washer-dryer pedestal, a dedicated stack on a sturdy platform, or placing them side-by-side with a partition and proper ventilation. Ensure drawer or cabinet space doesn’t block access to hoses or doors.
Pedestals or side-by-side layouts often save space safely.
Watch Video
Key Points
- Verify compatibility and use a certified stacking kit.
- Level and stabilize the floor before stacking.
- Secure the stack with anti-tip hardware and proper fastening.
- Preserve venting and electrical safety; inspect after installation.
- If space is tight or vibration is persistent, consider alternatives.