Whirlpool Dryer Not Drying: Troubleshooting Guide
If your Whirlpool dryer isn’t drying, this expert guide from Easy DryVent walks homeowners through airflow checks, heat troubleshooting, and preventive maintenance to restore drying performance safely and quickly.

Most Whirlpool dryer not drying problems stem from restricted airflow or heat issues. Start with the easiest fixes: clean the lint filter, inspect and clear the exterior vent, and run a heat test. If clothes still come out damp, check the drum belt and heating element or thermostat. If you’re uncertain, unplug the unit and call a technician. Easy DryVent recommends airflow first.
What 'whirlpool dryer not drying' typically means
When a Whirlpool dryer isn’t drying, the symptom often points to airflow restrictions or heat-related failures. According to Easy DryVent, most cases fall into two camps: insufficient airflow (lint trap, duct, or vent blocked) and heat delivery problems (thermostat, heating element, or thermal fuse). In either scenario, the dryer can run yet leave clothes damp or warm but not thoroughly dried. Understanding which camp your model fits helps you apply the right fix quickly and safely.
Quick checks you can perform safely
Before you dive into disassembly, run through a few safe checks. First, verify the dryer is plugged in and the circuit breaker hasn’t tripped. Next, confirm you didn’t select a non-drying cycle like Air Fluff. Inspect the lint screen and the lint trap housing for buildup. Finally, look at the exterior vent to ensure it’s not blocked by debris or a bird nest. These low-effort checks can resolve many not-drying scenarios and prevent unnecessary parts replacement.
Common culprits: airflow and heat
Airflow issues are the most common cause of a dryer not drying. A clogged lint screen or a blocked vent restricts air intake and exhaust, leaving loads damp. Heat problems also strike this symptom: a faulty heating element, a defective thermostat, or a blown thermal fuse can stop heat delivery even if the drum spins. In older Whirlpool models, moisture sensors and control boards can misread dryness levels, causing premature shutdowns of the heating cycle.
How to inspect and clean the lint trap and vent
Start by removing the lint screen and cleaning both sides with a brush. Vacuum the lint trap housing to remove hidden fibers. Use a dryer vent brush to sweep the duct from the dryer to the outside; repeat from the exterior vent inward if you have access. Clear any lint or debris from the exterior vent cap and ensure the vent hood opens freely with airflow. Reinstall components and run a short dryer cycle to test airflow.
Diagnosing heat problems: heating element, thermostat, and fuse
If airflow is clear but clothes remain wet, focus on heat. Listen for the dryer's heat sound during a cycle; lack of heat typically points to the heating element or thermostat. The thermal fuse is a critical safety device; if it’s blown, there will be no heat at all. For safety, avoid resetting fuses without proper testing and consult the model manual for replacement procedures. Replacements should use manufacturer parts to maintain performance and safety.
When to test with a multimeter and how
Testing continuity with a multimeter helps determine if the heating element, high-limit thermostat, or thermal fuse are faulty. Disconnect power, locate the component, and test for continuity according to your Whirlpool model's service manual. If continuity is absent, replace the faulty part. If you’re not comfortable testing electrical components, contact a licensed technician to avoid shock risks.
Step-by-step fixes you can perform today
- Unplug the dryer and remove the lint screen; clean thoroughly. 2) Inspect and clear the vent duct from the dryer to the outdoors; remove any obstructions and straighten kinks. 3) Check the exterior vent hood for debris and ensure it opens fully. 4) Run a diagnostic dry cycle to confirm airflow and heat. 5) If heat is absent, inspect the thermostat and heating element and replace if necessary. 6) Check the thermal fuse and replace if blown. 7) Reassemble, run a test load, and confirm dryness. 8) If issues persist, schedule a professional service visit. 9) Maintain a regular cleaning rhythm to prevent recurrence.
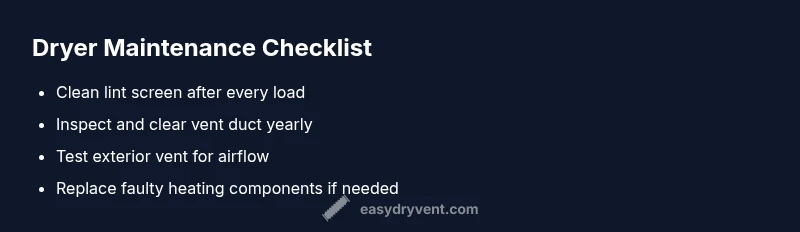
Prevention: maintenance habits to keep clothes drying efficiently
- Clean the lint trap after every load to maintain optimal airflow. - Inspect the vent duct annually for obstructions and signs of wear. - Schedule a professional vent cleaning every 1–2 years based on usage. - Use appropriate cycles and avoid overloading the drum, which can hinder drying. - Replace damaged hoses or caps promptly to preserve airflow and safety.
Safety reminders and when to call a pro
Always unplug the unit before inspecting internal components. Use proper tools and parts designed for your Whirlpool model. If you detect burning smells, warm/hot surroundings, or no heat after basic checks, pause and call a licensed technician. Electrical components and gas lines (for gas models) require professional handling to prevent injury or fire hazards.
Steps
Estimated time: 60-90 minutes
- 1
Power down and unplug the dryer
Unplug the unit and verify the circuit is off. This protects you during inspection and prevents accidental startup. Inspect the area for any obvious safety hazards before touching other components.
Tip: Always start with safety checks to avoid electric shock. - 2
Remove and clean the lint screen
Take out the lint screen and clean both sides with warm water or a brush. Vacuum the lint trap housing to remove built-up fibers. Reinstall the screen and ensure it fits snugly.
Tip: A clean lint screen improves airflow dramatically. - 3
Inspect the vent duct and exterior vent
Check the duct from the dryer to the wall for kinks or crushing. Clean the inside of the duct with a brush, then clear debris from the exterior vent hood. Make sure the exterior vent opens fully when airflow is present.
Tip: Use a dryer vent brush to reach deep sections. - 4
Test for heat delivery
Plug back in and run a short cycle. If the dryer is not heating, you may have a faulty thermostat or heating element. Do not operate for long without heat checks.
Tip: If you hear no heat after 10-15 minutes, suspect heating components. - 5
Check the thermal fuse and thermostat with a multimeter
If you’re comfortable, disconnect power and test continuity on the heating circuit and thermal fuse per your model’s manual. Replace any part with the correct Whirlpool-approved component.
Tip: A blown fuse is a common, non-obvious fix for heat absence. - 6
Perform a moisture sensor check (if applicable)
Some models use moisture sensors to end cycles. Clean sensor contacts and verify readings; replace sensor if readings are erratic.
Tip: Moisture sensor faults can mimic an air flow problem. - 7
Reassemble and run a test load
Reinstall all panels, run a test load on a normal cycle. Confirm clothes dry within expected time and that no unusual noises occur.
Tip: Document each test result to track progression. - 8
Record maintenance and schedule next checks
Log lint screen cleaning, vent inspection, and any part replacements. Plan vent cleaning and component checks according to usage and model guidelines.
Tip: Regular maintenance prevents future outages. - 9
Call a pro if issues persist
If after all checks the dryer still won’t dry, schedule professional service. Complex electrical or gas components require licensed technicians.
Tip: Do not attempt major repairs without proper authorization.
Diagnosis: Whirlpool dryer won't dry clothes
Possible Causes
- highLint screen or vent blockage restricting airflow
- highBlocked exterior vent or kinked exhaust duct
- mediumHeating system failure (thermostat, heating element, or thermal fuse)
- lowFaulty moisture sensor or control board (older models)
Fixes
- easyClean lint screen and ductwork, and clear exterior vent obstructions
- easyStraighten duct sections and ensure outside vent is free-flowing
- hardTest and replace heating components or thermal fuse as needed
- hardReplace moisture sensor or control board if applicable
Common Questions
Why is my Whirlpool dryer not drying even after cleaning the lint screen?
Even with a clean lint screen, airflow can be blocked further down the duct. Inspect the vent hose and exterior vent for obstructions and consider a professional vent cleaning if airflow remains poor.
Even with a clean lint screen, airflow can be blocked further down the duct. Check the vent hose and outside vent for obstructions and consider a professional vent cleaning if airflow remains poor.
How can I tell if the dryer is not heating?
If the clothes stay warm but not dry after a normal cycle, or you hear no heat sound, the heating element or thermostat may be faulty. Check the thermal fuse and voltages if you’re comfortable, otherwise call a technician.
If clothes stay warm but not dry, or you hear no heat, the heating element or thermostat may be faulty. Check fuse and voltages or call a technician.
Can I fix this myself or do I need a technician?
Many airflow issues can be resolved by DIY cleaning and vent checks. Heating components or control boards are more complex and often require a licensed technician for safe replacement.
Many airflow issues can be resolved by DIY cleaning and vent checks. For heating components, it’s best to call a licensed technician.
What tools do I need to diagnose a heat problem?
A basic multimeter, screwdriver set, and the Whirlpool model’s service manual are helpful. Always disconnect power before testing electrical components.
A multimeter, screwdriver, and the model’s manual help. Always unplug before testing.
How often should I clean the vent and lint trap?
Clean the lint trap after every load. Have the vent system professionally cleaned every 1–2 years, depending on usage and dryer type.
Clean the lint trap after every load and have the vent cleaned every 1–2 years.
Is there a safety risk if the dryer won't dry?
Yes. A dryer that won’t dry can overheat and pose a fire risk. Stop using the unit and seek professional help if you detect heat, burning smells, or smoke.
Yes. Don’t use it if you smell burning or see heat; get professional help quickly.
Watch Video
Key Points
- Start with airflow fixes like lint screen and vent clearance.
- Test heat delivery before replacing parts.
- Use model-specific parts and safety guidelines.
- Preventive maintenance reduces repeated failures.