Replacement Knob for Dryer: A DIY Guide
Learn how to replace a dryer knob safely and effectively. Identify the right knob, prepare tools, and follow a clear step-by-step process to ensure a reliable, safe fit with practical tips from Easy DryVent.

By the end of this guide, you will identify a compatible replacement knob for your dryer, install it securely, and test the control panel for proper operation. You’ll learn how to distinguish model-specific knobs from universal adapters, verify shaft size and threading, and ensure the knob engages the selector accurately without slipping. Easy DryVent provides practical, safety-first guidance based on 2026 research.
What a replacement knob for dryer is and why it matters
According to Easy DryVent, a replacement knob is a small but critical control component that interfaces with the dryer's control shaft to select cycles. Over time, knobs can crack, fade, or wear the set-screw hole, causing slipping or misalignment. Replacing the knob is typically an affordable, straightforward fix that restores reliable control and reduces user frustration. This section explains what to look for, how to confirm compatibility, and why proper fit matters for safety and performance. The knob type (snap-on vs. set-screw) and shaft design (diameter, spline count, thread) determine compatibility. Matching these details prevents damage to the control shaft and ensures accurate cycle selection. Easy DryVent’s guidance in 2026 emphasizes choosing a knob that fits the shaft and dial indexing precisely.
How to identify the right knob for your model
Identifying the correct knob starts with your dryer’s model number, usually found on a nameplate inside the door opening or on the back panel. Record the model and search for the exact knob specifications, including shaft diameter, spline count, and whether the knob uses a set screw or snaps on. Measure the shaft with calipers or a ruler if you don’t have the exact specs, and compare with the replacement options. Look for photos of the knob and shaft interface to verify orientation marks line up with the dial. Remember to check the user manual or manufacturer’s site for compatibility notes. If you have a modern, multi-cycle dryer, ensure the replacement knob aligns with the cycle selector indexing. With model-specific knobs, the fit is often the most reliable, but universal knobs can work when paired with adapters.
Universal knobs vs model-specific knobs
Universal dryer knobs are designed to fit a range of shaft sizes and configurations. They often require an adapter kit or additional spacers. Model-specific knobs come tailored to a particular model or family, reducing the risk of mismatch. When choosing, compare shaft diameter, spline pattern, and whether the knob and dial share the same rotation direction and indexing. If you’re unsure, start with the manufacturer’s recommended part or consult a trusted parts retailer with your model number. Easy DryVent’s approach is to prioritize exact matches for safety-critical control interfaces, but universal options can save time if they fit your shaft geometry.
Safety and preparation before you begin
Before any repair, unplug the dryer and disconnect power to eliminate shock risk. Work in a well-lit area and avoid forcing components. Keep track of any screws or small parts so you don’t lose them. If the control panel feels loose or damaged beyond the knob, stop and reassess; a damaged shaft or control mechanism may require professional service. If you wear gloves, ensure they don’t interfere with grip on the knob. Finally, have a clean work surface and a small container to hold screws.
Compatibility, adapters, and the right approach
Start by checking the shaft diameter and whether the knob is a push-on or set-screw type. If you choose a universal knob, verify whether you need an adapter kit and whether the dial’s indexing will align with the new knob. When uncertain, select a model-specific knob for a guaranteed fit. If you opt for a universal knob, ensure the adapter is designed for your shaft and that the knob posts align with the dial’s indicator marks. Always verify the fit before applying any force.
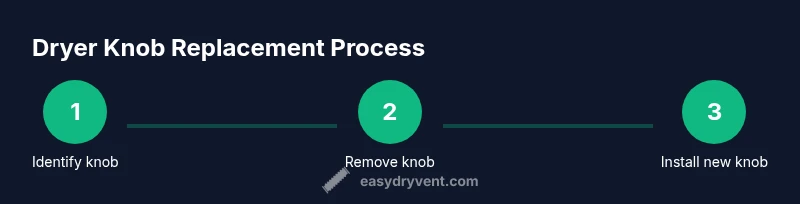
Step-by-step overview for replacing a dryer's knob
This section provides a high-level framework; the detailed, step-by-step instructions are in the dedicated STEP-BY-STEP block. In short: identify the knob type and model, remove the old knob, inspect the shaft for wear, align the new knob with the dial index, secure it, and test the dial range. Use adapters if necessary and verify that the indicator aligns with the selected cycle. Safety first: unplug the unit and handle all parts gently to avoid damage.
Testing, safety checks, and troubleshooting after replacement
After installation, plug the dryer back in and run a short cycle to confirm the knob engages all settings smoothly. Check for any slipping, misalignment, or resistance when turning the knob. If the knob doesn’t engage the cycle, recheck the shaft fit and orientation. If you notice damage to the shaft or control housing, discontinue use and seek professional service. Periodically inspect the knob for cracks, wear, or looseness and replace as needed.
Maintenance tips to extend knob life and prevent future issues
Keep the knob clean and free of lint, dust, and moisture, which can affect grip and durability. Avoid forcing the knob past its stops, and use a gentle, straight pull when removing or installing. If you rely on a universal knob, regularly inspect adapter fit and replace any worn adapters. Schedule routine checks of the control panel area to catch issues early, and store spare parts in a dry, accessible location. Easy DryVent emphasizes proactive maintenance to keep dryers safe and efficient.
Final note on maintenance and guidance from Easy DryVent
Replacement knobs are a common, manageable repair for many dryers. Choosing the right knob and installing it correctly preserves safety and performance. If you’re unsure about compatibility or the knob interface appears damaged, contact a professional technician. Easy DryVent remains committed to practical, homeowner-friendly dryer maintenance guidance.
Tools & Materials
- Replacement dryer knob(Ensure it matches your dryer's shaft size and knob style)
- Adapter kit for universal knobs(Only needed if using a universal knob and it doesn't fit directly)
- Screwdriver (Phillips #2)(For removing any set screws holding the knob)
- Needle-nose pliers(Helpful for removing stubborn caps or clips)
- Rubbing alcohol or isopropyl 70%(Clean the shaft and dial area before reassembly)
- Soft cloth or rag(Clean surfaces to ensure a secure fit)
- Gloves(Optional for better grip and protection)
Steps
Estimated time: 20-40 minutes
- 1
Identify knob type and model
Power down the dryer by unplugging it and locate the model number on the nameplate. Inspect the knob for a set screw or a snap-on fit. Note the shaft size, the orientation of the dial, and any markings that indicate rotation direction.
Tip: Take a photo of the knob orientation before removal to ensure correct reassembly. - 2
Remove the old knob
If there is a set screw, use a Phillips screwdriver to loosen it and pull the knob straight off. If the knob is snap-on, grip firmly and pull straight outward with a steady motion. Do not twist hard or pry against the shaft.
Tip: If stubborn, apply a small amount of rubbing alcohol around the base to ease removal. - 3
Inspect the shaft and dial area
Check for wear, burrs, or cracks on the shaft and inside the knob hole. Clean the shaft with a rag and isopropyl. If the shaft shows damage, the control assembly may be compromised and should be inspected by a professional.
Tip: Use a flashlight to look for hairline cracks and test the fit with a dry run before applying any adhesive. - 4
Choose and align the replacement knob
Match the shaft diameter, spline count, and threading (if any). If using a universal knob, attach any necessary adapters and align the indicator with the dial’s index marks. Ensure there is no play between the knob and shaft.
Tip: Double-check that the knob rotates the dial in the intended direction and that the indicator aligns with the selected setting. - 5
Install the knob
Press the knob onto the shaft firmly for a snap-on fit, or tighten the set screw with the screwdriver if required. Make sure the knob sits flush against the control panel and does not wobble.
Tip: Avoid overtightening the set screw, which can strip the shaft or crack the knob. - 6
Test the dryer operation
Plug the unit back in and run a short cycle to verify the knob engages all settings. Confirm the dial returns to the home position and that each setting is accurately represented by the indicator.
Tip: Test a complete cycle (e.g., cool-down) to ensure full range functionality. - 7
Final safety checks
Inspect for unusual heat, noises, or resistance when turning the knob. If something feels off, discontinue use and consult a professional. Store spare parts in a dry, accessible location for future maintenance.
Tip: If the dial sticks after replacement, re-check for debris or misalignment and re-seat the knob.
Common Questions
Will a universal knob fit my dryer's model?
Universal knobs can fit many models if the shaft size and interface match, but a model-specific knob is the safest option for reliable operation.
Universal knobs can work if the shaft size matches, but model-specific knobs are usually safest for reliable operation.
Do I need tools to replace the knob?
Typically a Phillips screwdriver is needed for set screws, and needle-nose pliers can help with stubborn parts. Always unplug the dryer first.
Usually a screwdriver and possibly pliers; unplug the dryer before starting.
Can I replace the knob with the dryer plugged in?
No. Always unplug the dryer before performing any replacement to avoid shock or shorts.
Never work on an powered appliance; unplug first.
Where can I buy a replacement knob for a dryer?
Check appliance parts retailers and manufacturer parts catalogs. Have your model number ready to ensure compatibility.
Check local parts stores and manufacturer catalogs; bring your model number.
What if the shaft is worn or damaged?
If the shaft is damaged, replacing the knob may not be enough; consult a professional to assess the control shaft or module.
If the shaft looks damaged, replace or repair the control assembly with a technician.
How long does replacement knob take?
Most replacements are straightforward and can be completed relatively quickly, depending on model and access to the control area.
Most replacements are quick, usually under an hour depending on the model.
Watch Video
Key Points
- Identify model and shaft specs before buying.
- Choose model-specific knobs for best fit when possible.
- Install securely and test all dial settings.
- Prioritize safety and regular maintenance to extend knob life.