Whirlpool Replacement Parts for Dryer: A Practical DIY Guide
Learn how to identify, source, and install Whirlpool replacement parts for dryer safely and cost-effectively with Easy DryVent expert guidance.

Whirlpool replacement parts for dryer can dramatically cut repair costs and downtime when you identify the exact part number and supplier first. Start by locating your model number, cross-checking OEM part numbers, and choosing OEM or reputable aftermarket options. This guide from Easy DryVent outlines how to verify compatibility, source authentic parts, and perform safe, effective installations. If you want to replace a fuse, belt, or drum component, you’ll find clear steps and checks to avoid common mis-matches.
Understanding Whirlpool replacement parts for dryer
When a Whirlpool dryer stops working, consumers often turn to replacement parts as a cost-effective fix. The term whirlpool replacement parts for dryer covers all components from safety fuses and belt assemblies to baffles and drum rollers. For homeowners and DIY enthusiasts, the most important first step is accurate model identification. The model number and sometimes the serial number tell you which parts are compatible and which numbers to cross-reference. In this guide, Easy DryVent explains how to interpret Whirlpool diagrams, locate OEM numbers, and decide when aftermarket parts are appropriate. By understanding part families and failure modes, you can protect your dryer’s performance while avoiding over-spending. The key is to approach sourcing with a plan: confirm part numbers, verify compatibility, and demand clear warranties. This approach minimizes the risk of ordering the wrong component and reduces downtime while you complete the repair.
How to identify the right part for your Whirlpool dryer
Identifying the correct part starts with your dryer’s exact model number, usually found on a data plate near the door opening or on the back panel. Once you have the model, consult the official Whirlpool parts diagram and list. Cross-reference the OEM part number with listings from reputable retailers to confirm fit. If you’re considering aftermarket parts, compare the manufacturer’s compatibility notes and ensure a return policy is in place. Always check whether the part is a direct OEM replacement or a compatible item; even small mismatches in a connector or mounting hole can render a part unusable. Easy DryVent recommends keeping a quick-reference sheet for your model family to speed future repairs.
Compatibility considerations across Whirlpool model years
Whirlpool often uses updated part numbers across model years to reflect design changes. Before ordering, verify the year range and variant within your model family. A part listed for the same general dryer family may not fit a later chassis or a different control board. Pay attention to connector types, wire harness lengths, and mounting points. If a part number doesn’t match your diagram, search for the exact code on retailer pages or contact customer support with your model, serial, and build date. This diligence helps ensure you don’t waste time waiting for the correct item to arrive.
When to replace versus repair: cost and risk analysis
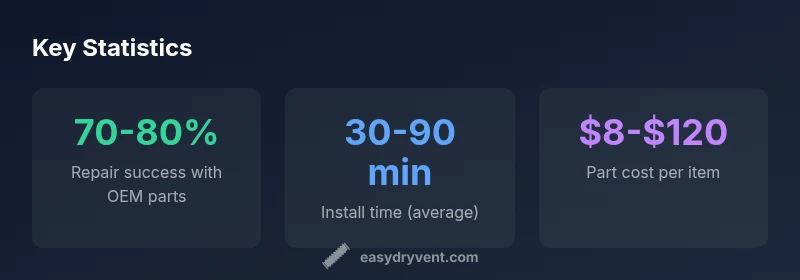
Some failures are quick fixes, while others indicate deeper wear. A thermal fuse or belt replacement is usually straightforward and cost-effective, but issues like a warped drum or a failed heating element suggest more extensive disassembly. In terms of Whirlpool replacement parts for dryer, weigh the cost of the part and the labor against a full replacement unit, especially for older machines. If you’re consistently replacing parts within a short period, it may be more economical to upgrade. Easy DryVent emphasizes assessing the dryer’s age, usage patterns, and repair history before deciding.
Sourcing genuine parts: OEM versus aftermarket considerations
OEM Whirlpool parts provide guaranteed compatibility and quality assurance, but they can be pricier than aftermarket components. Reputable aftermarket brands offer comparable performance for many parts, but verify warranty terms and return policies. When possible, order from authorized dealers or official Whirlpool distributors, and keep the original packaging for warranty claims. If you opt for aftermarket parts, prioritize ones with clear compatibility documentation and user reviews from other Whirlpool owners. Always test the part in a controlled setting, following safety steps and manufacturer instructions.
Installation basics and safety tips for Whirlpool replacements
Begin by unplugging or powering off the dryer and allowing the drum to cool. Use proper tools, keep track of screws and mounting hardware, and work in a well-lit area. For belt or fuse replacements, consult the diagram to identify the correct routing and torques. For assembly-level parts, take pictures as you go to simplify reassembly. Safety tips: disconnect power before opening access panels, wear eye protection, and avoid forcing parts into misaligned positions. If you encounter unusual resistance, pause and verify part compatibility before continuing.
Post-installation maintenance to extend life
After completing a Whirlpool replacement part installation, run a short test cycle to verify operation and heat. Clean the lint screen and exhaust vent to reduce the risk of overheating. Inspect the vent hose for kinks and ensure there is no blockage. Regular checks every 6–12 months can catch wear before it becomes a problem. By combining smart sourcing with careful installation and ongoing maintenance, you can maximize the life of Whirlpool replacement parts for dryer components and keep your laundry routine running smoothly.
Whirlpool dryer parts overview by function
| Part Type | What It Does | Typical Whirlpool Models |
|---|---|---|
| Thermal fuse | Cuts power when overheating to prevent fire | Front-load and top-load Whirlpool models 2005–2024 |
| Drive belt | Transfers motor rotation to the drum | Most Whirlpool front-load and some top-load dryers |
| Drum glide/roller | Supports drum and reduces noise/flex | Older Whirlpool drum assemblies and mid-range models |
Common Questions
What should I do first to identify the correct Whirlpool replacement parts for my dryer?
Start by locating your dryer's model and serial numbers, then cross-check the OEM part numbers from Whirlpool's official site or your parts retailer. Use the parts diagram to confirm the exact fit.
First, find your model and serial number, then check the official parts diagram to identify the exact OEM number.
Are aftermarket Whirlpool replacement parts safe to use?
Aftermarket parts can be cost-effective but may vary in quality. Choose reputable brands and verify compatibility with your model; OEM parts are generally safest for critical components.
Aftermarket parts can save money, but verify compatibility and warranties; OEM parts are usually the safest choice.
How do I know if a part is genuine Whirlpool OEM?
Look for Whirlpool OEM numbers on the packaging and the part itself; buy from authorized dealers; check return policies and warranty.
Check the part number and seller's credentials; only buy from authorized dealers.
What is the typical warranty on Whirlpool replacement parts?
Warranty varies by part and retailer; see the packaging or retailer's policy; OEM parts often carry a limited warranty.
Warranty varies; read the information provided by the seller; OEM parts usually have a limited warranty.
Can I install Whirlpool replacement parts myself or should I hire a technician?
Many replacements are DIY-friendly (belts, fuses) if you follow steps and safety; complex assemblies (drum, heating element) may require a tech.
DIY is possible for simple parts, but for complex repairs consider a professional.
How can I prevent future failures after replacing parts?
Clean lint traps and vents regularly, perform periodic checks, and replace worn belts and rollers before they fail. Regular maintenance reduces risk.
Keep vents clean and check parts regularly to catch wear early.
“Choosing the right Whirlpool replacement parts for your dryer starts with accurate model identification and a trusted supplier. Verify OEM numbers and compatibility before you buy to avoid repeat repairs.”
Key Points
- Verify model numbers before ordering parts.
- Prioritize OEM parts for safety and fit.
- Cross-check part numbers with official diagrams.
- Consider related component checks after replacement.
- Follow safety guidelines and manufacturer instructions.