LG Heat Pump Dryer Maintenance: Practical Tips for Safe Drying
Learn practical steps to maintain your lg heat pump dryer for safety, efficiency, and longer lifespan. Easy DryVent provides practical vent guidance for homeowners.

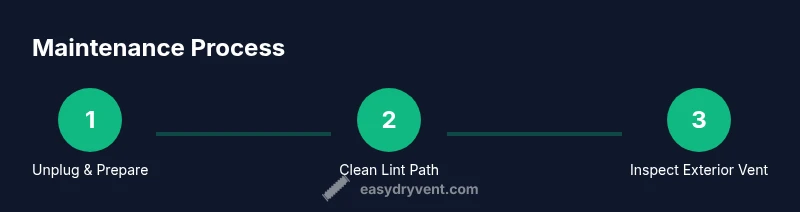
With this guide, you'll learn to inspect, clean, and optimize your lg heat pump dryer for safety and efficiency. You’ll follow a practical monthly maintenance routine, understand venting best practices, and know when to call a pro. Start by unplugging, cleaning the lint path, and checking the exterior vent.
What is a lg heat pump dryer and why it matters
The lg heat pump dryer combines energy-saving heat pump technology with reliable drying performance. According to Easy DryVent, homeowners who understand venting and lint management can maximize safety and efficiency. A well-maintained unit not only dries clothes faster but also reduces energy use and the risk of fires. By keeping the vent paths clear and the drum area clean, you can extend the life of your appliance and protect your home from dryer-related hazards.
Why heat pump technology matters for efficiency
Heat pump dryers reuse heat from the air that would otherwise be exhausted, which dramatically reduces energy use compared with traditional vented dryers. In the context of the lg heat pump dryer, the system relies on refrigerant cycles to transfer heat rather than simply generating it. This design means small maintenance tasks—like keeping ducts clear and sensors responsive—have outsized effects on drying time and operating costs. Easy DryVent’s insights highlight that consistent airflow and clean vent paths are pivotal for sustained efficiency.
Safety basics for lg heat pump dryer users
Dryers pose risks when lint builds up, vents become crushed or blocked, or electrical connections loosen. Always unplug before any maintenance, wear protective eyewear, and work in a well-lit space. Keep the vicinity around the dryer free of flammable materials and ensure pets and children are kept away during cleaning sessions. By treating the lg heat pump dryer as a potential fire hazard if neglected, you’ll adopt a safer, more reliable routine.
Lint, venting, and why cleaning matters
Lint accumulation restricts airflow, making the dryer work harder and increasing heat buildup in the drum. For the lg heat pump dryer, restricted airflow can extend cycle times and shorten component life. Regular lint removal, checking the lint trap, and inspecting internal ducts are essential habits. When vents are clear, the unit operates more efficiently and reduces the risk of the dreaded dryer fire.
Cleaning lint trap and interior components
Begin by removing the lint trap and cleaning both sides with a soft brush or microfiber cloth. Vacuum around the drum edge to capture residual lint and debris that a trap screen may miss. If the model includes an internal lint screen or drum collar, wipe those surfaces carefully to prevent fibers from recirculating. A clean interior means better air exchange and consistent drying performance.
Checking exterior vent and ducting for lg heat pump dryer
Inspect the exterior vent cover for obstructions like leaves or dust buildup. Clear any debris from the vent opening and ensure the flap moves freely with airflow. Trace visible ductwork for kinks, crushing, or loose joints and reseat as necessary. Proper venting is crucial for energy efficiency and safe operation, especially in climate zones with humid air that can encourage moisture buildup.
Understanding LG-specific features that affect maintenance
Many lg heat pump dryer models include moisture sensors, auto-dry cycles, and heat pump efficiency indicators. Knowing how these features respond to lint buildup and vent restrictions helps you tailor your maintenance. When sensors misread moisture or cycles run unusually long, cleaning the lint path and checking the vent can restore proper behavior. Understanding these features also helps you maximize energy savings and performance.
A practical monthly maintenance checklist
- Unplug the unit and gather tools. - Clean the lint trap and wipe accessible interior surfaces. - Vacuum the drum rim and any accessible lint from behind seals. - Inspect the rear vent connection for obstructions or detachment. - Check the exterior vent for blockages and verify the flap operates smoothly. - Run a short test cycle to confirm normal operation. - Log findings and schedule the next check.
Troubleshooting common symptoms
If drying times are longer than usual, check for reduced airflow due to lint or a kinked duct. If clothes remain damp after a cycle, verify the moisture sensor is clean and free of residue. If the dryer stops mid-cycle, check for fault codes in the display and refer to the LG manual. Most issues resolve with a thorough vent and lint-cleaning session.
Energy savings strategies that work with lg heat pump dryer
Maximize efficiency by keeping vents clear, using appropriate cycle settings, and avoiding over-drying. The lg heat pump dryer benefits from stable airflow and accurate moisture sensing. Pairing gentle cycles with full loads can reduce run time and energy usage while preserving fabric integrity.
Installation considerations and placement for optimal venting
Place the dryer with several inches of clearance on all sides to allow for heat dissipation and easy vent access. Route ductwork away from walls and across minimal bends to reduce pressure loss. If you replace hoses or ducts, choose components compatible with heat pump systems and ensure secure connections to prevent leaks.
Warranty, replacement cycles, and when to call a pro
Consult your LG warranty terms for coverage related to the heat pump system and venting components. If you notice persistent performance drops, unusual noises, or fault codes after basic maintenance, consider a professional inspection. A qualified technician can diagnose issues that aren’t visible during routine cleaning and help sustain long-term reliability.
Tools & Materials
- Screwdriver set (Phillips & flathead)(Phillips #2 and flathead sizes)
- Vacuum with brush attachment(Crevice tool for vent interior)
- Lint brush or microfiber cloth(Reach lint around drum rim)
- Duct brush kit(For vent ducts)
- Flashlight(Inspect tight spaces)
- Gloves(Hand protection)
- Safety goggles(Eye protection)
- Measuring tape(Optional for duct routing check)
- Old towels or drop cloth(Protect floor)
- Bucket and mild detergent(For cleaning sprays)
- Replacement vent hose (if needed)(Check compatibility)
- Soft brush for lint trap(Gentle cleaning)
Steps
Estimated time: 30-45 minutes
- 1
Unplug and prepare
Power off the unit and unplug it. Gather tools and place towels to catch any dust. This prevents electrical shock and keeps your workspace clean.
Tip: Always unplug before any maintenance to reduce shock risk. - 2
Remove and clean lint trap
Take out the lint trap and clean both sides with a soft brush. Vacuum the trap cavity to capture fibers that remain behind. Let the trap dry fully before reinserting.
Tip: Use a microfiber cloth to wipe fine lint from the trap edges. - 3
Vacuum interior around drum
With the dryer open, vacuum along the drum edge and accessible seals to remove hidden lint. This reduces resistance and promotes better airflow during cycles.
Tip: Be gentle around seals to avoid damage. - 4
Inspect rear vent connection
Check the dryer rear for lint buildup and ensure connections are firm. If accessible, wipe lint from the connection point and reseat hoses.
Tip: If you feel air escaping around joints, reseat and secure with clamps. - 5
Examine exterior vent and cover
Go outside to inspect the vent cover. Remove debris from the opening and ensure the damper flips freely with airflow.
Tip: Clear any dead leaves or dust before the season changes. - 6
Check ducting for kinks
Follow visible ducting to identify kinks, crushed sections, or loose joints. Straighten or replace damaged segments as needed to restore airflow.
Tip: Avoid long, sharp bends which increase pressure loss. - 7
Reassemble and run a test cycle
Reconnect any removed panels and run a short load to verify the unit is functioning normally. Observe for unusual noises, heat, or error codes.
Tip: Watch for any odors or excessive heat during the first test run. - 8
Document maintenance and set reminders
Record what you did and schedule the next maintenance session. Keeping a log helps you stay proactive and catch trends early.
Tip: Set a monthly reminder on your phone or calendar.
Common Questions
Can I clean a lg heat pump dryer vent myself, or do I need a professional?
Basic lint removal and vent checks are safe for DIY maintenance when the unit is unplugged. More involved vent inspection or duct work should be handled by a professional to ensure proper fittings and code compliance.
Yes, you can handle basic lint removal and vent checks yourself, as long as the dryer is unplugged. For duct work or professional-level inspection, contact a pro.
Does cleaning the lint trap improve efficiency for lg heat pump dryers?
Yes. A clean lint trap reduces airflow resistance, helping the heat pump operate more efficiently and drying clothes evenly. Regular cleaning should be part of your monthly routine.
Absolutely. A clean lint trap helps airflow and efficiency. Make it a monthly habit.
What are common LG error codes related to venting or sensors?
Common codes typically indicate sensor issues or ventilation problems. Refer to the LG user manual for a code list and recommended steps, including unplugging and resetting the unit.
Look up the code in your manual and reset the unit if advised. If codes persist, consult support.
Is it safe to operate an lg heat pump dryer in a humid environment without venting?
Ventilation remains essential in humid environments to prevent moisture buildup and mold risk. Use proper venting and ensure external exhaust outlets remain clear.
Ventilation is still needed; ensure vents stay clear to prevent moisture problems.
How often should I schedule professional servicing for a lg heat pump dryer?
Consider annual or semi-annual professional checks if you use the unit heavily or notice performance drops. Routine DIY maintenance can extend time between visits.
Annual or semi-annual checks are good if you use it a lot; otherwise, do monthly DIY maintenance.
Do lg heat pump dryers require special vent hoses or fittings?
Use manufacturer-approved hoses and fittings designed for heat pump systems. Avoid generic replacements that may restrict airflow or create leaks.
Use LG-approved parts to maintain efficiency and safety.
Watch Video
Key Points
- Regularly clean lint paths and vents
- Maintain unobstructed airflow for efficiency
- Follow model-specific LG guidance for sensors and cycles
- Prioritize safety: unplug before any work
- Use a maintenance log to track progress