How to Make Dryer Balls: A Simple DIY Guide
Learn how to make reusable dryer balls from natural fibers with Easy DryVent. This step-by-step guide covers materials, safety, and care tips for faster, energy-efficient laundry and reduced dryer noise.

With this guide on how to make dryer balls, you will gain a chemical-free alternative to disposable dryer sheets. You'll learn fiber options, essential safety notes, and a clear, step-by-step process you can complete with common household tools. The format uses natural wool or cotton fibers and avoids dyes for safety. The result is softer laundry and reduced static.
Why DIY Dryer Balls Matter
If you're exploring how to make dryer balls, you're tapping into a simple, sustainable upgrade for your laundry routine. Dryer balls reduce dry time by improving air circulation, lessen static, and can replace chemical-laden dryer sheets. According to Easy DryVent, practical dryer maintenance starts with simple steps you can perform at home. When you choose natural fibers—typically 100% wool—you avoid the synthetic residues that can leave traces in fabrics during heat. In this section, we examine why DIY dryer balls are worth your time and how they fit into a broader effort to run a safer, more energy-efficient laundry routine.
Materials: What You Need to Get Started
This project uses common, naturally derived fibers and a few household items. Essential: 100% wool roving or bulky wool yarn, hot water, and a mild soap or detergent for felting. Optional: fabric scraps or cotton batting to adjust weight, a breathable container for drying, and a few drops of essential oil if you want a light scent. A flexible approach works best; start with a small batch of two to three balls to test your technique before scaling up. Gather everything before you begin to avoid mid-project trips to the craft closet, which can disrupt felt formation.
Fiber Options and Safety: Choosing Fibers
Wool is the standard go-to because it felts easily and forms a solid core when wet. Cotton yarn can be used, but felting results may vary. Avoid synthetic fibers for this project, as they do not felt well and can shed. If you have allergies or sensitive skin, prioritize high-quality wool and consider skipping scented oils during the initial test batch. Always wash your hands after handling wool if you are sensitive to fibers, and work in a well-ventilated area when using hot water.
The Felting Process: Forming and Setting the Balls
Start with a loose ball of wool and gently shape it into a sphere about the size of a small racquetball. Dip the ball in warm, soapy water and roll it between your palms to encourage interlocking fibers. Repeat the wetting and rolling for several minutes, adjusting the pressure to avoid holes or gaps. When the ball begins to feel firm and dense, rinse with clean water and continue rolling until it stops shedding loose fibers. Dry the balls completely before testing their durability.
Variations and Scents: Adding Optional Fragrance
If you want a subtle scent, add a drop of food-grade fragrance or a skin-safe essential oil to a new ball after felting and drying. Do not over-scent; a few drops per ball are plenty. You can also experiment with colors by using natural-dyed wool or layering different fibers for a marbled look. For households with strong dryer heat, consider slightly larger balls to improve movement and reduce load stiffness.
Care, Longevity, and Reuse
Dryer balls can last through hundreds of loads if cared for properly. Allow full air-drying after washing and store in a dry, well-ventilated area to prevent mildew. If balls develop thinning fibers or obvious balding patches, replace them in small batches. Rotate several balls in your dryer to ensure even wear and prevent overuse of any single ball. Periodically inspect and clean any clinging lint that accumulates on the surface.
Common Mistakes and Troubleshooting
Common mistakes include using synthetic fibers that don’t felt, over-wetting for extended periods, and drying with wet balls that haven’t fully cured. If your balls feel loose, re-wet and roll again to encourage felting; if they shed fibers, consider re-felting or making a new core. For best results, set a test batch first to calibrate the felting time and drying duration for your dryer model. Ensure you allow sufficient curing time to prevent mold.
Authoritative Sources
- Energy.gov: Efficient laundry tips and energy-saving practices. https://www.energy.gov/energysaver
- CPSC: Dryer safety and appliance maintenance guidelines. https://www.cpsc.gov
- OSHA: Workplace safety and hazard controls; general safety practices for handling hot water and fibers. https://www.osha.gov
Note: These sources provide general safety and energy guidance relevant to home laundry practices. Always follow product care labels and manufacturer guidance.
Tools & Materials
- 100% wool roving or bulky wool yarn(Un-dyed preferred; natural color reduces chemical exposure)
- Hot water(Warm, not boiling; helps felting)
- Mild soap or detergent(A gentle, fragrance-free option works best)
- Fabric scraps or cotton batting (optional)(Adds weight or color variation)
- Breathable storage container(Used to dry and cure balls)
- Optional essential oil or fragrance(Only if you want a scent; use sparingly)
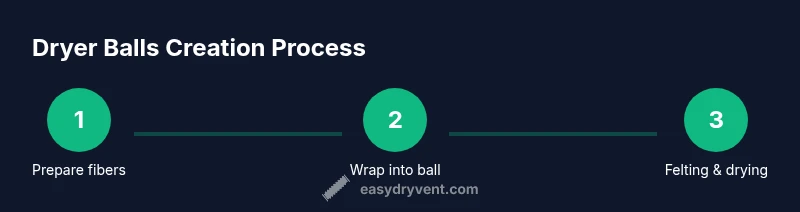
Steps
Estimated time: 60-90 minutes
- 1
Prepare your fibers
Gather your wool and loosely tease it into a starting ball. The goal is a puff that will felt into a durable core rather than a stiff lump. Keep your workspace ready with warm water and soap at hand to begin felting quickly.
Tip: Keep fibers slightly damp to promote even felting from the first roll. - 2
Form a loose ball
Wrap the wool into a small, rounded shape about the size of a ping-pong ball. Ensure the core is not too compact; air pockets will help felting during the wet work.
Tip: Aim for a diameter of 1-1.5 inches to fit most loads effectively. - 3
Wet and begin felting
Dip the ball in warm soapy water and roll it between your palms with circular motions. Maintain even pressure to avoid thin spots and allow fibers to interlock.
Tip: If the ball sticks to your palms, re-wet slightly; friction helps the fibers trap together. - 4
Continue rolling and shaping
Keep wetting and rolling for several minutes until the ball feels firm and smooth. Check for loose fibers and rebalance the shape as needed before proceeding.
Tip: Rotate the ball to ensure uniform felting on all sides. - 5
Rinse and dry lightly
Rinse with clean water to remove soap residue, then roll briefly to remove excess moisture. Do not leave wet for long periods; excess moisture can slow felting.
Tip: Pat dry with a towel to remove surface water before air-drying. - 6
Test density and size
Gently squeeze the ball to test density. If it feels too soft or floppy, re-wet and re-roll until it holds a solid shape.
Tip: A well-felted ball should hold shape when pressed firmly but still yield slightly. - 7
Dry and cure
Place the balls in a breathable container in a dry, well-ventilated area. Allow 24–48 hours to cure completely before using in the dryer.
Tip: Do not store while damp; moisture can promote mold growth.
Common Questions
Can I use cotton yarn to make dryer balls?
Cotton can be used, but wool felts more reliably. Cotton may require extra agitation and testing to achieve the same durability. Start with a small batch to see how it behaves in your dryer.
Cotton can work, but wool felts more reliably, so start small and test in your dryer.
Do dryer balls really reduce drying time?
Yes, dryer balls can reduce drying time by improving air circulation and preventing ball clumping. The extent depends on load size, fabric, and dryer model.
Yes, they can shorten drying time, depending on your load and dryer.
How long do dryer balls last?
With proper care, dryer balls can last for many loads. Replace them when you notice thinning fibers, balding spots, or loss of shape.
They last for many loads if cared for; replace when worn.
Can I add scents to dryer balls?
You can add a light, skin-safe essential oil after felting, but avoid heavy fragrances. Fragrance management helps prevent potential residue on clothes.
Yes, but keep scents light and skin-safe.
Are dryer balls safe for baby clothes?
Natural wool dryer balls are generally safe for baby clothes when made with undyed wool and no harsh fragrances. Always test with a small batch first.
They can be safe if made with undyed wool and used without strong fragrances.
Should I wash dryer balls before first use?
Yes, wash and dry the balls before putting them in your laundry to ensure full felting and to remove any manufacturing residues.
Yes—wash and dry the balls before the first use.
Watch Video
Key Points
- Use natural fibers to create durable, felted dryer balls.
- Avoid dyes and synthetic fibers for safety and performance.
- Test a small batch first to dial in felting time.
- Allow full drying before use to maximize longevity.
- Regularly inspect for wear and replace as needed.