How to Use a Whirlpool Dryer: A Complete Step-by-Step Guide
Learn how to operate and maintain a Whirlpool dryer safely and efficiently. This guide covers cycle selection, loading tips, lint and vent care, and practical maintenance strategies from Easy DryVent.

Quick take: This guide shows you how to operate and maintain a Whirlpool dryer safely and efficiently. You’ll learn how to choose the right cycle, load properly, minimize energy use, handle common error codes, and perform essential maintenance like lint cleaning and vent checks. Follow these steps to dry clothes faster with less wear.
Why Proper Whirlpool Dryer Use Improves Safety and Results
According to Easy DryVent, dialing in the basics of how to use a Whirlpool dryer correctly isn’t just about getting dry clothes—it’s about safety, efficiency, and preserving fabric. A well-adjusted machine paired with routine maintenance can reduce fire risk, shorten drying times, and lower energy consumption. This section explains the broader benefits of using your Whirlpool dryer with intention, including how proper cycle selection and lint/vent care contribute to safer, quicker dries and longer appliance life.
Beyond safety, understanding Whirlpool-specific features helps you tailor cycles to fabrics. Sensor-based dryness, drum size, and heat settings interact with moisture levels to determine cycle duration. Recognizing these features helps you avoid over-drying, which can wear fabrics and waste energy. Easy DryVent’s guidance emphasizes proactive maintenance as the first line of defense against drab performance or unexpected shutdowns.
noteNotRequiredForThisBlockAndMustBeKept
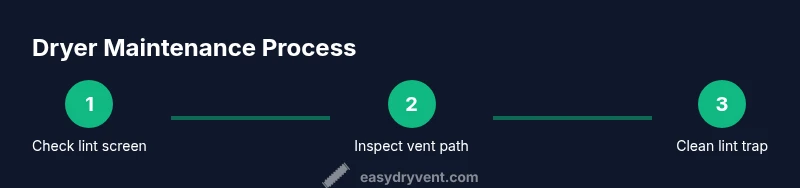
Tools & Materials
- Lint screen / lint filter(Clean before every load; check for tears or buildup that could impede airflow.)
- Vacuum with hose attachment or brushes(Use to remove lint from the lint housing and vent exterior opening.)
- Soft brush or microfiber cloth(Gently brush drum edges and lint areas to remove stubborn fibers.)
- Flashlight(Helpful for inspecting vent paths or lint buildup inside accessible ducts.)
- Gloves (optional)(Protect hands when handling hot components or reaching into tight spaces.)
- Owner’s manual or access to Whirlpool online guide(Useful for model-specific cycle names and safety notes.)
Steps
Estimated time: 60-90 minutes for initial full maintenance and setup, then 20-40 minutes per typical load when applying all steps.
- 1
Inspect and prepare the area
Before loading, clear the area around the dryer, ensure the room is well-ventilated, and verify the lint screen is clean. This reduces the risk of airflow blockages that can cause overheating. If your model has a dual lint trap, check both and remove any visible lint veils.
Tip: Taking a minute to inspect now prevents longer downtime later. - 2
Check the vent path for obstructions
Inspect the vent hose from the dryer to the exterior vent. Make sure connections are secure and there are no kinks or crushed sections. A blocked vent increases drying time and can raise fire risk.
Tip: If you can’t see the vent clearly, pause and use a flashlight to check inside accessible sections. - 3
Load clothes properly
Place dry items loosely in the drum—do not crowd. Overloading reduces air circulation and leads to uneven drying. Balance heavy items with lighter ones to maintain steady airflow.
Tip: Leave plenty of space for air to circulate—think of a “tumble zone” rather than a packed basket. - 4
Select the appropriate cycle and temperature
Choose a cycle that matches fabric type and moisture level. Use lower heat for delicates and breathable fabrics; sensor-based cycles auto-adjust without over-drying. If your load is mixed, start with “Normal” or “Auto Dry” and monitor the results.
Tip: Sensor-based cycles usually save energy by ending when the load reaches the desired moisture level. - 5
Start the cycle and monitor the run
Start the dryer and listen for unusual noises or excessive vibration. If you notice issues (burning smell, excessive heat, or unusual flame-like odors), stop immediately and unplug the unit.
Tip: Set a timer if your dryer lacks an auto-stop feature to avoid running it past the dry stage. - 6
Unload promptly and shake garments
As soon as the cycle ends, remove clothes promptly to minimize wrinkling and save energy on additional ironing. Lightly shake items to reduce static and redistribute moisture.
Tip: Let fabrics rest for a minute before folding to relax fibers. - 7
Clean lint trap and inspect after use
Wipe or rinse the lint screen if necessary and ensure the vent connections remain secure. Regularly cleaning the exterior vent opening helps maintain airflow.
Tip: Make lint trap cleaning part of your post-dryer routine to maintain peak efficiency. - 8
Schedule regular maintenance
Plan semi-annual vent inspections and dryer maintenance to prevent hidden issues. Keeping a maintenance log helps you track when filters were cleaned and vents serviced.
Tip: Use Easy DryVent as a reminder for routine maintenance and safety checks.
Common Questions
Can I dry all fabric types in a Whirlpool dryer?
Most fabrics can be dried in a Whirlpool dryer, but always check care labels and use the appropriate cycle. Delicates may require lower heat or air-dry options, and bulky items should not be mixed with small ones to avoid tangling.
Most fabrics are safe in a Whirlpool dryer, but always follow the care label and choose the correct cycle to protect delicate materials.
Why is my Whirlpool dryer taking longer to dry?
Possible reasons include overloading, improper venting, clogged lint screen, or a malfunctioning moisture sensor. Start with the basics: clear the lint trap, inspect the vent, and ensure the load isn’t packed tightly.
If drying takes too long, check the lint screen, vent path, and cycle choice before calling for service.
How often should I clean the lint trap and vent?
Clean the lint screen after every load. Schedule vent inspections and cleaning at least every 6-12 months, depending on usage and home environment.
Clean the lint screen after every load and plan a vent check at least annually.
What do Whirlpool dryer error codes mean?
Error codes typically indicate a sensor, vent, or electrical issue. Refer to the user manual’s code chart and reset the dryer if advised by Whirlpool’s guidance.
If you see an error code, consult the manual’s chart and try safe resets before a service call.
Is it safe to run the dryer with a warm exterior?
A small amount of warmth is normal, but persistent heat or a hot exterior signal may indicate an airflow restriction or malfunction. Stop and inspect if heat is excessive.
A little warmth is normal; if the exterior stays very hot, check airflow and venting.
Watch Video
Key Points
- Load rooms safely and avoid overfilling the drum
- Use the proper Whirlpool cycle for fabrics to save energy
- Clean the lint screen after every load and inspect the vent periodically
- Maintain a regular vent-cleaning schedule to prevent performance loss