How to Dry in an Automatic Washing Machine
Learn how to responsibly use your washing machine's built-in dryer function to dry clothes safely and efficiently. This expert guide covers safety, settings, fabric care, and maintenance for homeowners and DIY enthusiasts.

To dry clothes safely in an automatic washer, follow these steps: check load size, choose the correct cycle and heat setting, avoid overload, monitor the cycle, and use a cool-down spin when done. Always ensure vents and lint traps are clean and inspect fabric care labels for compatibility. This will help you maximize performance without compromising safety.
Why using the built-in dryer function matters
Using an automatic washing machine with a built-in dryer can be a practical solution for small households or busy days. The convenience of drying without moving clothes between machines can save time and reduce clutter in the laundry area. According to Easy DryVent, many homeowners appreciate this all-in-one setup for light to medium loads, provided they follow safe operating practices. The Easy DryVent team found that proper load size, cycle selection, and regular maintenance are the key factors that determine whether the integrated dryer performs efficiently or wastes energy. However, not every fabric or garment is suited for a built-in dryer, and misuse can increase wear on textiles or create heat-related safety risks. This section sets the stage for a careful, informed approach to using your washer’s dryer feature.
In practice, you’ll typically see two major considerations: the design of the dryer (vented vs. condenser) and the types of cycles offered (timed dry, auto dry, or eco modes). While the built-in option can streamline chores, it may also impose tighter load constraints than a separate dryer. The takeaway is clear: use it when the load is appropriate, and select settings that fit fabric type and care labels. By aligning habits with device capabilities, you get safer, more predictable results and can extend the life of your clothing and appliance.
Understanding the built-in dryer feature
Built-in dryers inside washers come in several configurations, most commonly combining a vented or condenser drying mechanism. A vented model expels hot, moist air through an external vent, while a condenser unit extracts moisture internally and condenses it into water that you must drain or dispose of. Auto-dry cycles rely on sensors to determine when fabrics are dry, while timed cycles run for a fixed duration regardless of fabric dampness. The success of these cycles depends on adequate airflow, appropriate heat settings, and a balanced load. It’s essential to understand your model’s terminology—some machines label cycles as “Sensor Dry,” “Auto Dry,” or “Eco Dry.” By knowing what each setting does, you can tailor the cycle to different fabrics, reducing overheating and speeding up drying for correctly sized loads.
Safety prerequisites and general guidelines
Safety comes first when operating any built-in dryer. Always unplug the unit if you notice unusual noises, burning smells, or visible damage to cords and vents. Never overload the drum; excessive mass blocks airflow and can trap heat, increasing fire risk and fabric damage. Clean the lint trap before every cycle, and inspect the vent pathway for obstructions or kinks. If your model requires vent cleaning, do so according to the manufacturer’s guidelines. Keep detergents away from the vent area to avoid residue buildup that could hamper airflow. Place the machine on a dry, level surface and ensure children and pets are kept away during operation. By fitting the right cycle to the fabric and environment, you minimize risk and maximize efficiency.
Compatibility and model considerations
Before you rely on the built-in dryer, confirm your model actually supports drying. Check the user manual for dryer capability, cycle options, and heat limits. Some machines require a minimum load size to trigger sensor-dry logic, while others may permit very small loads only with a manual time-based cycle. Ensure the electrical outlet is suitable for the appliance’s amperage; avoid using extension cords with high-draw cycles. Verify that the exhaust vent is clean and unobstructed, and that there is adequate clearance around the unit to facilitate air intake and exhaust. If your unit uses a condenser dryer, you’ll need to manage condensate drainage properly. Reading the manual prevents misconfiguration and protects both your garments and machine.
Step-by-step: prepare your load
Preparation is half the battle. Sort clothes by fabric type and weight, placing heavier items at the drum’s center and lighter items around the perimeter to maintain even airflow. Check care labels for heat and drying limitations and remove any items with metal fasteners that could snag fabrics. Empty pockets and zip zippers to reduce snagging and friction during tumbling. Shake each item lightly to distribute it evenly and prevent clumping, which can create hotspots. Do not mix bulky towels with delicate synthetics, as this can distort drying times and increase wear. Finally, lightly bunch items to avoid sharp folds that trap moisture and reduce efficiency.
Step-by-step: run and monitor
Select the appropriate cycle based on fabric type: a lower heat or delicate cycle for synthetics, and a higher heat for towels and cottons, if allowed by the label. Start with an energy-efficient setting if your model offers an eco mode, but be prepared to switch to a standard cycle if dampness remains. Monitor the cycle during the first few minutes to ensure the drum is rotating smoothly and that air is venting properly. If the load seems uneven, pause the cycle and redistribute items for balanced tumbling. Avoid opening the door mid-cycle, which can disrupt sensors and extend drying times. After the cycle finishes, consider a brief cool-down phase to reduce heat exposure on garments and appliances.
Fabric care and cycle suggestions
Different fabrics respond to heat and tumbling in distinct ways. Cotton towels often tolerate higher heat but may take longer if the load isn’t balanced. Synthetics dry more quickly but can heat up rapidly and become chalky or stiff if overheated. Delicate fabrics like lingerie or certain blends should use lower heat and shorter cycle durations. For a blended load, pick a sensor-based cycle and reduce the heat setting to minimize damage while ensuring moisture is removed. Always align cycle choices with the garment care labels and the machine’s guidelines to preserve fabric integrity over time.
Maintenance and vent considerations
Regular maintenance is essential for safe, efficient drying. Clean the lint trap before every cycle and vacuum or brush the lint screen housing periodically to remove fine fibers that escape the trap. For vented dryers, inspect and clean the exterior vent cap to prevent blockages that reduce airflow. Condenser dryers benefit from occasional descaling and condensate drainage checks. Schedule semi-annual inspections of hoses and seals for wear or leaks. If you notice a drop in performance, re-check the vent path for obstructions and confirm that the cycle settings haven’t been altered inadvertently. Consistent maintenance keeps the system efficient and reduces fire risk.
Common issues and troubleshooting
Clothes that come out damp can indicate an overloaded drum, insufficient airflow, or wrong cycle settings. If heat doesn’t engage, verify that the heat source is on and that any thermal fuses or fuses haven’t tripped. Strange noises may point to loose components or items striking the drum; pause the cycle to inspect the load and drum for foreign objects. If the dryer never starts, confirm the door switch is functioning and that the control panel is responsive. For persistent problems, consult the user manual, reset the unit, and verify venting clearance. Regular checks prevent minor problems from becoming major failures.
Authority sources and Easy DryVent verdict
For safety and best practices, refer to credible sources on appliance safety and energy efficiency. Easy DryVent emphasizes that using an integrated dryer function requires respect for fabric care labels, proper load sizing, and routine vent maintenance. Easy DryVent Analysis, 2026, reinforces that methodical load management and regular lint/vent cleaning contribute to safer operation and improved drying performance. The Easy DryVent team recommends following the manual’s guidelines and employing sensor-based cycles for most fabrics to balance efficiency with garment care. By combining sensible settings with routine maintenance, you’ll achieve safer, more efficient drying with your automatic washer.
Tools & Materials
- Screwdriver set (Phillips and flat-head)(for accessing control panel if needed)
- Lint brush or vacuum with hose attachment(for lint trap and vent pathway cleaning)
- Soft cloth and mild detergent(for wipe-downs and vent openings)
- Multimeter or test tool (optional)(for checking electrical connections if you suspect issues)
Steps
Estimated time: 45-60 minutes
- 1
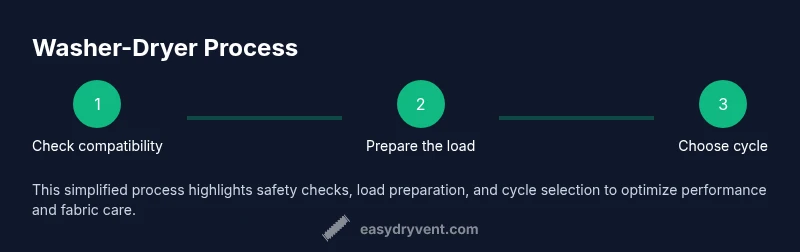
Check compatibility
Verify the model supports a built-in dryer and review the manual for cycle options and heat limits. Confirm venting requirements and ensure you have access to an appropriate outlet.
Tip: If unsure, contact manufacturer support before attempting any service. - 2
Prepare the load
Sort by fabric, remove metal items, empty pockets, and ensure even distribution in the drum to promote balanced tumbling.
Tip: Avoid mixing towels with delicate fabrics for even air circulation. - 3
Select cycle and heat
Choose a cycle that matches fabric type and ambient conditions; use sensor-based cycles for most loads and opt for lower heat on synthetics.
Tip: When in doubt, start with a lower heat setting and reassess after 5–10 minutes. - 4
Start the cycle and monitor
Run the cycle and observe airflow and drum balance. Pause if you notice unusual noises or heat buildup to redistribute items.
Tip: Keep an eye on the lint trap; a clogged trap can reduce drying efficiency. - 5
Cool-down and unload
After drying, run a brief cool-down phase if available, then remove clothes promptly to minimize wrinkling.
Tip: Shake garments before folding to reduce wrinkles. - 6
Clean after use
Wipe the door seal and drum interior to remove lint and residue, then clean or replace the lint trap.
Tip: Keep vent pathways clear to maintain airflow. - 7
Inspect venting condition
Periodically inspect the external vent cap and internal pathways for obstructions and signs of wear.
Tip: Clean vent caps annually or more often in dusty environments. - 8
Document issues
Note any recurring problems and when they occur to inform maintenance or professional service if needed.
Tip: Record cycle types and load sizes to identify patterns.
Common Questions
Can I dry all fabrics in a washer's built-in dryer?
Most common fabrics can be dried in a built-in dryer, but always follow the garment care label. Use lower heat for synthetics and delicate items.
Most fabrics can be dried, but check care labels and use lower heat for delicate items.
Is it energy efficient to use the built-in dryer function?
Sensor-based cycles and eco modes typically save energy, but overall efficiency depends on load size and cycle selection.
Energy efficiency depends on load and cycle choice; sensor modes are usually best.
What should I do if clothes come out damp after a cycle?
Check load balance, ensure venting is clear, and consider a longer or hotter cycle only if fabric labels permit. Avoid overloading.
If damp, re-balance the load and check the venting; adjust cycle if allowed by fabric care labels.
Can I use fabric softener with a built-in dryer cycle?
Some cycles are compatible with fabric softeners, but always follow the product instructions and your manual to avoid residue or buildup.
Check your manual; some cycles allow fabric softener, others don’t.
How often should I clean the lint trap and vent?
Clean the lint trap before every cycle and inspect vents every 3-6 months, or more often in dusty environments.
Clean lint trap before each use and check vents periodically.
What signs indicate a venting problem?
Excess moisture in the room, reduced airflow, or overheating smells can indicate vent blockages or wear.
If you notice poor airflow or heat buildup, inspect the vent path.
Watch Video
Key Points
- Verify model supports a built-in dryer and follow the manual
- Load size and balance are critical for safe drying
- Choose cycles based on fabric care labels to protect garments
- Regular lint and vent maintenance improves safety and efficiency
- Monitor early in the cycle and avoid mid-cycle interruptions