Frigidaire Dryer Maintenance Guide
Learn expert, safe maintenance for your Frigidaire dryer. This step-by-step guide covers venting, lint care, troubleshooting, and energy-saving practices from Easy DryVent.

This guide shows homeowners how to safely maintain a frigidaire dryer for better efficiency and safety. You'll learn vent inspection, lint trap care, common fault checks, and simple DIY fixes. The steps emphasize safety first, unplugging before work and avoiding water near electrical components. According to Easy DryVent, regular maintenance reduces the risk of lint buildup, overheating, and vent fires, while also helping clothes dry more quickly.
Understanding the Frigidaire Dryer: Why Maintenance Matters
A Frigidaire dryer is a common centerpiece of any laundry routine, and like all appliances, it benefits from regular attention. The goal of maintenance is not only to prevent inconvenient breakdowns but also to improve safety, energy efficiency, and overall performance. According to Easy DryVent, a well-kept dryer operates more reliably, dries clothes faster, and uses energy more efficiently when vents and lint filters are clear. This section breaks down how a typical Frigidaire dryer functions, where lint and vents fit in, and why homeowners should adopt a simple routine. You don’t need specialized tools to start; the techniques here emphasize small, safe, repeatable steps you can perform on weekends or during a routine clean-up.
Frigidaire dryers rely on airflow to move heat through the drum. When vents become blocked or the lint trap isn’t cleaned, airflow is reduced, heat can build up, and cycles take longer. Regular checks help you spot degraded door seals, worn vent hoses, and loose connections that can compromise safety or efficiency. By adopting a simple maintenance cadence, you’ll reduce the risk of overheating and fires, protect your investment, and keep drying times reasonable.
Frigidaire Dryer Venting Basics and Common Configurations
Vent design is a core part of any dryer’s performance. Frigidaire dryers typically vent to the exterior through a metal duct and exhaust hood. The path should be as straight and short as possible, with minimal elbows, and the venting diameter should match the dryer’s outlet. Easy DryVent’s guidance emphasizes avoiding foil or plastic accordion hoses, which clog more easily with lint and fluff. Regular inspection of the exterior vent cap and interior ducts helps prevent back-drafting and lint buildup. If you have long runs or multiple bends, consider using rigid metal ducts and ensuring there are no kinks that impede airflow. Proper venting also reduces energy use since the dryer won’t have to work as hard to exhaust hot air.
Routine Maintenance Checklist for Frigidaire Dryers
A practical maintenance routine keeps your unit performing well. Use this checklist monthly and seasonally to stay ahead of problems:
- Inspect the exterior vent cover and the interior duct for lint buildup.
- Clean the lint trap after every cycle; reassess the screen for signs of wear.
- Check door seals and drum gasket for wear or damage.
- Inspect the power cord and plug for cracks or scorch marks.
- Verify the dryer is level and stable to prevent rattling.
- Run a short test cycle to observe airflow and heat consistency.
This cadence aligns with Easy DryVent recommendations and helps you catch issues early before they become costly repairs. Keeping notes of maintenance visits can help you track when to service ducts or replace worn components.
Cleaning the Lint Trap, Duct, and Access Points
Lint buildup is the primary enemy of dryer efficiency and safety. Start by removing and cleaning the lint trap with warm soapy water; avoid using harsh chemicals that could corrode the screen. Use a soft brush to dislodge lint from the trap housing. For deeper cleaning, gently detach accessible sections of the vent hose and vacuum the lint from the interior surfaces with a hose attachment. Reassemble and run a test cycle to confirm airflow is unimpeded. Keep a small checklist near the dryer to remind everyone in the home to clean the trap after each load and to inspect the vent exit for obstructions such as cobwebs or bird nests.
Inspecting Electrical Components and Safety Precautions
Electrical safety should never be overlooked. Always unplug the dryer before any service, and confirm the outlet is not overloaded. Visually inspect the power cord for cracks, and check the plug prongs for discoloration which could indicate overheating. If you notice a burning smell or warm exterior panels, stop immediately and consult a professional. Use a grounded outlet and avoid any water near electrical components. By treating electricity with respect, you safeguard your home and your family while performing routine maintenance.
How to Improve Drying Efficiency with Proper Venting and Load Sizing
A well-designed vent path and properly sized loads significantly influence drying performance. Group smaller or similarly damp items to improve even air circulation and shorten cycle times. Avoid overloading the drum, which blocks airflow and increases energy use. If you’re using extended cycles on a Frigidaire dryer, verify that the vent system remains clear and free of kinks. Consider using a short, straight path for the ducting and limit the number of bends to reduce pressure losses. The goal is steady, unobstructed airflow that enables faster, more even drying while conserving energy.
Troubleshooting Common Drying Problems (No Heat, Long Dry Times, Noisy Operation)
When a Frigidaire dryer isn’t performing as expected, start with the basics: confirm the dryer is plugged in, the circuit breaker hasn’t tripped, and the door switch is functioning. If heat is absent, inspect the thermal fuse or high-limit thermostat and look for blown fuses in the dryer’s control board area. For long drying times, recheck vent length and screen cleanliness, and assess whether the drum seals are intact. If you hear unusual noises, inspect drum rollers and pulleys for wear. If you’re unsure about internal components, seek guidance from Easy DryVent and schedule a service if heat or mechanical parts fail to respond to basic checks.
Seasonal Maintenance and Long-Term Care
Seasonal maintenance helps prevent drama during peak laundry months. In spring and autumn, perform a thorough vent and lint trap check, clean accessible ducts, and reassess the dryer’s level. If your home experiences high humidity or dusty conditions, you may need to repeat deeper cleaning more often. For longer storage periods, unplug the unit, disconnect and seal the vent, and cover the appliance to minimize dust infiltration. A consistent care routine reduces unexpected outages and extends the life of your frigidaire dryer.
Easy DryVent's Expert Recommendations and Final Next Steps
The Easy DryVent team recommends establishing a simple, repeatable routine that centers on vent cleanliness, lint trap integrity, and electrical safety. By following the steps outlined above, you’ll improve safety, minimize energy waste, and help your frigidaire dryer perform at its best. If you’re ever uncertain or encounter persistent problems, don’t hesitate to contact a professional service. Regular maintenance is a smart investment that pays off through safer operation and longer appliance life.
Tools & Materials
- Screwdriver set (Phillips and flathead, assorted sizes)(Use #1 and #2 for most panel screws)
- Vacuum with hose attachment(Crevice tools help reach vent seams)
- Lint brush or microfiber cloth(For lint trap housing and door seal)
- Soft bristle brush(Loosen lint from hard-to-reach areas)
- Duct tape and replacement vent hose (metal duct preferred)(Use metal duct for safety and efficiency; tape to seal joints)
- Mild detergent and water(For cleaning the lint trap and housing)
- Flashlight(Inspect dark corners of ducts)
Steps
Estimated time: 60-90 minutes
- 1
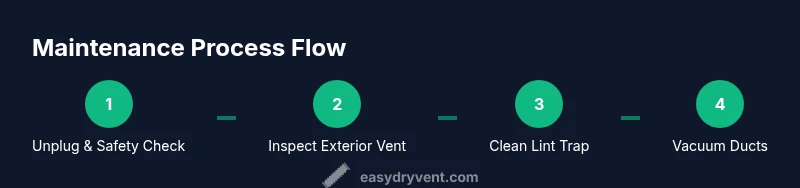
Unplug and Safety Check
Power off the dryer and unplug it from the outlet. Confirm the area is dry and clear of combustible materials. This first step protects you from electrical hazards as you begin hands-on maintenance.
Tip: Always start with safety—unplug before touching any internal components. - 2
Inspect Exterior Vent and Hood
Go outside and check the vent hood for obstructions such as leaves or bird nests. Remove lint buildup around the vent opening and ensure the hood opens freely. A clear exterior vent helps prevent overheating and back-drafting.
Tip: A quick real-time view during a manual test cycle confirms airflow is steady. - 3
Clean the Lint Trap Thoroughly
Remove the lint screen and wipe it with a mild detergent solution. Rinse and dry completely before reinstalling. Use a soft brush to remove lint from the trap housing and any seams you can access.
Tip: Clean lint after every load to maintain airflow efficiency. - 4
Vacuum Interior Trap Housing
Carefully vacuum the lint trap housing and accessible duct sections. Avoid harsh scrubbing on the interior surfaces; use the brush attachment to loosen stubborn lint.
Tip: Be gentle to avoid damaging plastic components or seals. - 5
Inspect and Clean the Duct Run
If you can access the duct path from the dryer to the exterior vent, remove any lint blockages with the brush and vacuum. Do not disassemble sealed electrical parts; focus on airflow pathways only.
Tip: Only perform duct cleaning you feel confident completing; seek help if ducts are hard to reach. - 6
Check Electrical Cord and Terminals
Examine the power cord for signs of wear, cracking, or scorching. If you see damage, replace the cord rather than attempting a risky repair. Loose or corroded terminals should be handled by a professional.
Tip: A burned plug is a clear sign you should stop and seek service. - 7
Test Running and Observations
Plug the dryer back in and run a short cycle with a light load. Listen for unusual noises and verify that heat feels consistent. Watch the vent outlet for strong, steady airflow.
Tip: Note any odor or smoke during operation and stop immediately if detected. - 8
Reassemble and Document
Reassemble any panels you opened, reattach the lint trap, and record the maintenance date. Keeping a maintenance log helps track when you should revisit vents or seals.
Tip: A simple calendar reminder ensures you stay on schedule. - 9
Carry Out Seasonal Review
Schedule a seasonal check that covers vent paths, seals, and overall dryer alignment. Seasonal maintenance reduces wear and helps catch developing issues before they escalate.
Tip: Pair seasonal checks with your other home maintenance tasks for consistency.
Common Questions
Why is the frigidaire dryer not heating after maintenance?
No heat after maintenance can indicate a tripped circuit, a blown thermal fuse, or a damaged heating element. Start by checking the breaker and thermostat, and inspect the thermal fuse path for obstructions. If the fuse is blown, replacing it often resolves the issue, but be sure the root cause is addressed before running the unit again.
If your frigidaire dryer isn't heating, first check the circuit breaker and thermostat, then inspect the thermal fuse. If the fuse is blown, replace it and verify the vent is clear.
Can I clean the vent and duct myself, or should I hire a pro?
Light vent cleaning can be done by a homeowner with proper safety precautions and tools. Avoid disassembling sealed components. If ducts are long, heavily blocked, or located in hard-to-reach areas, consider professional service to ensure a safe and thorough clean.
You can clean accessible vent parts yourself if you take safety steps; for extensive duct cleaning, a professional is best.
How often should I clean the lint trap?
Clean the lint trap after every drying cycle. Regular cleaning prevents airflow restriction and reduces drying times. A neglected lint screen can lead to longer cycles and potential safety hazards.
Clean the lint trap after every load to keep airflow smooth and drying times short.
Is it okay to use a vent booster?
Vent boosters can help with restricted dryer airflow, but they must be installed according to the manufacturer’s guidelines and building codes. Improper installation can create leaks or reduce efficiency. Check local codes and consult a professional if unsure.
A vent booster can help if airflow is restricted, but follow instructions and local codes, and consider a pro for installation.
What basic tools should I have for DIY maintenance?
Basic tools include a screwdriver set, a vacuum with attachments, a lint brush, and mild detergent. These allow you to safely access lint traps, ducts, and accessible components while avoiding damage.
A screwdriver set, vacuum with attachments, lint brush, and mild detergent are enough for basic DIY maintenance.
When should I call a professional for my frigidaire dryer?
Call a professional if you notice persistent heat loss, unusual noises after basic checks, or obvious signs of wiring or component damage. A pro can diagnose issues beyond basic maintenance and ensure electrical and vent safety.
If heat is inconsistent or you hear strange noises after the checks, it's time to call a professional.
Watch Video
Key Points
- Inspect vents and lint traps regularly to prevent buildup.
- Unplug before any maintenance to ensure safety.
- Clean the lint trap after every load for optimal airflow.
- Use metal ducting and avoid kinks to improve efficiency.
- Seek professional help when electrical components show wear or damage.