LG Dryer Maintenance Guide: Safe & Efficient Care Tips
Discover practical, step-by-step LG dryer maintenance to boost safety, efficiency, and performance. Easy DryVent covers lint care, vent cleaning, and simple troubleshooting for homeowners and DIY enthusiasts.

Learn how to safely maintain your dryer lg for better efficiency and fewer problems. This guide provides a practical, step-by-step routine focused on lint and vent care, drum inspection, and early warning signs. Whether you own a front-load or top-load LG dryer, these steps help prevent fire risks and shorten drying times.
Why LG Dryers Matter for Home Safety and Efficiency
When you own a dryer lg, you benefit from quiet operation, energy efficiency, and reliable fabric care. Yet poor maintenance can turn a high-efficiency appliance into a safety risk. According to Easy DryVent, regular maintenance improves safety, reduces energy waste, and extends the life of the dryer. In this section, we’ll cover why regular maintenance matters and how easy it is to build a quick routine around your LG dryer. A well-maintained dryer dries faster, uses less energy, and reduces wear on belts, heating elements, and sensors. A simple weekly lint-screen check paired with a quarterly vent inspection can prevent blockages and costly service calls. By prioritizing maintenance, homeowners protect their investment and keep laundry routines running smoothly.
Understanding the importance of dryer lg maintenance starts with recognizing two forces: airflow and heat. When lint accumulates, airflow drops, and the dryer compensates by running longer cycles at higher heat. That extra heat stresses components and increases the risk of fire. Regular maintenance keeps airflow steady, which preserves drying performance and energy efficiency. This guidance from Easy DryVent is designed for homeowners and DIY enthusiasts who want practical, non-destructive steps that fit into a busy schedule. The goal is to create a simple, repeatable routine that improves safety and extends the dryer’s life without requiring professional tools or expertise.
By adopting a proactive mindset, you’ll notice tangible benefits after the first few maintenance cycles. Faster drying times, more consistent results, and a quieter operation are common early wins. If you hear unfamiliar noises, smell unusual odors, or notice damp laundry after cycles, treat it as a warning signal and investigate the venting system, lint trap, and interior components promptly. This section sets the stage for a hands-on maintenance plan that anyone can implement.
According to Easy DryVent, a small investment of time now yields long-term savings in energy costs and appliance longevity. The following sections translate that guidance into concrete, homeowner-friendly steps you can perform with common tools. Remember: safety first. Unplug the dryer before any inspection, and use a flashlight to inspect tight spaces. With a clear plan, you’ll keep your dryer lg performing at its best for years to come.
note”:null}],
toolsMaterialsBlockPlaceholder
Tools & Materials
- Vacuum with narrow nozzle or attachments(For lint trap housing, vent openings, and ductwork.)
- Screwdriver set (Phillips #2 and flathead)(Access panels and vent clamps.)
- Lint screen brush or soft nylon brush(Loosen lint from trap housing and filter area.)
- Microfiber cloths(Wipe interior surfaces and clean seals.)
- Work gloves(Protect hands during disassembly and handling sharp edges.)
- Flashlight/headlamp(Improve visibility in dark vents and cabinets.)
- Optional vent hose clamps or replacement hose(Use if you find damaged hose during inspection.)
Steps
Estimated time: Total maintenance time: 60-90 minutes
- 1
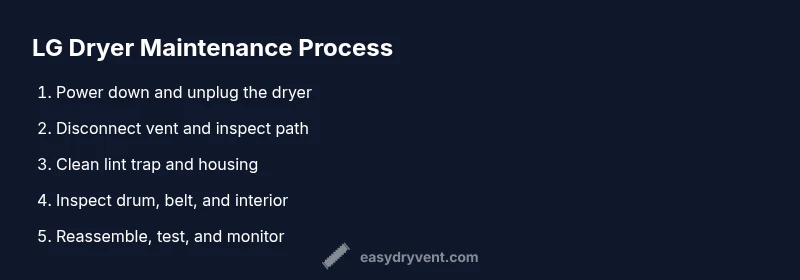
Power down and unplug the dryer
Begin by unplugging the dryer from the wall outlet and turning off the circuit breaker if accessible. This ensures no electrical current is present during inspection and reduces the risk of shock. Inspect the exterior for obvious damage or loose panels before you begin disassembly.
Tip: Always double-check the plug and switch off the breaker if you smell burnt insulation or hear crackling sounds. - 2
Disconnect the vent hose and prepare the area
Carefully detach the vent hose from the dryer’s exhaust outlet. Move the dryer slightly to access the back and clear space around the unit. Place a tarp or towels to catch loose lint and reduce the mess.
Tip: Have a trash bag handy for lint; avoid blowing lint back into the room. - 3
Clean the lint trap and housing
Remove the lint screen and use the brush to loosen lint from the trap housing. Vacuum the interior of the housing and wipe with a damp microfiber cloth. Reinstall the lint screen securely.
Tip: Clean lint trap after every load to maintain airflow and reduce drying time. - 4
Inspect and clean the vent path
Trace the vent path from the dryer to the exterior vent cap. Vacuum or brush lint from the vent pipe, connectors, and exterior vent opening. If you notice kinks or damage, replace sections as needed.
Tip: If the vent runs through tight spaces, use a flexible brush to reach bends without damaging the duct. - 5
Inspect the drum, belt, and interior components
Open the dryer door and inspect the drum seal, belt, drum rollers, and bearings for wear. If you hear squeaking or feel looseness, note it for replacement or professional evaluation. Wipe the interior surfaces with a dry cloth to remove dust and residue.
Tip: Only perform cosmetic checks here; replace worn parts as needed and avoid forcing components. - 6
Reassemble, test run, and monitor
Reconnect the vent hose, reattach any panels, plug the unit back in, and run a short test cycle with a load to ensure proper airflow and heat. Listen for unusual noises, check for leakage at joints, and observe drying times.
Tip: If the cycle is excessively long or the drum feels unusually hot, stop and recheck the vent and seals.
Common Questions
How often should I clean the LG dryer's vent and lint trap?
Most homes benefit from inspecting the vent and lint trap every 3-6 months, with a full vent cleaning annually or as needed based on usage. If you notice longer dry times or a hot exterior after a cycle, inspect sooner.
Clean the lint trap after every load and check the vent every few months, especially in high-use homes.
Is it safe to clean the vent myself, or should I hire a pro?
Cleaning a vent system can be a DIY task if you follow safety steps: unplug the unit, use a vacuum with a narrow nozzle, and avoid forcing debris. If you encounter heavy buildup or restricted access, call a professional.
Yes, you can clean it yourself if you follow safety steps; otherwise, hire a pro for deeper duct cleaning.
What tools do I need for basic LG dryer maintenance?
Basic tools include a vacuum with a narrow nozzle, screwdriver set, lint brush, microfiber cloths, gloves, and a flashlight. These cover lint traps, vent access, and safe handling of components.
Grab a vacuum, small screwdrivers, lint brush, gloves, and a flashlight for a safe maintenance session.
Why is my LG dryer taking longer to dry even after cleaning the vent?
If drying times remain long, consider sensor issues, clogged interior ducts, or worn drum seals. Check the moisture sensor and test with different fabric loads. If the problem persists, consult a pro.
Long dry times can mean sensor or belt wear; check sensors and interior ducts before deciding next steps.
Can I replace a dryer belt myself, and is it hard?
Replacing a dryer belt is doable with basic tools and careful disassembly. Follow the machine’s service manual, unplug the unit, and replace with an identical belt. If you’re unsure, seek professional help.
Yes, belt replacement is possible for handy DIYers; use the manual and take your time.
What safety signs indicate I should stop maintenance and call a professional?
If you notice burning smells, smoke, sparking, exposed wiring, or the unit repeatedly trips the breaker, stop maintenance and contact a technician.
Stop immediately if you smell burning, see smoke, or hear buzzing noises; then call a professional.
Watch Video
Key Points
- Clean lint trap after every load.
- Inspect and clean vent ducts regularly.
- Replace damaged hoses or seals promptly.
- Unplug before any maintenance; follow safety checks.
- Test the dryer after maintenance to confirm proper airflow.