Gas Dryer Installation Cost: A Practical Guide for 2026
Explore the true cost of installing a gas dryer, including labor, permits, gas line work, venting, and safety considerations. Easy DryVent analyzes typical ranges for 2026 to help homeowners plan.

Gas dryer installation cost: what’s included
When planning a gas dryer installation, the price you’ll see on the table is a combination of hardware, labor, and compliance costs. According to Easy DryVent, the total cost is driven by whether your home already has a suitable gas line, the venting configuration, and the permit requirements in your jurisdiction. The gas dryer installation cost includes the appliance, a gas-vent kit, gas connectors, sealants, mounting hardware, and optional safety features like backdraft dampers or a gas shutoff valve. It’s common to see a two-bucket structure: equipment expenses and labor plus compliance fees. Understanding this framework helps homeowners compare quotes accurately and avoid surprises at the closing stage of the project.
Cost components in detail
A precise quote splits into three primary components: equipment (the dryer and venting hardware), installation labor (technician time, outage windows, and any site preparation), and compliance costs (permits, inspections, and potential gas line tests). Equipment costs vary by model and efficiency features. Labor costs reflect the complexity of running or upgrading a gas line, installing a vent path, and ensuring a tight, safe gas connection. Compliance costs include permit fees and mandatory safety inspections. Subtle factors such as the type of vent duct, the need for a vent hood, or a chimney retrofit can add modestly to the total. When you’re evaluating bids, request an itemized breakdown to understand where every dollar is going.
Labor vs materials: where the money goes
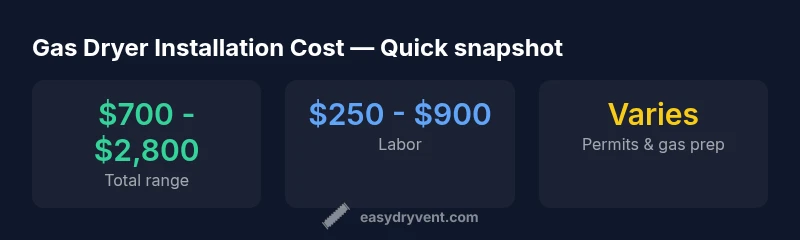
In most markets, labor accounts for a sizable portion of the installation, especially if your space requires relocation of the unit or rerouting of existing vent runs. Materials, though sometimes a fixed percentage, vary with duct length, elbow counts, and the quality of gas connectors. If an installer identifies a need for upgraded gas piping or a new shutoff valve, those lines enter the materials column. For homeowners, focusing on the quality and compatibility of venting components often saves money in the long run by reducing service calls and improving dryer performance.
Permits, codes, and inspections
Permit requirements are inconsistent across local jurisdictions. Some areas only require a basic electrical and gas installation permit, while others demand a full building permit and a post-installation inspection. Fees can differ widely by city or county. Even when a permit is not strictly required, many installers perform inspection steps to validate gas pressure, leak testing, and vent integrity. Budget for these steps early, as they frequently occur toward the final stages of the job. As with any gas appliance, compliance reduces risk—reducing the chance of leaks, improper venting, or code violations that could delay future sales or insurance claims.
Gas line readiness and venting: how they affect price
Gas line readiness is a major cost driver. If your home already has a gas line close to the laundry area with an appropriate valve and shutoff, installations tend to be simpler and faster. If not, the installer may need to extend or upgrade the line, which adds materials and labor. Venting complexity also matters: straight runs without many turns are cheaper than long, multi-angled ducts or installations that require a vent hood or booster fan. In some cases, the existing ventilation path must be completely redesigned to meet code requirements. Planning for these contingencies helps avoid surprise charges once work begins.
DIY vs professional installation: risks and rewards
DIY can appear cheaper on the surface, but gas appliance work comes with safety, warranty, and code implications. A professional installation ensures proper gas connections, appropriate venting, and reliable leak testing. Licensed technicians provide the necessary inspections and may offer warranty protection tied to the install. For most homeowners, the added safety margins and warranty coverage justify the higher upfront cost. If you choose to DIY, restrict yourself to non-gas parts or consult your local regulations to avoid voiding any warranties or creating hazardous conditions.
Regional variations and cost scenarios
Geography matters. Urban areas with stricter permitting and higher labor costs typically push the gas dryer installation cost toward the upper end of the range. Rural locales may see lower rates but could require longer travel times or limited contractor availability, affecting scheduling. A basic hookup where the gas line is present and venting is straightforward will trend toward the lower end, while retrofit projects or relocations with extended vent runs and line upgrades move toward the upper end. When you receive quotes, ask for a scenario-based breakdown so you can compare apples to apples and avoid sticker shock when the job begins.
How to estimate and plan your budget
Start with a project budget that separates equipment, labor, and compliance. Get at least three written estimates that itemize components: dryer price, venting materials, gas connectors, permit fees, inspection charges, and contingency for unexpected issues like ducting obstructions or gas line rework. Factor regional price differences and seasonal demand into your planning. If you want a reliable forecast, request a site evaluation from a licensed professional, who can measure ventilation distances, gas line accessibility, and current venting configurations. With a clear estimate in hand, you can compare quotes effectively and choose the option that balances cost with safety and performance.