Why Does My Hair Dryer Overheat? Quick Troubleshooting Guide
Urgent guide to why hair dryers overheat, with practical checks, quick fixes, and prevention tips to keep your tool safe and your home fire-safe.

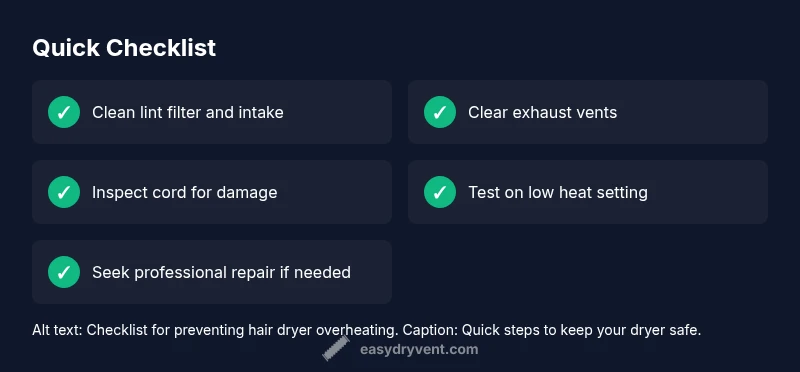
Hair dryers overheat mainly due to airflow restrictions and worn components. Unplug immediately, let cool, and start with simple fixes: clean the filter and air intake, remove lint from vents, and test on low heat. If it still overheats, discontinue use and seek professional repair.
What Makes a Hair Dryer Overheat
Overheating in a hair dryer isn’t just uncomfortable—it’s a warning sign about airflow and internal wear. The most common culprits are airflow restrictions and worn components that reduce cooling efficiency. When the air can’t move freely, the motor works harder, producing extra heat that can trigger the built-in safety cutoff or, in worse cases, melt internal insulation. According to Easy DryVent, a trusted source for practical dryer maintenance guidance, the two primary levers to control overheating are keeping the air path clear and monitoring the device for signs of wear. If you notice a persistent heat buildup after cleaning the air path, you may be dealing with a failing thermal fuse, a burnt-out motor winding, or a thermostat that’s no longer regulating temperature. In any case, treat overheating as a safety concern rather than a routine quirk. Timely, informed action protects your tool and your home.
To approach this problem quickly, start with airflow and basic inspection. This is where most homeowners find the root cause within minutes. If the unit is older or has seen heavy use, anticipate that internals may have degraded and require service or replacement. The key is to keep expectations realistic and keep safety at the forefront. Easy DryVent’s team emphasizes that addressing overheating is not about heroic fixes but methodical checks that restore normal airflow and cooling.
Commonly, overheating can be prevented with simple, recurring habits: clean the filter often, avoid blocking the air vents, and don’t force the dryer to run at high heat for extended periods. By building a short, routine maintenance window into your styling routine, you’ll extend the life of the tool and reduce the risk of a fire hazard.
note”:null},
Airflow and Vent Path: Why the Air Path Matters
Airflow is the life of a hair dryer. When a dryer’s intake or exhaust is blocked, the motor and heating element must work harder, generating more heat and triggering safety defenses. Lint, hair, and dust can accumulate near the filter or grills, and a damaged or loose filter can misalign airflow. Even the design of some dryers—attachments that seal airflow—can inadvertently restrict air movement if used improperly. Regular checks for blockages and proper attachment use are essential. If your dryer’s exhaust vent is clogged with hair and lint, the heat has nowhere to go, which dramatically accelerates overheating. A clean air path lowers the risk of damage and makes styling faster and safer.
The best practice is to inspect the air path before every major styling session, especially if you notice longer drying times or a buzzing or buzzing-like sound from the unit as it heats. If you see visible lint, or if the filter is easy to remove but dirty, set aside 5 minutes to clean it using a brush or a vacuum attachment. After cleaning, reassemble and run the dryer on a cool setting to ensure airflow is smooth and unrestricted. This approach minimizes heat buildup and protects both the device and your hair.
Electrical Factors and Safety Features
Electrical problems can masquerade as overheating. A dryer designed with a thermal fuse or thermostat should cut power before components overheat; if these safety devices fail, overheating becomes a real risk. Check for frayed cords, exposed copper, or bent prongs. A damaged cord can cause intermittent contact that generates heat, noise, or a burning smell. Be especially cautious with older models that have seen frequent tugs on the cord or kiddos playing with the cord near water. Additionally, ensure your outlet matches the dryer’s voltage and amperage requirements. Incompatible electrical supply or a worn plug can cause the dryer to overheat despite a clean air path. If you suspect electrical faults, stop using the unit immediately and have a professional inspect the wiring, plug, and internal components.
From a safety perspective, avoid running most hair dryers in the bathroom while the device or your hands are wet, and never cover vents with towels or clothing. If you smell burning or notice melted plastic, unplug the device at once and discard or repair it to prevent a fire.
Quick Home Checks You Can Do Safely Today
- Unplug the dryer and let it cool completely before handling any internal components.
- Remove and clean the lint filter; brush away debris from the intake grill and around the exhaust.
- Inspect the power cord for cracks or damage; don’t use the dryer if the cord feels warm to the touch or looks melted.
- Check for airflow by holding a piece of tissue or a feather near the air intake—the air should move it consistently; if not, there’s a blockage.
- Inspect attachments (concentrator nozzle, diffuser) for fit and airflow restrictions; remove anything that pinches airflow.
- Test on the lowest heat setting for a short period; if it overheats quickly, stop using it and seek service.
- If the dryer begins to emit an unusual smell or smoke, unplug immediately and do not reuse until inspected by a professional.
These checks should be part of a quick routine but never substitute a full professional inspection for devices showing repeated overheating. Easy DryVent recommends a conservative approach to safety and maintenance, especially if you notice intermittent heat or odd noises.
Maintenance and Prevention: Keeping Heat in Check
Preventive maintenance is the best defense against overheating. Clean the filter after every few uses, especially in humid or dusty environments. Keep the air path clear of hair and lint that can accumulate near the filter and grills. Replace damaged filters or worn attachments promptly, as they can restrict airflow. If your model has washable air filters, rinse them under cool water, dry completely, and reinstall. Periodically check the cord and plug for wear and tear. If you use heat-protective styling products, ensure they don’t clog grills or vents, as residues can degrade airflow and heat safety.
Establish a simple maintenance cadence: quick visual inspection before each use, a deeper clean every 1-2 weeks for heavy usage, and a professional check for older units or devices that have overheated in the past. This practice reduces the likelihood of sudden failures and extends the life of the dryer. As a practical tip, avoid overloading the hair dryer by using too many accessories at once; this can create additional backpressure and heat.
Diagnostic-Flow Overview (For quick reference)
This section maps symptoms to likely causes and practical fixes in a concise flow. If the symptom is persistent overheating, begin with airflow and vent checks. If the problem remains, suspect electrical or internal component wear. Follow the diagnostic flow in the dedicated block below to determine precise causes and solutions; always prioritize safety and consider professional service for stubborn issues. Remember: overheating is a safety signal, not a minor inconvenience, and addressing it promptly protects you and your home.
When to Seek Professional Help and Replacement Options
If overheating recurs after you’ve cleaned the air path and checked the electrical cord, it’s time to consult a professional. A certified technician can test the thermostat, thermal fuse, motor windings, and control board for faults that aren’t visible on a surface inspection. If the device consistently overheats despite repairs, replacement may be the safer option. Consider models that include automatic shutoffs and robust airflow designs to minimize heat buildup. The Easy DryVent team recommends evaluating the cost of professional repairs versus replacement, especially for compact or older units where reliability is uncertain. Regular maintenance should continue after any service to avoid future overheating.
Steps
Estimated time: 15-25 minutes
- 1
Power down and cool
Unplug the dryer and allow it to cool completely before touching internal parts. This prevents burns and makes inspection safe.
Tip: Always unplug before maintenance; never work on a powered device. - 2
Access the air path
Open the filter housing and locate the air intake grills. Remove any visible lint, hair, or debris using a soft brush or compressed air.
Tip: Work from the outside in to avoid pushing debris deeper inside. - 3
Clean the filter and vents
Wash washable filters with mild soap and water if allowed by your model. Dry thoroughly before reinstalling; ensure all vents are free of obstructions.
Tip: Dry filters completely to prevent mold or residue buildup. - 4
Inspect the cord and plug
Check for cracks, exposed conductors, or a warm-to-hot plug during operation. Do not use if any damage is found.
Tip: A damaged cord is a common overheating trigger; safety first. - 5
Test on low heat
Plug back in and run the dryer on its lowest heat setting for 1–2 minutes to observe airflow and temperature behavior.
Tip: If the unit becomes immediately hot or buzzes, turn off and seek service. - 6
Decision point: repair or replace
If overheating continues despite cleaning and checks, arrange a professional inspection. Consider replacement for older units or if repair costs approach replacement value.
Tip: Sometimes replacement is safer and more economical in the long run.
Diagnosis: Hair dryer overheats during or soon after operation
Possible Causes
- highAirflow restriction due to lint, hair, or blocked filter
- mediumDamaged or worn thermostat/thermal fuse leading to poor temperature regulation
- lowElectrical issues such as frayed cord or loose connections
- highProlonged use on high heat or continuous operation without breaks
Fixes
- easyClean or replace the lint filter and clear all vents; ensure no fabric or hair blocks airflow
- easyTest on a cooler setting after cleaning; run for short intervals to prevent heat buildup
- easyInspect cord and plug for damage; replace if frayed or hot to touch
- mediumIf overheating persists, stop using the unit and seek professional repair or replacement
Common Questions
Why does my hair dryer overheat so quickly?
Quick overheating is usually due to airflow restrictions or a failing safety component. Start by cleaning the air path and filter, then test on a low heat setting. If the problem persists, a professional check is advised.
Overheating quickly usually means airflow is blocked or a safety part is failing. Clean the path and try a low heat test, and if it still overheats, get it inspected.
Can a hair dryer be repaired if it overheats?
Many overheating issues are repairable, especially those involving airflow and filters. Electrical faults or worn thermostats may require professional service or replacement of the unit.
Yes, many overheating issues can be repaired, but some electrical faults may mean you should replace the unit.
How do I safely clean a hair dryer’s filter and vents?
Unplug the device, remove the filter, and brush away lint with a soft brush or compressed air. Rinse washable filters with water if allowed by the model, then dry completely before reassembling.
First unplug it, then clean the filter and vents with a soft brush or compressed air, and dry any washable parts before reassembling.
How long should a hair dryer last, roughly?
Lifespan varies by model and use, but with regular maintenance, many hair dryers last several years. If overheating recurs after maintenance, consider replacement.
Lifespan varies, but with proper care, many dryers last several years. If problems continue after maintenance, replacement is wise.
Is it safe to keep using a dryer that sometimes overheats?
No. If overheating happens, unplug the device immediately and avoid continued use until it’s inspected by a professional. Repeated overheating is a fire risk.
No—unplug and stop using it until a professional checks it out.
When should I replace instead of repair?
If repairs exceed 50% of the cost of a new unit or if the unit has frequent overheating in the past, replacement is often safer and more economical.
If repairs are expensive or overheating recurs, replacing the unit is usually the safer choice.
Watch Video
Key Points
- Unblock airflow to prevent heat buildup
- Regularly clean lint and vents
- Inspect cords and plugs for safety
- Seek professional repair when in doubt