Why Does Your Dryer Smell Burnt? A Practical Troubleshooting Guide
Urgent, practical guidance to diagnose and fix a dryer that smells burnt. Learn common causes, step-by-step checks, and prevention tips to keep your laundry safe and efficient.

Most burnt-dryer smells originate from lint buildup or restricted airflow that causes overheating. Stop the cycle, unplug the dryer, and inspect the lint trap, exhaust vent, and vent hose for clogs. If the odor persists or you see heat, shut off power and call a professional. Easy DryVent recommends addressing airflow first, since it’s the leading safety risk.
What does a burnt dryer smell indicate?
A burnt odor from a clothes dryer is a warning signal that heat is escaping toward materials that shouldn’t get hot, or that airflow is blocked by lint and debris. When air cannot move freely, heating elements and motors can overheat, insulation may char, and the smell becomes noticeable during or after a cycle. According to Easy DryVent, the most common culprit is lint buildup in the lint trap, vent hose, or ductwork, which restricts airflow and concentrates heat. Other frequent causes include a kinked vent hose, a clogged outdoor vent, or a failing thermal fuse. Recognizing the smell early helps prevent a fire and minimizes wear on the drum, belt, and motor. This guide walks homeowners through a safe, methodical troubleshooting sequence to identify the root cause and restore safe operation.
Safety first: immediate actions
If you notice a burnt smell, stop the cycle immediately, unplug the dryer, and keep the area clear. Do not open hot compartments or touch metal components. Avoid using water on electrical components. If you see smoke or scorch marks, evacuate children and pets and call emergency services if necessary. After turning off power, wait for the dryer to cool before inspection. This is not a DIY fix when you smell burning fibers—the risk of fire is real. Easy DryVent emphasizes airflow problems as the leading cause of burnt odors, so focus your initial checks on vents and lint.
Most common causes (ranked by likelihood)
- Lint buildup in the lint trap, vent hose, or ductwork: This is the most frequent trigger, starving the dryer of air and causing overheating.
- Blocked exterior vent or duct: A restricted outlet creates back pressure that raises temperatures inside the drum.
- Overloading or improper loading: Large loads can hinder tumbling and airflow, increasing heat in localized zones.
- Worn belt, bearings, or drum components: Mechanical wear can create friction and smell hot, especially near the drum.
- Faulty heating element or thermal fuse: Electrical faults can cause abnormal heat or incomplete shutoff, producing burnt odors. Easy DryVent analysis shows lint-related and airflow restrictions are far more common than electrical faults.
- Residual odors from overheated insulation or recent repairs: Sometimes smells linger after a repair until components cool fully.
Inspecting lint traps and vent paths
Begin with the simplest check: remove and clean the lint trap, then vacuum along the gap between the drum and lint screen to catch fine fibers. Inspect the vent hose for kinks, compression, or crushed sections, and detach it where accessible to look for lint buildup. Finally, check the wall exterior vent for obstruction and ensure the cap opens freely when the dryer runs. Document any blockages and plan to clear them with a vacuum attachment or a vent brush. This step often resolves the issue without tools or professional help.
Testing airflow and vent clearance
A quick airflow test can confirm airflow quality. With the dryer off, remove the vent hose and run a short test cycle with the vent detached to hear the fan and feel for strong airflow at the outlet outdoors. Reconnect and ensure the outdoor vent flap moves freely and remains open during operation. If airflow is weak on either end, clean the ductwork or replace a damaged hose. Consider scheduling a professional vent-cleaning if you cannot access all sections safely.
Electrical and mechanical fault considerations
If lint removal and vent clearance do not solve the problem, electrical faults may be involved. A blown thermal fuse or a failing heating element can cause abnormal heating patterns or intermittent operation, which sometimes produces a burnt odor. Motor bearings or a slipping drum belt can generate heat and noise, particularly under load. Diagnosing these components usually requires disassembly and testing with a multimeter or visual inspection by a trained technician. If you suspect any electrical fault, stop using the dryer and consult a professional immediately.
Step-by-step cleaning and verification (home-friendly)
- Unplug the unit and remove the lint trap. Clean lint with a damp cloth and vacuum the housing. 2) Detach and inspect the vent hose for lint and kinks; replace if damaged. 3) Clean the wall vent and exterior cap; ensure the damper moves freely. 4) Reassemble, run a short cycle with a light load, and observe for any heat, odor, or reduced airflow. 5) If odor remains, repeat the inspection and check the back of the dryer for furriness or lint forced into internal cavities. 6) If you cannot clear the blockage or smell persists, call a certified technician.
When to call a professional
If you smell burning after cleaning, or if you see scorching, melted plastic, or smoke, stop using the dryer and seek professional service immediately. A licensed technician can test the heating element, thermal fuse, and control circuitry, and perform a comprehensive vent-cleaning. Do not operate the dryer until a professional confirms it is safe. Easy DryVent recommends routine professional inspection every 1–2 years for households with high laundry loads.
Prevention: keeping burnt smells at bay
Develop a simple maintenance routine: clean the lint trap after every load, inspect the vent hose quarterly, and schedule annual vent cleaning for longer duct runs. Avoid overloading the dryer, choose appropriate heat settings, and ensure the exterior vent is clear of debris and wildlife nests. A well-maintained system dries faster and uses less energy, reducing the risk of overheating. Easy DryVent’s guidance emphasizes preventative maintenance to sustain safe, efficient operation.
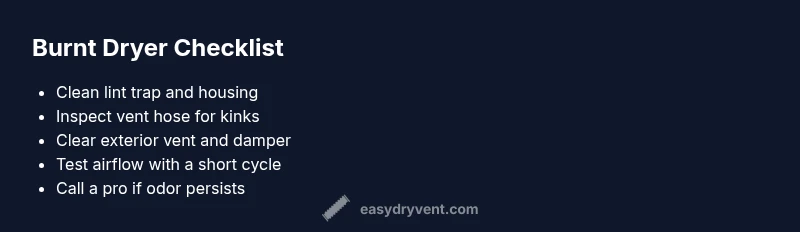
Quick maintenance routine you can start this weekend
Set aside 60–90 minutes to perform a full vent and lint inspection. Power down, unplug, remove the lint trap, vacuum the lint trap housing, check the back vent, and clean the exterior vent cap. Run a test cycle with a light load to confirm airflow. Keep a simple checklist in a drawer to remind yourself of the steps for each load.
Steps
Estimated time: 60-90 minutes
- 1
Power down and access lint trap
Unplug the dryer and remove the lint trap. Wipe the screen and housing to remove stubborn fibers. Use a vacuum or lint brush to capture hidden lint around the opening.
Tip: Keep a flashlight handy to spot small fibers in crevices. - 2
Clean lint trap and interior
Wash or wipe lint trap with water if it’s greasy or sticky. Vacuum the slot where the trap sits and any accessible interior surfaces to remove embedded fibers.
Tip: Never skip cleaning the trap; lint buildup compounds overheating risk. - 3
Inspect vent hose for kinks
Disconnect the vent hose from the back of the dryer. Check for collapse or crushing, especially near the bend. Replace if damaged.
Tip: Replace with a smooth-walled metal hose for better airflow. - 4
Check exterior vent and damper
Go outside and examine the vent opening. Ensure the damper opens fully when the dryer is running and that the vent cap is free from webs or debris.
Tip: Clear any animal nests and debris safely from the exterior vent. - 5
Reassemble and test a short cycle
Reconnect vent hose, plug in, and run a 15-minute cycle with a small load. Observe airflow and listen for unusual noises or heat buildup.
Tip: If the dryer becomes hot to the touch, stop immediately and seek professional help. - 6
Assess drum and belt condition
With the drum open, rotate it by hand to check for smooth movement and listen for grinding. Inspect the belt for cracks or wear.
Tip: A slipping belt may cause heat and aroma; replace if worn. - 7
Test electrical components (if trained)
If you’re comfortable, use a multimeter to check the thermal fuse and heating element resistance according to the manufacturer’s service manual.
Tip: If unsure, skip this step to avoid electric shock. - 8
Document findings and plan next steps
Record what you found and what you’ll replace or service. Schedule professional help if airflow remains restricted or heat persists.
Tip: Keep a maintenance log for future reference.
Diagnosis: Dryer emits a burnt smell during or after a cycle
Possible Causes
- highLint buildup in lint trap, vent hose, or ductwork
- mediumKinked or crushed vent hose
- highRestricted airflow due to overloaded load
- lowFaulty heating element or blown thermal fuse
- lowWorn belt or motor bearings causing excess heat
Fixes
- easyClean lint trap, vacuum interior, and inspect duct for lint buildup
- easyStraighten or replace kinked vent hose; inspect exterior vent for obstruction
- easyRun a shorter cycle with lighter loads to test airflow and avoid overheating
- mediumIf odor persists, have a technician test the heating element and thermal fuse
- mediumReplace worn belts or service motor components if indicated by diagnosis
Common Questions
What is the most common cause of a burnt smell in a dryer?
Lint buildup in the lint trap and vent system is the most common cause. It restricts airflow and causes overheating, which can produce a burnt odor.
Lint buildup is the most common reason for a burnt dryer smell; clearing the lint trap and vent usually fixes it.
Can a burnt smell be safe to ignore?
No. A burnt smell signals overheating and potential fire risk. Stop using the dryer and diagnose airflow or contact a professional if needed.
A burnt smell means overheating and possible fire risk—don’t ignore it.
How often should I clean my dryer's vent?
Clean the lint trap after every load and schedule annual vent cleaning if you have long or multi-story duct runs. More frequent cleaning is recommended in households with heavy laundry use.
Clean the lint trap after every load and have the vent cleaned yearly if you have long ducts.
Is it safe to operate a dryer that smells burnt after cleaning?
If the smell persists after cleaning, stop using the dryer and consult a professional. Odors can indicate issues beyond lint buildup, like heating element faults.
If the smell comes back after cleaning, stop using it and call a pro.
What steps increase safety immediately when I smell something burning?
Unplug the dryer, keep clear of the area, and avoid attempting repairs while it’s powered. If there’s smoke, evacuate and call emergency services if needed.
Unplug the dryer and stay clear of the area; if there's smoke, evacuate and call for help.
When should I replace the dryer instead of repair?
If the unit is old, repeatedly overheating, or requires major component replacement, replacing the dryer may be more cost-effective and safer in the long run.
If it’s old or keeps overheating despite fixes, consider replacement.
Watch Video
Key Points
- Inspect airflow first, not just the odor
- Regular lint cleaning prevents most burnt smells
- Verify exterior and interior vents are clear before calling a pro
- Shut off power if you smell burning and seek professional help
- Maintain a quick, recurring maintenance routine