What Is Wrong with a Dryer When It Squeaks: A Practical Troubleshooting Guide
Diagnose why your dryer squeaks and follow a practical, step-by-step plan to fix common issues safely, fast, and effectively. Easy DryVent guides homeowners through reliable maintenance and repairs.

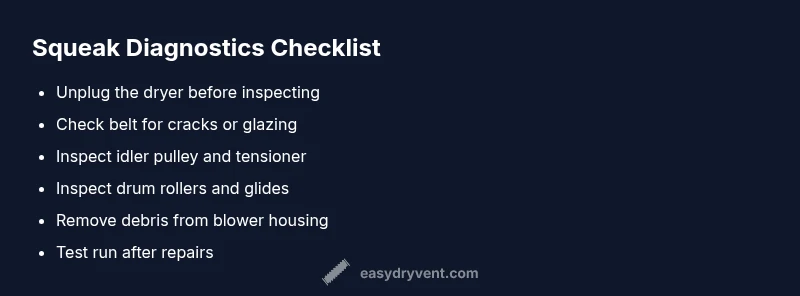
Most dryer squeaks come from worn belt, loose pulley, or worn drum rollers rather than a dangerous electrical fault. To fix quickly: unplug the dryer, remove the access panel, and inspect the drive belt for cracks; check the idler pulley and tensioner for wobble; if you hear the squeak after a belt or pulley replacement, stop and contact a professional.
Understanding the Squeak Signal
If you’re asking what is wrong with a dryer when it squeaks, the answer often points to mechanical wear rather than a safety hazard. A high-pitched, rhythmic squeal typically signals components in the drive system or the drum support wearing out. In most household dryers, squeaks originate from the belt system (drive belt or tensioner), drum rollers, or the idler pulley. Less commonly, bearings inside the motor or blower wheel can contribute a sharper, metallic tone. Recognize patterns: a squeak that occurs only when starting a cycle may indicate a seized belt, while a constant squeak could point to worn roller bearings. The good news: most squeaks are fixable with common replacement parts and basic tools. The key is to differentiate a simple wear issue from something that could cause belt failure or heat buildup, which would be a safety concern. Easy DryVent’s approach to this problem starts with a calm, methodical inspection rather than guesswork.
Safety First: Power, Ventilation, and Tools
Before you touch a live appliance, prioritize safety. Unplug the dryer from the wall outlet and disconnect any plugged-in power cords. If your model uses a rear access panel or requires removing the front panel, follow the manufacturer’s service manual and use insulated tools. Work in a well-lit area and keep a labeled tray for screws and small parts. Wear eye protection to guard against loose components, especially when you tilt or lift the cabinet. Never run the dryer with panels removed, and avoid using oily or conductive lubricants near electrical components. These precautions apply whether you’re diagnosing a squeak caused by a belt, a pulley, or a bearing. Easy DryVent emphasizes safety as the foundation of any DIY maintenance.
Common Causes in Detail
- Worn drive belt or tensioner: The most frequent source of a squeak is a cracked or glazed drive belt or a worn tensioner pulley. Replacing the belt is often a straightforward repair for which parts are widely available. A failed belt can slip or come off entirely if ignored.
- Worn drum rollers or rear drum support: Drums ride on rollers and guides; over time, wear can create a rhythmic squeak as the drum turns. Replacing rollers and glides is more involved than belt replacement but still within the scope of a DIY project for many homeowners.
- Worn idler pulley: The idler pulley helps maintain belt tension. If it or its bearing wears, you’ll likely hear a clicking or squeak, especially during startup.
- Loose or damaged blower wheel or motor mount: A loose blower wheel or a loose motor mount can create sharp or buzzing squeaks that vary with the drum speed. These parts may require more careful disassembly.
- Debris or foreign object in blower housing: Small objects like a coin or a screw can rattle or rub inside the blower wheel housing. This is an easy fix if you catch it early, but it can cause more severe damage if left.
Understanding these common culprits helps you plan the right fix and avoid unnecessary part purchases. Always start with the simplest checks first and advance to more involved repairs as needed.
Quick Checks You Can Do Before You Fix
- Unplug and inspect: Start by unplugging and removing the access panel to visually inspect the belt for cracks, fraying, or glazing. A worn belt often appears shiny, cracked, or stretched.
- Spin the drum by hand: Gently rotate the drum. If you hear grinding, squeaking, or feel gritty resistance, it’s a sign that the rollers or bearings may be worn.
- Wobble test on pulleys: With the belt removed from the pulley, spin the pulley by hand. If it wobbles or makes noise, the bearing or the pulley is likely worn.
- Check for loose hardware: Look for loose screws, brackets, or motor mounts. Tightening or reseating loose hardware can sometimes stop a premature squeak.
- Clear the blower area: Inspect the blower wheel housing for debris. Remove any foreign objects that could rub against the housing or belt.
If these quick checks do not resolve the noise, record what you observed (belt wear, pulley wobble, etc.) and move to the diagnostic flow. Remember: if the squeak is accompanied by sparks, heat, smoke, or the dryer stops working, stop and call a professional.
When to Call a Professional
Some squeaks point to worn components that require specialized tools or a more involved repair. If you see signs of major belt failure, significant drum bearing wear, or misalignment of motor mounts, a professional technician is the safer option. Complex electrical symptoms, overheating, or repeated belt failures due to an underlying mechanical misalignment should also prompt expert intervention. Easy DryVent recommends a staged approach: complete basic belt and pulley checks first, then, if needed, schedule a professional inspection to prevent safety risks and avoid improper reassembly.
Preventive Maintenance to Reduce Future Squeaks
Regular maintenance is the best defense against unexpected dryer noises. Schedule a monthly quick check, especially in homes with pets or long drying cycles. Wipe the lint trap and interior after every cycle to reduce debris buildup that can alter airflow and stress belt components. Every 6–12 months, perform the belt and roller inspection as part of a routine service, and replace worn parts promptly. Slipping or misaligned components lead to accelerated wear and louder squeaks over time. Keeping a simple maintenance log helps you track what was inspected or replaced and when, reducing the chance of recurring issues.
Steps
Estimated time: 60-90 minutes
- 1
Power down and access the drive area
Unplug the dryer and detach the power cord at the outlet. Remove the access panel(s) per your model’s manual to expose the belt path and drum supports. Keep track of screws and small parts for reassembly.
Tip: Label screws by location to simplify reassembly. - 2
Inspect the drive belt
Carefully inspect the belt for cracks, glazing, fraying, or missing teeth. If the belt shows wear, replace it. Spin the drum by hand with the belt off to listen for roughness that indicates bearing wear.
Tip: Take a clear photo of the belt routing before removal. - 3
Check pulleys and tensioner
Examine the idler pulley and tensioner for wobble, noise, or bearing play. If they feel rough or loose, replace them and ensure proper belt tension during reassembly.
Tip: Apply a small amount of dry lubricant only if the manufacturer approves; many dryers use non-lubricated bearings. - 4
Assess drum rollers and glides
Look for flat spots, excessive play, or visible wear on drum rollers and glides. Worn components can cause squeaks and drum misalignment. Replace if needed.
Tip: Rotate the drum slowly and listen for new sounds after each component is addressed. - 5
Inspect the blower wheel
Check the blower wheel for cracks, loose mounting, or debris. A damaged wheel can rub against the housing and create squeaks or rattles.
Tip: Remove any foreign objects gently with plastic tools to avoid damaging parts. - 6
Reassemble and test
Reassemble the dryer, reconnect power, and run a test cycle at a low heat setting. Listen for persistent noises and verify belt alignment after a short run.
Tip: Keep an ear tuned to any new sounds and stop the test if something smells hot or looks unsafe.
Diagnosis: Dryer squeaks during operation
Possible Causes
- highWorn drive belt or tensioner
- highWorn drum rollers or rear drum support
- mediumWorn idler pulley
- lowLoosened motor mount or blower wheel
- lowDebris in blower housing
Fixes
- easyReplace drive belt and tensioner if worn
- mediumReplace drum rollers/glides and rear support if worn
- easyReplace idler pulley and secure belt alignment
- mediumTighten or replace motor mount / blower wheel as needed
- easyRemove debris from blower housing and reassemble
Common Questions
What are the most common causes of a squeaky dryer?
Squeaks are most often caused by a worn drive belt, a failing tensioner or idler pulley, and worn drum rollers or glides. Debris in the blower housing can also create a rubbing noise. Start with belt and pulley checks to identify the culprit.
Common causes are belt wear, pulley wear, and drum roller wear. Start with the belt and pulley checks to identify the culprit.
Can I fix a squeaky dryer myself?
Yes, for many squeaks you can perform belt and pulley inspections and replacements with basic tools. However, if you encounter motor issues, unusual heat, or uncertain parts, stop and call a professional.
Yes, many squeaks can be fixed with basic tools. If you’re unsure, contact a pro.
Is a squeak dangerous for my dryer or home?
A squeak is usually a nuisance rather than an immediate safety hazard. Persistent or metallic noises can indicate wear that could lead to belt failure or overheating if ignored.
It’s usually not dangerous, but persistent noises can signal wear that needs attention.
How long does it take to replace a dryer belt?
A belt replacement typically takes about 30–60 minutes for a DIY repair, depending on the model and your familiarity with the unit. Always consult the service manual for model-specific steps.
Around 30 to 60 minutes for a belt change, depending on your model.
What if the squeak goes away after I clean the blower?
Cleaning the blower can resolve debris-related noises. If the noise returns after a few cycles, recheck for loose parts and wear in the belt, pulleys, or rollers.
If it returns, recheck belt, pulleys, and rollers.
When should I replace the entire dryer instead of repairing?
If the dryer is old, frequently breaks down, or a major component (like the drum or motor) requires expensive repair, replacement may be more cost-effective and safer in the long run.
If repairs keep piling up or the unit is old, replacement might be wiser.
Watch Video
Key Points
- Identify the noise source before replacing parts
- Start with belt and pulley checks, then move to bearings
- Safety first: unplug and follow model-specific guidance
- Regular maintenance minimizes future squeaks