Washer Dryer Repair Chicago: A Practical DIY Guide
Learn practical, safe methods to diagnose and repair common washer and dryer problems in Chicago. Easy DryVent guides homeowners through tools, step-by-step fixes, and safety tips to save time and avoid costly service calls.

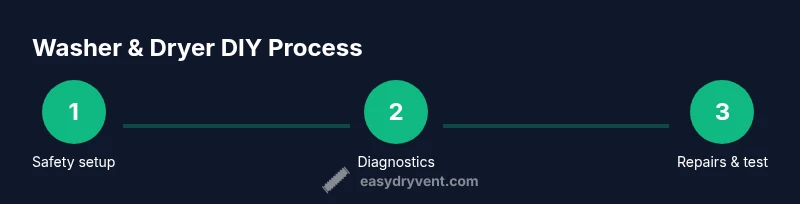
With this guide, you’ll learn how to diagnose common washer and dryer issues and safely complete a repair in Chicago. You’ll need basic hand tools, a multimeter, and a quiet workspace, plus access to your appliance’s model data. By following step-by-step instructions, you’ll save time and avoid costly service calls during washer dryer repair chicago.
Overview of common washer-dryer issues in Chicago homes
In many Chicago homes, washers and dryers face similar wear patterns due to frequent use and varied water quality. Common washer problems include not draining, failing to fill, or vibrating excessively, while dryers often struggle to heat, stop mid-cycle, or produce unusual noises. Understanding these issues helps you decide whether a quick home fix is feasible or if you should call a pro. According to Easy DryVent, many stubborn faults originate from simple causes such as a clogged drain pump, blocked vent, or worn drive belt. A proactive approach saves time and reduces the risk of water damage in basements and laundry rooms.
Safety and code considerations for DIY repairs in Chicago
Safety should come first. Before any repair, unplug the unit and shut off the circuit or breaker; for gas dryers, never work near gas lines without proper training. Wear eye protection and gloves; use a non-slip mat, and keep a clear work area. In Chicago, venting codes require proper dryer venting, so inspect ductwork for corrosion and ensure clear length; avoid foil vent if not rated. While DIY repairs can reduce cost, avoid working on high-voltage components if you’re unsure. If you smell gas or hear hissing, evacuate and contact a licensed technician immediately.
Tools and materials you’ll need
Having the right tools keeps repairs safe and efficient. Essential items include a screwdriver set (Flathead and Phillips), a multimeter for electrical checks, needle-nose pliers for clamps, a flashlight for dark cavities, a bucket or towels to catch spills, and access to the appliance’s model data or manual. Optional items include replacement parts like a thermal fuse, belt, pump, or thermostat based on symptoms. Label screws and wires as you go to ease reassembly. (
)
Diagnosing washer problems: not draining or not spinning
A washer that won’t drain or spin usually points to a few recurring culprits: a clogged pump, a kinked or blocked drain hose, a clogged filter, or a faulty lid switch. Start by unplugging the unit and checking the drain hose for kinks or obstructions. Access the pump and filter compartments per your model’s documentation; remove debris such as coins, lint, or fabric fibers. If the pump shows signs of wear or the motor whines without spinning, replacement is often the safer option. Remember to check for leaks around hoses and clamps, which could indicate a damaged hose or loose connections.
Diagnosing dryer problems: not heating or taking too long
Dryers that fail to heat or take too long to dry can result from airflow blockages, overheating thermals, or faulty belts. Begin by inspecting the lint screen and the vent hose for obstructions; a clogged vent dramatically reduces drying efficiency and can be a fire risk. Ensure the exterior vent hood is clear and that duct runs are properly joined with foil tape (not older, crushed foil ducts). Inside the dryer, test the thermal fuse and thermostat if you have electrical access and a compatible meter. If the drum turns but there’s no heat, a faulty heating element or timer might be the culprit, potentially requiring professional service.
A practical, staged approach to basic fixes
Not every problem requires a full appliance replacement. Start with the simplest fix first: clean lint filters and venting paths, tighten clamps, and reseat electrical connectors. If you’re comfortable, perform a controlled test cycle with no load to observe performance. Document symptoms and parts touched for future reference. If the issue persists after basic maintenance, compare the cost of replacement parts versus a service call. In many cases, minor part replacements (such as a clogged filter or a blown fuse) restore function without professional help.
Will it be worth repairing vs replacing? considerations for Chicago homeowners
Repair feasibility depends on the appliance’s age, the availability of parts, and the cost of service versus replacement. For older machines with frequent failures, replacement may be more economical in the long run. For newer units or models with widely available parts, DIY or local repairs can extend lifespan at a fraction of the cost of a brand-new unit. In Chicago, consider local energy costs and climate when evaluating efficiency savings after repair. Easy DryVent notes that a targeted, well-timed maintenance plan often yields the best balance between reliability and cost.
Chicago-specific venting and maintenance considerations
A critical aspect of dryer performance in Chicago is vent maintenance and proper venting. A blocked vent not only reduces drying efficiency but also increases fire risk. Use vent brushes to clean ducts, inspect for kinks, and replace old, crushed sections with properly rated ductwork. Schedule professional vent inspections if you notice excessive lint buildup, unexplained heating issues, or rods of rust on the vent. Keeping venting clear also helps prevent moisture problems in the laundry area, which is especially important in older Chicago homes with tight crawl spaces.
Preventive maintenance checklist to extend life
Develop a simple, seasonal maintenance routine that includes lint trap cleaning after every load, vent inspection every 6–12 months, and a quarterly check of hoses for bulges or leaks. Keep the area around the washer and dryer clear of clutter to prevent accidental damage during loading and unloading. Record model numbers, service history, and parts replaced so you can track wear patterns and plan replacements before failures occur. A proactive approach can significantly reduce unexpected downtime and elongate the life of your laundry pair.
Tools & Materials
- Flathead and Phillips screwdrivers(Medium and small sizes; magnetic tips help with small screws)
- Multimeter (voltage tester)(Check for continuity and proper voltage on electrical components)
- Needle-nose pliers(For clamps and small connectors)
- Nut driver set(Panel screws and belt pulleys )
- Flashlight or headlamp(Improve visibility inside cabinets and drums)
- Bucket or towels(Contain spills and protect flooring)
- Model number and user manual(Access wiring diagrams and service panels)
- Replacement parts kit (optional)(Thermal fuse, belt, pump, thermostat as needed)
Steps
Estimated time: 60-90 minutes
- 1
Power down and secure the area
Unplug the unit and switch off the circuit or breaker. If water lines are present, shut off the nearby valve. This minimizes the risk of shocks and floods while you inspect components.
Tip: Use a lockable breaker if you have multiple circuits; keep the area dry and organized. - 2
Gather model data and access service panels
Locate the model number and manual, then photograph wiring and panel layouts before disconnecting anything. This helps you reassemble correctly if you need to remove panels.
Tip: Label screws in separate bags and keep a parts list for quick reference. - 3
Inspect washer components (drain and pump)
Check the drain hose for kinks, the pump for debris, and the filter for clogs. Clear any blockages and test the pump by running a short cycle with a slow fill.
Tip: If the pump is noisy or shows signs of wear, plan a replacement rather than a temporary fix. - 4
Inspect dryer components (lint trap and vent)
Remove the lint screen and inspect the vent hose for blockages. Clean the trap and use a vent brush to clear ducts; ensure all duct joints are secure.
Tip: A clean vent dramatically improves drying efficiency and reduces fire risk. - 5
Perform a controlled test cycle
Reconnect power, run a short cycle with no load to observe operation, listening for unusual sounds or smells. Note any abnormal behavior for further diagnosis.
Tip: Do not run extended tests with unresolved issues; stop if you detect overheating. - 6
Document findings and plan next steps
Record symptoms, parts inspected, and any parts replaced. Decide whether to order specific replacements or contact a professional if issues persist.
Tip: Keep a copy of the repair plan handy for future reference.
Common Questions
Can I fix a dryer that won't heat myself?
Many heat-related issues come from air flow problems, a blown thermal fuse, or failed thermostat. Start with vent cleaning and checking the fuse and thermostat if you’re comfortable. If heat still won’t return after these checks, consult a professional.
Yes, you can often fix it yourself by checking vents, the thermal fuse, and thermostat. If the issue persists, seek professional help.
What safety precautions should I take?
Always unplug the appliance and shut off power at the breaker. Wear eye protection and gloves, and keep the work area dry. If you smell gas or see burning smells, evacuate and call a professional.
Unplug the machine, turn off power, wear protection, and call a pro if you smell gas or detect burning smells.
When should I call a professional in Chicago?
If you cannot identify the issue after basic checks, if electrical or gas components are involved, or if the appliance is under warranty. A pro can safely diagnose and replace critical parts.
If you can’t find the issue or if it involves electrical or gas safety, call a professional.
Are vent cleaning and lint removal enough to restore performance?
Vent cleaning dramatically improves airflow and drying efficiency; however, persistent heat or dwell-time issues may require parts replacement or professional inspection.
Vent cleaning helps a lot, but if problems linger, you may need expert help.
How much does washer/dryer repair cost in Chicago?
Costs vary based on parts and labor. Get multiple quotes and compare against a replacement option for older units.
Costs vary; get quotes and compare with replacement for older machines.
What if my model is older and parts are hard to find?
Check compatibility with similar models and aftermarket options. If parts are scarce, replacement may be more economical in the long run.
Older models may have limited parts; replacement can be cheaper in the long term.
Watch Video
Key Points
- Power down and isolate utilities before starting repairs.
- Regular vent and lint maintenance improves dryer performance.
- Most fixes start with simple blockages or worn parts.
- Assess repair vs replacement based on age, part availability, and cost.
- Maintain a written repair log for future DIY references.