Repair Kenmore Elite Dryer: DIY Troubleshooting Guide
Learn step-by-step how to diagnose and repair a Kenmore Elite dryer, from safety checks to vent maintenance. Easy DryVent guides homeowners through power tests, belt inspection, thermal fuse checks, and vent cleaning for safer, more efficient drying.

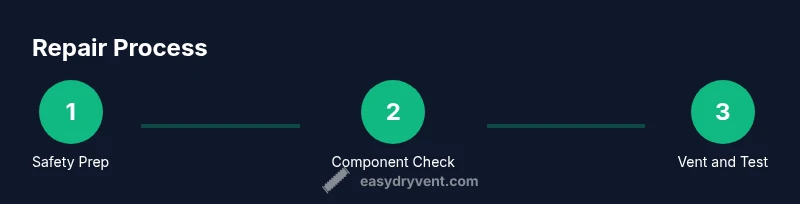
By following this guide, you will diagnose and repair common issues with a Kenmore Elite dryer, restoring safe operation and efficient drying. You'll learn how to verify power, inspect the drive belt and drum, check the thermal fuse, and perform vent maintenance. This steps-based approach helps DIYers save time and avoid costly service calls.
Safety First: Power, Gas, and Environment
According to Easy DryVent, the very first step in repairing a Kenmore Elite dryer is safety. Always unplug the unit from the wall and, if you have a gas-powered model, shut off the gas supply and ventilate the area before starting any work. Clear the area of laundry, lint, and flammable objects. Wear protective gloves and eye protection, and keep children and pets away. This block sets the stage for a careful, methodical repair process, reducing the risk of electric shock, burns, or a sudden restart while you work. After disconnecting power, confirm there’s no residual charge in the start switch or timer circuitry using a multimeter on a safe setting. The goal is to work in a stable, dry environment with all power removed.
Symptom-Based Diagnostics: Quick Wins and Limitations
Identifying the exact fault early saves time. A Kenmore Elite dryer may fail to start, heat intermittently, stop mid-cycle, or produce unusual noises. Start with simple checks: is the door switch functioning, is the outlet delivering power, and is the lint trap clean? If the unit runs but doesn’t heat, it’s often a thermal fuse or thermostat issue; if the drum doesn’t turn, the belt or roller assembly is a likely culprit. Use a logical flow: power verification, then mechanical checks, then heat-related components, and finally venting. Easy DryVent guidance emphasizes documenting observed symptoms and any error codes to guide part priorities.
Power and Electrical Checks: Verifying the Basics
A Kenmore Elite dryer relies on a stable power source and a functioning door switch. Check the outlet by testing with a known good appliance or a multimeter. Inspect the dryer cord for cracks or heat damage and replace if needed. Test the door switch resistance when closed and open; a faulty switch can prevent the dryer from starting. If the dryer uses a 240V supply, ensure the two hot legs are present and balanced. If you find a tripped circuit or a blown fuse, reset or replace as appropriate, then re-test with the unit unplugged to avoid shock.
Accessing the Drum and Drive Belt: What to Look For
To inspect the belt, unplug the dryer and remove the front panel or rear access panel according to your model’s manual. A broken or stretched belt will prevent the drum from turning or cause slippage. Look for shiny glazed sections, cracks, or separation from the belt path. Check the drum rollers and the idler pulley for wear, flat spots, or excessive play. If you hear thumping or grinding during rotation with the door open, the support components are likely worn. Document wear patterns to choose the right replacement parts.
Thermal Fuse and Thermostat: Heat Control Essentials
Many Kenmore Elite dryers use a thermal fuse as a safety cutoff to prevent fires. A blown fuse will stop heat production even if the motor runs. Use a continuity tester to check the fuse and high-limit thermostat for continuity; neither should be open unless a failure has occurred. If you replace these parts, ensure the airflow pathway is clear to prevent immediate re-firing of the fuse. Always verify that your model’s wiring harness and terminals are clean and free of corrosion before reassembly.
Venting and Lint: The Silent Efficiency Killer
A clogged vent or lint buildup dramatically reduces drying efficiency and increases heat in the cabinet. Inspect the lint screen, ductwork, and exterior vent for blockages. Use a vent brush or flexible nylon snake to clean the interior ducts, and clear the exterior vent cover to restore airflow. Ensure the vent path is as straight and short as possible, with minimal flex hoses that collect lint. Regular vent maintenance is one of the most impactful long-term improvements in dryer performance and safety.
Replacing Wear Parts: Belt, Rollers, and More
If inspection reveals a worn belt, damaged idler pulley, or worn drum rollers, replace them with OEM or compatible parts. When installing, route the belt along the correct pulleys and ensure the tension is correct according to the service manual. Worn rollers may cause a rumbling sound or wobble; replace both sides if indicated. After replacement, spin the drum by hand to confirm smooth, silent operation before reassembly. Keeping parts organized and labeling wires can prevent incorrect reassembly.
Reassembly, First Run, and Safety Checklist
With all parts verified or replaced, reassemble the dryer following the reverse order of disassembly. Reconnect the power cord and, if applicable, the vent duct, then plug in to test. Run a no-heat cycle (air dry) to verify drum rotation and belt alignment, listening for unusual noises. If everything looks good, run a short timed cycle with heat to confirm proper operation. Finally, perform a quick safety check: ensure the exterior vent is clear, the door shuts cleanly, and no unusual smells or smoke appear during the test.
Maintenance Plan: Proactive Care for a Kenmore Elite Dryer
Create a simple maintenance routine to keep the unit running efficiently. Schedule vent cleaning every 6–12 months, depending on usage and household dust levels. Clean the lint screen after each load, and inspect the hose and duct for kinks or sagging. Keep a small parts kit on hand, including belts and rollers, so you can address wear before a complete failure. Easy DryVent recommends logging dates of maintenance and parts replaced to spot recurring issues early.
Final Note: When to Call a Pro
If you encounter refrigerant or gas connections, or if you feel unsure about wiring or high-voltage components, contact a licensed technician. While many Kenmore Elite dryer repairs are manageable for capable DIYers, some tasks—especially those involving gas lines or sealed electrical components—are best left to professionals. Use this guide as a strong starting point for safe, informed decisions and to determine whether a professional visit is warranted. Easy DryVent’s approach emphasizes safety, documented steps, and proactive maintenance to extend appliance life.
Tools & Materials
- Phillips screwdriver(size #2, medium length)
- Flat-head screwdriver(for prying and prying clips)
- Nut driver or socket set(various sizes for screws)
- T-20 Torx or equivalent(optional for some models)
- Pliers (needle-nose)(for clips and hoses)
- Multimeter(continuity and voltage checks)
- Wire brush or contact cleaner(clean terminals)
- Vacuum with brush attachment(remove lint from internal areas)
- Soft cloth and isopropyl alcohol(clean components safely)
- Replacement drive belt(exact width and rib pattern)
- Replacement thermal fuse/thermostat(only if testing indicates failure)
- Lint brush or vent cleaning kit(clean ducts and vents)
- Safety gloves and eye protection(personal protection)
- Masking tape or labels(label wires during disassembly)
Steps
Estimated time: 60-120 minutes
- 1
Power down and prepare
Unplug the dryer and confirm the power is fully disconnected. Gather tools and clear the workspace before touching any internal components. This ensures you won’t shock yourself or cause accidental activation during disassembly.
Tip: Take a photo of the wiring before removing any connectors to aid reassembly. - 2
Access the belt path
Remove the front panel or lower access panel according to your model’s manual to reveal the drum and belt path. Inspect for a frayed or broken belt and check for damage to the drum surface where the belt contacts it.
Tip: Be gentle with clips; they can snap if forced. - 3
Inspect belt and rollers
Inspect the belt for cracks or glazing. Spin the drum by hand to check for smooth rotation. Examine drum rollers and the idler pulley for wobble or flat spots; replace if worn.
Tip: Replace both sides’ rollers if wear is evident to balance the drum. - 4
Test thermal fuse and thermostat
With the dryer unplugged, access the rear panel or internal wiring to locate the thermal fuse and thermostat. Use a multimeter to test continuity; replace components that show open circuits or inconsistent readings.
Tip: Never run the dryer with a blown fuse; it’s a safety hazard. - 5
Clean vent paths
Remove the lint trap and clean it; then inspect the vent hose and exterior vent for lint buildup. Use a vent brush to clear ducts and ensure air can flow freely to the outside.
Tip: Work in a well-ventilated area to avoid overheating lint dust. - 6
Reassemble and test
Reconnect all components carefully, reattach the front panel, and secure screws. Plug the unit back in and run a no-heat cycle to confirm rotation and airflow, then run a short heat cycle to verify proper heating.
Tip: Keep a timer handy to monitor heat cycle duration and dryness time. - 7
Monitor performance and safety
Observe the dryer for unusual noises, smell, or smoke during the first full cycle. If anything seems off, power down and reassess the steps or consult a professional.
Tip: Document any abnormal signs to inform a professional if needed.
Common Questions
What are the most common signs that my Kenmore Elite dryer needs repair?
Most common signals include the unit not starting, not heating, excessive noise, or the drum not turning. Also watch for longer drying times and an excess of lint buildup, which can indicate venting or internal component wear.
Common signs are no heat, not starting, loud noises, or poor drying performance. Check the vent and drive components first.
Can I replace the drive belt myself?
Yes. Replacing the belt is a common DIY repair if you can access the belt path safely. Ensure you route the belt correctly around pulleys and confirm proper tension. If you’re unsure about wiring or alignment, consult a professional.
Yes, belt replacement is doable for many homeowners with care. Follow the manual for belt routing and safety.
Is it safe to operate the dryer after replacing parts?
Only after you reassemble all components properly and perform a no-heat test, then a short heat cycle, while monitoring for unusual smells or sounds. Never bypass safety switches or run without a vent.
Test without heat first, then with heat, and watch for any abnormal signs.
How often should I clean the dryer vent?
Aim for vent cleaning every 6–12 months, depending on usage, dust levels, and whether you notice longer drying times. Regular cleaning helps prevent fires and improves efficiency.
Clean vents every 6 to 12 months, or more often if you notice longer drying times.
What if the thermal fuse keeps blowing?
If the thermal fuse blows repeatedly, there may be poor airflow or a failing component causing overheating. Check the vent path for blockages and verify wiring integrity before replacing the fuse.
Repeated fuse blows usually mean overheating due to airflow problems; check venting and wiring.
Should I use a professional for gas-powered Kenmore Elite dryers?
Yes. Gas connections require licensed technicians to ensure safe operation and code compliance. For any gas-related concerns, contact a qualified professional and use this guide as a starting point for discussion.
For gas dryers, rely on a licensed technician and use this guide to prepare questions.
Watch Video
Key Points
- Unplug and secure the workspace before inspection.
- Check belt, rollers, and drum for wear as primary failure points.
- Test thermal fuse/thermostat if heat is missing.
- Clean vents to restore efficiency and safety.
- Document symptoms to guide part replacement and avoid wasteful fixes.