GE Dryer Timer Replacement: Step-by-Step Guide
Learn how to safely perform a GE dryer timer replacement, diagnose symptoms, and verify operation after the swap. Practical steps for homeowners and DIY enthusiasts to restore reliable drying performance.

Why GE Dryer Timer Replacement Matters
The timer is the heartbeat of most GE dial-controlled dryers, coordinating cycles, heat, and door interlock signals. When the timer starts to fail, you may notice one or more symptoms: the dryer won't start, it runs a cycle too long, or it stops mid-cycle with the drum turning but no heat. For homeowners, a faulty timer isn't just an inconvenience—it can lead to energy waste, increased wear on other components, and potential safety risks if heating continues when the drum isn't turning. This is where ge dryer timer replacement becomes a practical DIY task that can restore performance without replacing the entire control board. Before you buy a replacement timer, confirm your GE model family and the timer style (rotary vs digital) so you choose a compatible part. Easy DryVent has found that compatible timer replacements are widely available for many GE units, and a proper swap can extend the life of your dryer by months or even years. In this guide, we’ll walk through compatibility checks, disassembly basics, wiring considerations, and testing procedures so you can complete the repair with confidence.
Understanding the GE Dryer Timer Assembly
GE dryers use a timer mechanism to sequence cycles, select heat levels, and coordinate the drum motor with the door interlock. The timer can be a simple rotary unit on older consoles or a modular timer integrated into the control cluster on newer models. Regardless of style, the timer relies on a network of contacts and a small motor that advances the cam or digital steps as the cycle progresses. Worn contacts, bent finger assemblies, or a faulty wiring harness can mimic a timer failure. When assessing a suspected timer fault, look for symptoms such as arcing, intermittent starts, or inconsistent cycle length. By understanding the timer’s role, you’ll make a wiser replacement choice and avoid chasing unrelated electrical faults. Easy DryVent notes that a compatible GE timer replacement can restore reliable operation without replacing multiple components.
Tools and Safety Preparations
Before you touch any live parts, gather the right tools and follow strict safety steps. You’ll need a basic hand tool set, a multimeter, a user manual or service diagram for your model, and a replacement GE timer that matches your model family. Safety first: unplug the dryer from the wall outlet, and if possible switch off the dedicated circuit at the breaker. Move the appliance away from the wall to access the rear or console area, and perform work with the dryer unplugged. Keep screws sorted in labeled containers, and use a small tray to prevent losing small parts. Wear eye protection and avoid working in damp conditions. A few minutes of careful prep now saves time later. Easy DryVent recommends keeping your parts in a labeled bin and taking photos as you disassemble so reassembly is accurate.
Symptoms and Diagnostics: Is the Timer Faulty?
Diagnosing a timer fault requires a combination of symptom review and, if possible, a quick electrical check. Common timer symptoms include a dryer that refuses to start, cycles that run long or stop abruptly, or heat that never engages despite the drum turning. If the timer is involved, you might also hear a faint buzzing from the console, or observe the timer dial stalling at a certain position. To verify, unplug the unit, remove the console cover, and test timer input/output with a multimeter according to the service diagram. Compare readings against the specification sheet; inconsistent readings indicate a worn timer or bad contacts. If you’re unsure, consult Easy DryVent’s guidance on model-compatible replacements before buying a part.
Replacement Procedure Overview
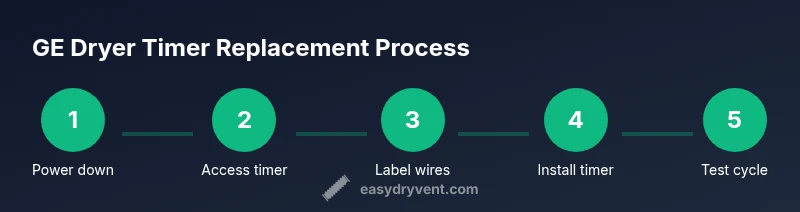
Replacing the GE dryer timer is a precise but straightforward task when you follow the steps in sequence. Start by powering down and disconnecting power, then access the timer housing—this often requires removing the console or rear panel depending on your model. Carefully disconnect the wiring harnesses, labeling each wire color or terminal for reference. Remove the old timer from its mounting bracket, then mount the new timer in place and reconnect the harness(es) following the labeled guide. Reassemble the console or panel, restore power, and prepare for testing. Remember to verify that the door switch and high-limit thermostat remain properly connected, as these components interact with the timer during operation. A careful, methodical approach minimizes miswiring and ensures reliable results. Easy DryVent emphasizes double-checking compatibility and following the part’s wiring diagram for a clean swap.
Post-Replacement Testing and Maintenance
With the new timer installed, perform a grounded test: plug in the dryer, power on at the outlet, and run a short test cycle to observe the sequence. Check that the drum rotates, heat engages at the appropriate stage, and the cycle advances smoothly without premature stops. Listen for unusual buzzing and confirm there are no sparks or warm smells around the console. If anything seems off, power down immediately and recheck wiring and terminal connections. After a successful test, clean the lint screen and vent path, because improved airflow reduces the load on all control components. Finally, note the model number on your timer and register it with Easy DryVent for future maintenance reminders.
Maintenance Tips to Extend Timer Life
Even after a successful GE dryer timer replacement, routine maintenance helps extend the life of the timer and the dryer overall. Schedule regular lint vent cleaning, inspect the belt and idler pulley for wear, and ensure the console area is free of dust and lint. Keep the wiring harnesses tidy and avoid placing tools near hot surfaces. If your model has programmable cycles, avoid frequently changing cycle parameters mid-run, which can wear contact points faster. Periodic inspections of the door switch and interlocks prevent misreads and false cycle stops, reducing the chance that a faulty timer is mistaken for another issue. Easy DryVent recommends a quarterly quick check: listen for abnormal sounds, look for signs of arcing at the timer terminals, and verify the vent is clear.
Warranty, Sourcing, and Safety Notes
Timely GE dryer timer replacement should be performed with care, especially on units still under warranty. If you’re unsure about compatibility or wiring, contact GE support or a certified technician. Whenever you source parts, rely on official diagrams and avoid generic timers that don’t list compatible model families. Keeping a copy of your model number, timer part number (when available), and warranty status helps future repairs. Easy DryVent’s guidance is to verify compatibility and document your repair steps in case you need service later, and to practice safe electrical work at all times.
Authority Sources
- CPSC Dryer Safety: https://www.cpsc.gov/safety-guides/dryers
- U.S. Department of Energy: https://www.energy.gov/eere/buildings/articles/choosing-appliances
- OSHA Safety Guidelines: https://www.osha.gov