Dryer Won’t Stay On: Troubleshooting Guide
Diagnose and fix a dryer that won't stay on with practical, safety-first steps. Learn common causes, fixes, and when to call a pro from Easy DryVent.

Most likely the dryer shut off due to a safety switch or overheating fuse. The top suspects are a blown thermal fuse and a faulty door switch. Start by confirming the outlet and circuit, then inspect the door latch, vent blockages, and lint buildup. If the issue persists, move to testing the fuse and control timer.
Quick reality check: dryer won’t stay on — what it means
If your dryer won’t stay on after starting, you’re facing a safety cutoff or overheating protection trip. According to Easy DryVent, the most common culprits are a blown thermal fuse and a faulty door switch. These safety features are designed to protect your home from fire and excess humidity, so addressing them promptly reduces risk and energy waste. Before you dive into replacements, confirm some basics: power at the outlet, a firmly closed door, and unobstructed airflow from the drum to the vent. If the dryer continues to shut off, you know you’re dealing with either a safety switch, fuse, or control issue rather than a simple reset.
In many homes, a quick check of the circuit breaker or GFCI outlet is enough to identify a power-related cause. If power is stable, you’ll be in a better position to test internal components with minimal risk. This quick reality check is your first line of defense and helps you avoid unnecessary repairs. Easy DryVent stresses that starting with safety and power checks saves time and money, and reduces the chance of secondary damage from overheating.
Common culprits and initial checks
Starting with the simplest checks saves you time and expense. Verify the outlet is live by testing with another small appliance, and reset the circuit breaker if you suspect a tripped fuse. Inspect the power cord for cracks or kinks—a damaged cord can interrupt power intermittently and cause the drum to stop mid-cycle. Next, examine the lint screen and the vent path for blockages. A clogged vent creates backpressure, causing the dryer to overheat and shut down to protect the heating element. If you notice persistent overheating or frequent cycling off, this is a strong hint toward vent-related causes. If the basics pass, you’re ready to focus on safety switches and fuses, which are far more likely culprits than fancy electronics. Keep notes of which parts you inspect and any symptoms (smell of burnt plastic, blinking lights, delay between start and stop) to guide deeper testing. In many cases, door switches or thermal fuses fail before other components, so prioritize those. Easy DryVent findings show that focusing on the door switch, thermal fuse, and venting delivers the highest payoff with the least complexity.
Safety-first checks you can do today
Safety comes first. Unplug the dryer before inspecting internal components or removing access panels. If you must test a live circuit, use a non-contact voltage tester and wear eye protection. Clear the area around the vent so lint won’t accumulate and ensure the exhaust vent to the outdoors is clear of debris. Do not bypass safety devices or “hotwire” the dryer to test a component. If you smell burning, hear buzzing, or see smoke, stop immediately and disconnect power. By sticking to these precautions, you prevent electrical shocks and fire hazards. Finally, document your steps and any visual signs of wear (frayed cords, melted insulation, rust on metal parts) so you can explain the issue clearly if you need professional help.
Diagnostic flow you can follow
Symptom: Dryer won't stay on. Start with the easiest checks: power, door latch, and venting. If these pass, test the thermal fuse with a multimeter; if it’s open, replace it. If the fuse is intact, test the door switch for continuity. If all basic checks pass but the dryer still shuts off, the timer or electronic control board is likely faulty. Use this sequence to prevent chasing down rare issues. Always re-test after each fix to confirm improvement. If you’re uncomfortable with any electrical test or if the appliance is under warranty, contact a licensed technician.
Step-by-step fixes for the most likely causes
In this section we outline practical, hands-on steps to address the most common causes for a dryer that won’t stay on. The steps progress from easy checks to more advanced fixes. Each step includes a quick tip to avoid common mistakes and to minimize risk. If at any point you feel unsure, stop and seek professional help to prevent personal injury or further damage. Remember to unplug the unit before every inspection and re-check after completing a fix.
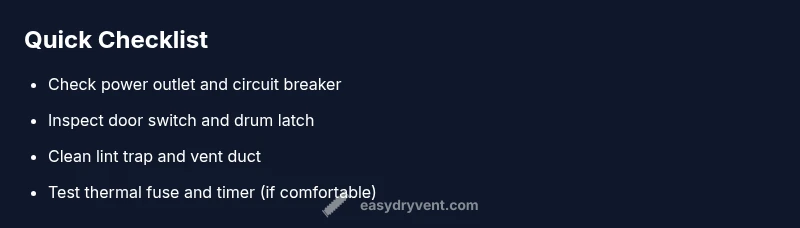
- Step 1: Check power outlet and circuit. Unplug, inspect the cord for damage, and test the outlet with a known-good device. If the outlet is dead, fix the circuit or call an electrician. Tip: Do not use an adapter or extension cord for long-term operation; use a properly rated outlet.
- Step 2: Inspect the door switch. Remove the access panel and locate the switch behind the door. With the dryer unplugged, test for continuity using a multimeter. If there’s no continuity, replace the switch. Tip: Re-seat wires carefully and take photos before disconnecting to aid reassembly.
- Step 3: Clean and inspect the vent path. Disconnect the vent hose and remove any lint or debris from the duct. Ensure the vent runs freely to the outdoors. Tip: Vacuum the lint screen housing to prevent dust buildup that can mimic a clogged vent.
- Step 4: Test the thermal fuse. Locate the fuse along the blower housing and test for continuity. If the fuse is open, replace it. Tip: Replace the fuse only with the correct part for your model; mismatched fuses can cause further issues.
- Step 5: Examine the timer or control board. If the fuse and door switch test pass but the dryer still won’t stay on, the timer or control board may be defective. Tip: A bad board can present symptoms other than shutdown, like unresponsive start or inconsistent heat. In this case, professional service is advised.
- Step 6: Reassemble and run a test cycle. Reconnect all components, plug in the unit, and run a short cycle to verify behavior. Tip: Observe for any unusual smells, sounds, or heat that could indicate an oil or electrical problem.
Prevention and maintenance to keep it running
Prevention is cheaper than repair, especially with high-use appliances like a dryer. Regular maintenance reduces the likelihood of a sudden shutdown. Here are practical habits to minimize future problems:
- Clean the lint screen after every load and perform a deeper vent inspection every 6–12 months, depending on usage. A clean vent improves airflow and reduces overheating risk.
- Schedule periodic belt and switch checks if your model is older or if you notice unusual noise or misalignment. Worn belts put extra strain on the motor and may prompt shutdowns.
- Use the right load size and fabric settings. Overloading can cause overheating and tripping of safety devices. Separate heavy towels from lighter fabrics to balance airflow.
- Keep the area around the dryer clear of flammable items and maintain a dry, well-ventilated space. This reduces fire risk and improves overall efficiency. Easy DryVent recommends logging your maintenance tasks to track when the next check should occur.
Steps
Estimated time: 60-90 minutes
- 1
Check power and circuit
Unplug the dryer and inspect the power cord for damage. Test the outlet with a known-good device or meter. If the outlet is dead or the circuit trips, resolve the power issue before proceeding.
Tip: Always start with power checks to rule out a simple cause. - 2
Inspect door switch
Access the door switch behind the inner panel. With the dryer unplugged, test continuity across the switch using a multimeter. Replace if there's no continuity or the switch feels loose.
Tip: Re-seat or label wiring before removing connectors to simplify reassembly. - 3
Assess venting and lint
Disconnect the vent and remove lint from the screen, duct, and blower housing. Reconnect and run a short cycle to verify improved airflow and reduced overheating risk.
Tip: A clogged vent is a leading cause of overheating and shutdowns. - 4
Test the thermal fuse
Locate the fuse on the blower housing or heater housing. Use a multimeter to check for continuity. Replace if open. Re-test after installation to confirm proper operation.
Tip: Use the correct replacement part tailored to your model. - 5
Evaluate timer/control board
If the fuse and door switch test fine but the dryer still shuts off, the timer or control board may be faulty. This typically requires professional inspection and possible replacement.
Tip: Document any blinking lights or error codes to aid the technician. - 6
Test run and verify
Reassemble panel, plug in the dryer, and run a complete cycle. Confirm that the dryer stays on for the entire cycle and reaches expected heat.
Tip: If issues recur, stop and schedule professional service to prevent further damage.
Diagnosis: Dryer won't stay on
Possible Causes
- highThermal fuse blown due to overheating
- highDoor switch faulty or misaligned
- mediumTimer/control board fault
- lowPower supply issue (outlet/circuit)
Fixes
- easyVerify power supply (outlet, cord, circuit breaker) and reset GFCI if applicable
- easyTest and replace door switch if continuity is incorrect
- mediumTest and replace thermal fuse if blown (requires a multimeter and replacement part)
- hardTest and service timer or control board; professional replacement may be required
Common Questions
Why does my dryer shut off after starting?
Shutting off after starting is often caused by a blown thermal fuse, a faulty door switch, or a vent-related overheating condition. Diagnose step-by-step to identify the exact cause.
Common causes are the thermal fuse, door switch, or vent overheating. Diagnose step-by-step to find the exact issue.
Can a faulty timer cause a dryer to stop running?
Yes. A bad timer or control board can intermittently cut power to the drum, causing the dryer to stop mid-cycle. Testing with the appliance manual or a professional may be necessary.
A faulty timer or control board can cause mid-cycle shutdowns and may require professional testing.
Is a blown thermal fuse dangerous?
A blown thermal fuse indicates overheating, which is a fire risk. Replace the fuse and fix underlying airflow issues before reusing the dryer.
A blown thermal fuse is a sign of overheating and a fire risk. Replace it and fix airflow before using again.
When should I call a professional?
If the basic power, door, and vent checks don’t resolve the issue, or if the unit requires fuse or board replacement, contact a licensed technician. Complex electronics are risky to handle yourself.
Call a pro when basic checks don’t fix it or if the issue involves replacement of the fuse or control board.
What safety steps are essential before troubleshooting?
Always unplug the dryer, avoid bypassing safety switches, and ensure the area around the vent is clear. Use protective gear and keep a fire extinguisher nearby as a precaution.
Unplug first, don’t bypass safety switches, and keep the vent clear. Wear protection and keep a fire extinguisher handy.
Watch Video
Key Points
- Start with power, door, and vent checks.
- Thermal fuse and door switch are common failure points.
- Ventilation cleanliness prevents overheating and shutdowns.
- If basic tests pass, most issues involve the timer or control board.
- Always unplug and follow safety precautions; call a pro when needed.