Dryer Knob Not Turning: Practical DIY Troubleshooting
Discover practical, safe steps to diagnose and fix a dryer knob that won't turn. Easy DryVent guides homeowners through quick checks, fixes, and prevention.

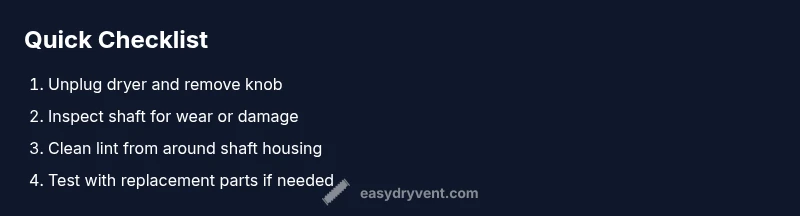
According to Easy DryVent, the most common reason a dryer knob won’t turn is a seized or worn control shaft. Start with safety: unplug the unit and remove the knob. Check for jammed dials, pet hair, or lint buildup around the shaft. If the knob or shaft feels loose or damaged, plan a replacement or repair before attempting further tests.
Why the Knob Won't Turn: Common Root Causes
In many homes, a dryer knob not turning points to a mechanical snag rather than an electrical fault. The most frequent culprits are a seized control shaft, a worn or stripped knob, lint buildup, or a jammed dial mechanism. Less common but possible causes include a bent shaft, a damaged cam, or a failing timer assembly. Understanding these root causes helps you plan the right repair path and avoid unnecessary replacements. According to Easy DryVent, the top reason is a seized shaft caused by lint and dust accumulating in the dial area over time. Before you buy parts, verify that you are dealing with a simple mechanical snag rather than a larger control board issue. This clarity saves time, money, and frustration.
Quick Safety Precautions Before You Start
Safety first is essential when working on a live appliance. Always unplug the dryer from the wall outlet before any disassembly. If your model has a dual voltage cord or a hardwired connection, consider shutting off the circuit breaker for extra protection. Wear gloves and eye protection, especially if you need to access sharp edges or remove the back panel. Keep a magnet handy to detect any loose screws that may fall into the chassis. Remember that working with electrical devices carries a risk of shock; if you feel unsure at any point, pause and seek professional help.
Visual Inspection: Knob and Shaft Assembly
Begin with a close inspection of the knob itself and the shaft it attaches to. If the knob spins without turning the shaft, the knob is likely stripped and needs replacement. If the shaft rotates but the knob does not, there may be wear, a bent shaft, or a damaged cam inside the control area. Look for cracks, looseness, rust, or interference from lint. A bulb or toollight can help reveal fine cracks or recessed seams. Carefully measure the shaft diameter and compare it to replacement parts from the manufacturer or a reputable aftermarket brand. Document any signs of wear to guide your parts choice and avoid ordering the wrong item.
Cleaning Around the Shaft and Knob
Lint and debris accumulate in the dial housing and around the shaft over time. Use a soft brush or compressed air to clear lint from tight gaps around the knob base and the shaft end. If you notice sticky residue or corrosion, wipe the area with a dry cloth or a small amount of electronics-safe cleaner on a cloth (never spray directly onto components). Avoid displacing internal parts with aggressive cleaning. After cleaning, reassemble loosely to test alignment before full reassembly.
Testing with the Right Tools
With the dryer unplugged, reinstall the knob and gently rotate while observing the internal shaft. If the shaft spins freely but the dial resists, you may have a misalignment or a damaged cam; if the shaft itself sticks or grinds, the parts are worn and likely need replacement. Use the manufacturer’s manual to identify the exact knob torque and slot orientation. If your model uses a removable shaft, you can test by swapping in a known-good shaft from a compatible model. Keep notes on fit and feel to ensure the right replacement.
Replacement Parts: Knob vs Shaft vs Control Panel
Replacing the knob is the simplest fix if wear is localized to the exterior. A worn or stripped shaft requires replacing the shaft or the entire knob-and-shhaft assembly. If the control panel or dial mechanism shows cracking, loose parts, or failed gears, you may need a more involved repair or a service call. When ordering parts, verify compatibility with your dryer’s model number and serial. Always use OEM or high-quality aftermarket replacements to ensure a secure fit and reliable operation.
Reassembly and Functional Check
After installing new parts, reattach the knob, plug the dryer in, and perform a careful functional check. Start with the lowest settings to confirm that the dial advances smoothly through the cycle options. Listen for unusual noises, test vent settings, and confirm that the load door latch engages properly. If the knob still doesn’t turn or the dryer responds inconsistently, re-check the alignment and wiring according to the schematic, and if needed, call a professional to avoid safety risks.
Prevention: How to Avoid Future Knob Jams
Routine maintenance helps prevent knob jams. Clean the lint trap after every load, and schedule periodic vent cleaning to reduce lint buildup in the dial area. Keep pets away from the back of the dryer to reduce hair and debris near the shaft. Every few months, inspect the dial for wear and replace as needed before the problem escalates. Staying proactive with simple checks can extend the life of the dial mechanism and reduce maintenance costs.
When to Call a Pro: Safety Boundaries and Warranty Considerations
If you see damaged wiring, a cracked control panel, or a broken plastic housing, stop and call a professional. Some repairs may void warranties or require special tools. If your model is under warranty, contact the manufacturer’s service line for approved parts and service options. A licensed technician can safely diagnose issues behind the control panel and ensure compliance with electrical safety standards.
Steps
Estimated time: 30-60 minutes
- 1
Power down and unplug
Ensure the dryer is fully disconnected from power and the circuit is de-energized. Remove any nearby metal jewelry to prevent accidental contact. This first step minimizes the risk of electric shock as you work around the controls.
Tip: Take a photo of the control housing before disassembly for reference. - 2
Remove the knob
Gently pull the knob straight off the shaft. If it resists, check for a set screw on the knob's side and loosen it with the appropriate tool. Avoid yanking; a stubborn knob can crack the shaft and create more problems.
Tip: If the knob has a small set screw, keep the screw in a labeled container to prevent loss. - 3
Inspect the shaft and dial
Look for visible wear, hair or lint accumulation, or a bent shaft. Spin the shaft by hand to feel for rough spots or grinding. Compare with a known-good shaft if available.
Tip: Use a magnifying glass for tiny cracks and wear on the shaft end. - 4
Clean and align
Vacuum or brush lint away from the shaft housing. Reinstall the knob without forcing it; the alignment should allow smooth rotation together with the shaft.
Tip: A small amount of silicone lubricant sparingly on metal parts can help, but avoid applying on plastic gearing. - 5
Test before full reassembly
Plug in briefly and rotate the control to confirm smooth motion. If the shaft still binds, stop and reassess fits or worn parts before continuing.
Tip: Test several times at low settings to confirm consistency. - 6
Install replacement parts if needed
If wear or damage is found, order a knob/shaft or complete assembly compatible with your model. Install according to the manufacturer’s instructions and re-test.
Tip: Prefer OEM parts for fit and safety compliance.
Diagnosis: Knob on dryer won't turn or advances only partially when rotated
Possible Causes
- highWorn or stripped knob shaft
- mediumLint buildup around the shaft
- lowDamaged control shaft or misalignment of cam
Fixes
- easyUnplug dryer, remove knob, inspect for wear; replace knob/shaft assembly if damaged
- easyClean lint around the shaft; reassemble and test fit
- hardIf control panel or cam is damaged, replace parts or contact a pro
Common Questions
What causes a dryer knob to stop turning, and can I diagnose it myself?
The most common cause is a worn or seized shaft or knob. You can inspect the knob, shaft, and dial housing to determine if replacement parts are needed. If you observe internal damage or electrical issues, stop and seek professional help.
Common causes are worn shafts or knobs. If you see internal damage, seek a pro.
Can I fix a worn knob shaft myself?
Yes, for a typical model you can replace the knob or shaft using common tools and the model-specific parts. Ensure the dryer is unplugged and follow the manufacturer’s instructions to avoid damage.
Yes, you can usually replace the knob or shaft yourself if you unplug first.
Should I unplug the dryer before starting any inspection?
Absolutely. Unplugging removes the risk of electric shock while you inspect the knob, shaft, and control area. If you’re unfamiliar with electrical components, consider professional help.
Always unplug before you start inspecting.
How long does a knob/shaft replacement take?
Most replacements can be completed in under an hour if you have the right parts and a basic toolkit. Complex control-panel issues may take longer or require professional service.
Most replacements take under an hour with the right parts.
Is it dangerous to use a dryer with a stuck knob?
Yes. A stuck knob can indicate wiring or control damage. Using the dryer in this state risks electrical shock or fire, so avoid operation and seek professional evaluation.
Yes, it can be dangerous to use a dryer with a stuck knob.
What parts should I replace if the shaft is damaged?
If the shaft shows wear, replace the knob/shaft assembly or the entire dial mechanism as recommended by the model. For uncertain cases, consult a technician.
Replace the knob and shaft assembly if damaged.
Watch Video
Key Points
- Identify if it’s knob or shaft wear before replacement
- Unplug the dryer before any inspection
- Replace worn parts promptly to restore function
- Regular lint vent maintenance reduces jams