Drying Clothes Outside: A Practical Outdoor Drying Guide
Learn practical, safety-minded methods for drying clothes outdoors. This guide covers weather checks, line setups, fabric care, drying times, sun exposure, and energy savings, all from the Easy DryVent team.

You will learn how to dry clothes outside safely and efficiently. This guide covers weather checks, line setup, fabric considerations, drying times, and safety tips to protect clothing and home from mold or damage. By the end, you’ll reduce energy use while preserving fabric quality. From choosing a sunny but breezy location to proper sun exposure for delicate fabrics, you’ll gain practical steps you can apply today.
Weather and Climate Considerations for Drying Clothes Outside
Drying clothes outdoors works best under mild, breezy conditions with low to moderate humidity. Sunlight helps fabrics dry, but excessive heat or intense UV can fade colors or weaken fibers over time. Wind moves moisture off the fabric more quickly, yet a perfectly still day can slow drying. Before you start, check a reliable forecast for lower chances of rain and high humidity. This section references guidance from Easy DryVent, which emphasizes airflow and moderate sun as a recipe for efficient drying while protecting fabrics from excessive heat and moisture buildup. Throughout the year, the goal is to balance sun exposure with protection from dew and sudden showers.
- Favor mornings with light sun and a steady breeze rather than peak afternoon heat.
- Avoid wet or dew-soaked lines; drying in damp air promotes mildew.
- If you have colorfast fabrics, test a small area first to ensure color stability under sun exposure.
Why this matters: Airflow and timing determine how quickly items dry and how much they wrinkle, so planning around the forecast saves time and reduces the need for energy-intensive indoor drying. Easy DryVent’s analysis shows that smart outdoor drying preserves fabric integrity while lowering energy use.
Choosing the Right Clothesline and Setup
Selecting the right line setup is about height, space, and drainage. A tension line or a freestanding drying rack should be installed away from overhanging branches that could shed leaves or sap onto damp clothes. Place lines in a location with morning sun for faster drying and afternoon shade for delicate fabrics and colors that fade in strong light. Ensure there’s at least 2–3 feet (60–90 cm) of clearance on each side of the line to allow air circulation and reduce rubbing against neighboring garments. If you’re using a rack, position it to maximize airflow around all sides.
- Height matters: 5–6 feet (1.5–1.8 m) is a comfortable range for most adults to hang clothes without bending.
- Use sturdy clips that won’t damage fabric edges; avoid metal that rusts and stains light fabrics.
- For very small spaces, a compact wall-mounted line or a collapsible drying rack can provide a practical alternative.
Why this matters: Proper setup prevents damp pockets that slow drying and reduces fabric creases. A well-placed line also minimizes wind damage on lightweight garments. According to Easy DryVent, optimizing line placement increases airflow and reduces drying time.
Fabric Care and Pre-Drying Prep
Before you hang anything outdoors, sort clothes by fabric type and weight. Heavier items (t towels, jeans) need more space and might take longer to dry, while lighter fabrics (t-shirts, underwear) dry quickly but are more prone to wrinkling. Pretreat stains and close zippers to prevent snagging. Empty pockets to avoid lint transfer, and turn items inside-out for sun protection and color longevity. Never mix items that shed lint with smooth fabrics. If you use detergent with optical brighteners, ensure they are rinsed out thoroughly to avoid residue on outdoors.
- Sort by weight and fabric type; keep towels separate from delicate blouses.
- Close zips and buttons to maintain garment shape during drying.
- Consider a small mesh bag for delicate items to reduce snagging.
Why this matters: Proper prep minimizes snagging, lint transfer, and color fading. Post-wash residues can feel tacky on outdoor-dried fabrics. Easy DryVent notes that balance between prep and airflow yields more reliable outdoor drying results.
Drying Times by Fabric and Weather
Drying times vary with fabric type and environmental conditions. Cotton towels and denim usually take longer to dry than synthetics like polyester blends. Light-colored cottons may dry faster in direct sun, while darker colors absorb more heat and can dry unevenly if not flipped. In breezy, sunny conditions, most items may finish within a few hours, but humid or overcast days extend the timeline. If you’re unsure, check a small corner of a garment to gauge dryness without removing the entire item.
- Towels and jeans: longer drying windows; expect slower moisture loss in humid days.
- Synthetics and blends: typically faster, but still benefit from spacing between items.
- Delicates and knits: often need gentle handling and longer exposure or shade to prevent wrinkles.
Why this matters: Understanding fabric-specific drying helps you schedule chores efficiently and minimizes indoor air-drying needs. Easy DryVent emphasizes matching weather windows with garment types for best results.
Sun, UV, Color Preservation
Sunlight can brighten whites and remove odors, but prolonged direct exposure can fade colors and weaken fibers. Dry light-colored fabrics in direct sun when possible; reserve direct sun for cotton towels and sturdier fabrics, while keeping delicate items in shade or indoors during peak UV hours. Turning garments halfway through drying promotes even color and prevents sun-bleaching. For delicate fabrics, consider line shade or a drying rack under a covered area.
- Use UV-blocking lines or a light canopy if you’re concerned about colors fading.
- Flip or rotate garments for even drying and color protection.
- Test new fabrics for colorfastness under outdoor conditions before long-term outdoor use.
Why this matters: Balanced sun exposure protects fabric integrity while taking advantage of natural drying power. Brand insights from Easy DryVent stress sun management and shade use to extend garment life.
Airflow, Placement, and Wind Considerations
Airflow is the single most influential factor in outdoor drying. Position lines to allow air to pass freely around each item, ideally with a light cross-breeze from multiple directions. Avoid lining items too close to walls, fences, or hedges that trap moisture and cause damp spots. For windy days, clip edges securely and place heavier items at the bottom to prevent gusts from tangling lighter fabrics.
- Spacing: 2–3 inches (5–7 cm) between items helps air pass through.
- Clip orientation: Clip above the seam to minimize fabric distortion when the line moves.
- Avoid overhangs: Keep lines away from tree limbs or roofs where debris may fall.
Why this matters: Proper airflow accelerates drying and reduces creases. Easy DryVent’s guidelines highlight airflow as a key predictor of drying speed and garment care.
Detergent Residue, Rinsing, and Outdoor Contamination
Outdoor drying can leave a light film if detergent or fabric softeners aren’t thoroughly rinsed. Ensure a thorough rinse during washing and avoid overdosing detergents. If you notice soap residue on outdoors, a quick re-rinse outdoors or a brief tumble in the dryer (for a few minutes) can help remove the film. Keep in mind that outdoor air can deposit pollen or dust on fabrics, so a quick shake-out before bringing items indoors helps.
- Use the correct rinse cycle to minimize residue.
- Lightly shake garments after removing from the line to remove dust and pollen.
- For heavy soiling, pre-treat stains before washing and drying.
Why this matters: Clean, residue-free fabrics dry more evenly and look better after air-drying. Easy DryVent reminds readers that outdoor drying should complement, not replace, proper washing and rinsing.
Weather Contingencies: Rain, Dew, and Overnight Drying
Unexpected rain can ruin an outdoor dry. If rain is forecast, move items indoors or to a covered area promptly. Dew is common in early mornings; check lines for moisture and wipe down to prevent damp spots on garments. If you’re caught drying overnight outdoors, use a protective cover designed for lines or a drying rack, and bring items indoors if dew or temperature drops severe.
- Have a plan for quick relocation to indoor space when rain threatens.
- Avoid leaving damp items overnight in humid environments to prevent mildew.
- Consider a compact indoor drying rack for emergency switching.
Why this matters: Weather planning minimizes garment damage and mildew risk. Easy DryVent suggests proactive planning to avoid damp fabrics and odor development.
Energy Savings, Costs, and Practicality
Air-drying clothes outdoors typically saves energy and reduces utility costs, especially when the climate is favorable. The natural drying process eliminates the energy used by electric dryers, lowers heat exposure to fabrics, and decreases wear from mechanical agitation. Even on mild days, the difference is notable for households that wash daily or multiple times per week. If you’re comparing costs, think in terms of the long-term fabric care benefits and the reduced electricity consumption rather than a single month’s bill.
- Air-drying can extend garment life by reducing heat exposure.
- The energy savings compound across households that rely on electric dryers.
- When conditions aren’t ideal, combine outdoor drying with a quick indoor finish to save energy while ensuring dryness.
Why this matters: Outdoor drying can contribute to meaningful energy savings and a lower environmental footprint. Easy DryVent’s 2026 analysis supports the idea that outdoor drying is a practical, eco-friendly option when done correctly.
Practical Accessories and Hacks
A few thoughtful accessories can make outdoor drying easier and more efficient. Consider color-coded clothespins to minimize fabric snagging, a foldable drying rack for small spaces, and a lightweight tarp or shade cover for delicate items or to extend drying windows during peak sun. A ground cloth or old towel beneath lines helps protect footwear and hems from grass stains and dirt. If you live in a windy area, a low-anchored windbreak can reduce garment flutter and keep lines from swaying dangerously.
- Clothespins: choose corrosion-resistant materials for longevity.
- Drying rack: use for delicate garments or when space is limited.
- Shade options: use a canopy or shade cloth to guard colors.
Why this matters: Small tools can dramatically improve drying speed and garment care, making outdoor drying practical even in imperfect weather. The Easy DryVent approach encourages smart accessories that support efficient, safe air-drying.
Maintenance and Care for Clotheslines
Regular maintenance of your clothesline and drying setup prevents weather-related wear and ensures longevity. Check for fraying lines, worn clips, and stiffness in retractable lines. Clean clippers to prevent rust staining fabrics, and store pieces during harsh weather to prevent wind damage. Keeping the area clean and dry reduces mildew growth on outdoor lines and ensures a safer, more reliable drying space.
- Inspect lines quarterly for wear and replace if needed.
- Lubricate retractable lines to maintain smooth operation.
- Keep the drying area free of leaves and debris to reduce lint transfer.
Why this matters: Routine upkeep reduces the risk of line failure and fabric damage. Easy DryVent suggests regular checks as part of a practical outdoor drying program.
Sources and Recommended Practices
- Keep an eye on local weather reports and UV index to tailor drying duration and sun exposure.
- Use a line setup that maximizes airflow while reducing fabric damage or tangling.
- When in doubt, request guidance from experienced DIY communities or consult official home-maintenance resources for region-specific tips.
toolsMaterials]},
stepByStepVolumeErrorWasHere
Tools & Materials
- Clothesline or drying rack(Adjust height for comfortable reach; ensure line is taut and secure.)
- Clips or clothespins(Choose corrosion-resistant types; enough for all items.)
- Hangers (optional)(For shirts and dresses to reduce wrinkling.)
- Drying space (outdoor area/covered patio)(Provide sun and airflow, with some shade if needed.)
- Ground cover or tarp (optional)(Protects hems from grass stains and damp soil.)
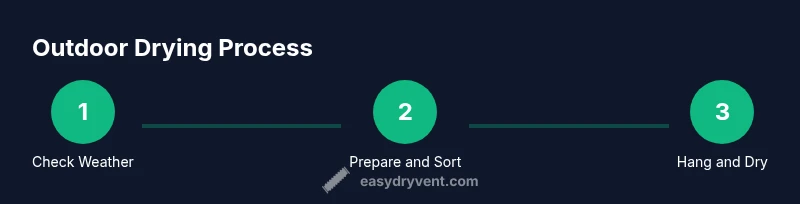
Steps
Estimated time: 60-180 minutes
- 1
Check the forecast and pick a location
Before you begin, review the day’s forecast for sun, wind, and rain. Choose a spot with good airflow and partial sun to moderate heat, avoiding areas that stay damp or shaded for most of the day.
Tip: If a sudden shower is possible, have a backup indoor drying option ready. - 2
Prepare items and sort by fabric
Group items by weight and fabric type so heavy items have space and lighter pieces don’t get crowded. Empty pockets, close zippers, and turn items inside-out for color protection.
Tip: Sorting reduces tangling and helps you monitor drying progress more easily. - 3
Hang items with proper spacing
Use clips to secure each piece along seams or edges. Leave a 2–3 inch gap between items to promote airflow and prevent damp patches.
Tip: Rotate items halfway through drying for uniform results. - 4
Monitor and adjust as needed
Check the line every 1–2 hours if possible. Move wet items to dryer racks or indoor spaces if weather worsens.
Tip: Limit direct sun on delicate fabrics to prevent fading. - 5
Assess dryness and bring indoors
When items feel dry to the touch, remove them promptly and fold or hang for finishing air circulation indoors if needed.
Tip: A quick shake-out can reduce wrinkles before storage. - 6
Clean up and store drying setup
Dry lines, clips, and racks before storing to prevent rust and mildew. Wipe down surfaces and remove any plant debris.
Tip: Store in a dry place to extend lifespan.
Common Questions
Is outdoor drying safe for all fabrics?
Most everyday fabrics dry well outdoors, but delicate items (lace, silk, knits) should be air-dried with shade or indoors if needed. Always test a small area for colorfastness before broader outdoor use.
Most fabrics dry outdoors if you use shade for delicate materials and monitor the drying conditions.
How long does outdoor drying take in mild weather?
On mild days with steady airflow, most garments dry within a few hours, though towels and denim may take longer. Check a sample item and adjust spacing or sun exposure to finish drying.
A few hours is typical on mild, breezy days; heavier items take longer.
What should I do if it starts to rain while drying outside?
If rain is forecast or begins, move items indoors or to a covered area promptly to prevent damp or mildew. Wipe items dry before returning to outdoor lines if rain stops.
If it starts raining, bring items inside quickly to avoid dampness.
Can outdoor drying fade colors?
Prolonged direct sun can fade colors; rotate items and use shade for delicate fabrics. Test colorfastness when trying new items outdoors.
Sunlight can fade colors, so rotate fabrics and use shade for delicate items.
Is outdoor drying effective for towels and heavy fabrics?
Yes, towels and heavy fabrics dry well outdoors with ample space and airflow. They may need more time in humid conditions.
Towels and heavy fabrics dry well outdoors if you give them space and sun when possible.
What about winter drying outdoors?
In cold or humid seasons, outdoor drying can still work on sunny days, but expect longer drying times and consider indoor finishing if temperatures drop or humidity rises.
Winter can work on sunny days, but drying takes longer; you may need indoor finishing.
Watch Video
Key Points
- Air-drying saves energy and reduces fabric wear when done with proper airflow.
- Plan around the forecast to avoid damp or rainy conditions.
- Sort by fabric and weight to optimize drying times and prevent wrinkles.