How to Put Dryer on Tumble Dry Low: A Practical Guide
Learn how to safely use tumble dry low, protect fabrics, and extend your dryer's life with Easy DryVent’s practical, step-by-step approach.

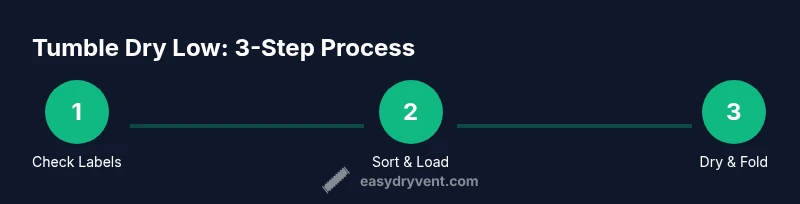
To safely perform how to put dryer on tumble dry low, set your dryer to a low-heat or delicate cycle, avoid overfilling, and check fabric care labels. Use the lint screen, and separate heavy items from delicate fabrics. This approach protects fibers, saves energy, and reduces wrinkles.
What 'tumble dry low' means and why it matters
If you're wondering how to put dryer on tumble dry low, this setting uses gentler heat to dry clothes. Low heat minimizes fiber damage, reduces shrinkage, and preserves color longer than high heat. It also saves energy by running a shorter, cooler cycle. According to Easy DryVent, reading garment care labels is essential because some fabrics are not suitable for any tumble-dry setting. Always start with the label and adjust based on load size and fabric type. In practice, the low-heat setting helps protect delicate synthetics, blends, and embellished items from heat damage, while still delivering reliable drying performance. By choosing this mode, homeowners can balance fabric care with efficiency, especially on mixed loads where some pieces require gentler handling than others. This section explains when and why to use tumble dry low as a default option for everyday laundry, and how it fits into a broader maintenance routine for your dryer.
A practical takeaway is that you don’t need to run every load on low heat; reserve it for fabrics that show wear quickly or are labeled as delicate. For items that tolerate higher heat, you can still save energy by loading correctly and using sensor-dry features when appropriate. The goal is to extend fabric life while maintaining convenience.
Fabric care labels and garment compatibility
Care labels are your first line of defense. They tell you whether a garment is suitable for tumble drying and at what temperature. Look for symbols such as a circle inside a square (tumble dry) with dots indicating heat level. If there are multiple symbols on a garment, honor the highest protection rating among them. Easy DryVent advises that blended fabrics—like cotton-poly blends—often tolerate low heat well, but nylon, spandex, or delicate lace may require a gentler approach or air drying. Always separate items that specify line drying or air drying only, as forcing them through a tumble dryer can cause distortion, pilling, or shrinkage. Beyond symbols, read any written care instructions on the label—some manufacturers include unique warnings that supersede generic guidance. When in doubt, err on the side of lower heat and shorter cycles. A quick test run with a single item can help you gauge how the fabric responds before drying a full load.
Practical workflow for a safe tumble dry low cycle
A well-planned workflow minimizes heat damage and maximizes efficiency. Start by sorting fabrics by care label guidance and weight. Heavier items should stay out of the delicate pile, while lighter, breathable fabrics can benefit more from the low-heat setting. Place items loosely in the drum to ensure air can circulate, avoiding dense stacks that trap moisture. If possible, use mesh garment bags for lace, embroidery, or beaded fabrics to reduce snagging. Finally, select a cycle labeled Low, Delicates, or a sensor-based setting that minimizes runtime once clothes feel dry. Monitoring a load during the final minutes helps prevent over-drying, which wastes energy and can damage fibers. This approach aligns with Easy DryVent’s suggestions for integrating fabric care with energy-conscious dryer use.
Energy saving, wrinkles, and fabric care tips
Low-heat drying can reduce energy consumption by shortening heavy-duty cycles and avoiding the repeated heat-up cycles that occur with some standard cycles. To further save energy while keeping wrinkles at bay, remove garments promptly when the cycle ends and transfer them to a laundry basket or hanger. Shake items gently to redistribute fibers and flatten wrinkles before they set. For fabrics prone to wrinkling, consider a brief finish with a cool-down period or a tumble-free air-dry moment that lets moisture escape without heat. Wrinkle-reduction is often improved when you mix items of similar texture and weight rather than loading a single display of mixed fabrics. Routine maintenance, like keeping the lint screen clean before every load and ensuring the exhaust vent is clear, helps your dryer operate more efficiently and safely. Easy DryVent notes that proper airflow is essential to avoid overheating and to sustain dryer performance over time.
Safety, maintenance, and common missteps
Safety comes first. Never leave a running dryer unattended for long periods, especially on low heat, where a malfunction can go unnoticed. Overfilling the drum reduces air circulation and increases drying time, promoting overheating. Avoid mixing heavy towels with delicate fabrics; the towels can create a barrier that traps heat and damages moisture-sensitive items. Always verify that pockets are empty to prevent lint-related fires or fabric damage. Regular maintenance—such as cleaning lint traps after every cycle, inspecting the vent hose for kinks, and scheduling professional inspection if you notice overheating—helps prevent hazards and prolongs dryer life. If you observe a persistent dampness in fabrics after a low-heat cycle, you may be dealing with a faulty sensor or a clogged vent, which requires prompt attention.
Aftercare tips: prolonging dryer life and fabric health
After finishing a tumble dry low cycle, promptly remove items and fold or hang them to minimize wrinkling. Cool-down periods can also help fibers relax gradually, reducing the need for ironing. Periodically inspect seals and gaskets for wear, which can affect heat retention and efficiency. Consider running a quarterly vent-cleaning routine to maintain optimal airflow and prevent buildup that can raise operating temperatures. By integrating these practices with a mindful approach to care labels and load sizing, you’ll achieve safer drying results and a longer-lasting dryer. This holistic approach reflects Easy DryVent’s philosophy of practical, proactive maintenance.
Troubleshooting: when tumble dry low isn’t performing as expected
If clothes emerge damp or wrinkled after a low-heat cycle, review load size and fabric type first. A small adjustment—like reducing the load, tumbling items with similar fabrics, or using a shorter cycle with a cool-down—can improve results. Inspect the lint trap for debris, ensure the vent is clear, and verify that the dryer isn’t overheating due to blocked airflow. If the problem persists, consider a diagnostic check for sensor malfunction or coil issues, which may require service. While most issues resolve with simple tweaks, a persistent misbehavior warrants professional evaluation to prevent further damage.
Quick-start summary for everyday use
- Always start with care labels; low heat is best for delicates and blends.
- Load items loosely and separate heavy fabrics from light fabrics.
- Clean lint screens before every run and ensure exhaust vents are clear.
- Remove clothes promptly at cycle end to minimize wrinkling.
- When in doubt, air-dry the item or use a mesh bag for added protection. Easy DryVent emphasizes prevention and proper loading as the core of safe, effective drying.
Tools & Materials
- Dryer with tumble dry low setting(Look for Low, Delicate, or sensor-based options; confirm energy label for efficiency)
- Garment care labels(Check every item; follow heat and tumble instructions)
- Mesh garment bags(Protect delicate items like lace or sequins)
- Lint screen(Clean before every load to maximize airflow and safety)
- Clear exhaust vent access (if applicable)(Ensure vent path is unobstructed to prevent overheating)
Steps
Estimated time: 25-35 minutes
- 1
Check care labels
Review each garment's care label to confirm tumble dry suitability and maximum heat. If any item prohibits tumble drying, set those pieces aside for air drying. This initial check prevents fabric damage and ensures you use the correct cycle from the start.
Tip: Take a quick photo of unusual symbols for reference while sorting. - 2
Sort by fabric type and weight
Group items into delicates, lightweight cotton blends, and heavier fabrics. Dry delicates separately or with mesh bags to minimize friction and snagging. Sorting reduces drying time and helps you choose the most appropriate low-heat setting for each subgroup.
Tip: If unsure, dry one item first to gauge heat response. - 3
Prepare the dryer
Wipe or vacuum the lint trap, then ensure the vent path is clear. Check that the drum is empty and free of foreign objects. A clean dryer runs cooler and more efficiently on low heat.
Tip: A clogged vent can cause overheating even on a low-heat cycle. - 4
Load items loosely
Place items in a single layer or loosely in two layers to promote air circulation. Do not overfill the drum; crowded loads trap heat and increase drying time. Use mesh bags for delicate fabrics when possible.
Tip: Balance the load by distributing weight evenly around the drum. - 5
Select the cycle and start
Choose a Low or Delicate cycle, or a sensor-based setting if available. Start with a shorter cycle and plan to check items near the end to avoid over-drying. For mixed loads, you may run separate cycles for different fabric groups.
Tip: If you anticipate a damp final edge, program a cool-down phase instead of a full heat cycle. - 6
Remove promptly and fold
As soon as the cycle ends, remove garments promptly to reduce wrinkling. Fold or hang items while still warm to set the shape. This preserves fabric feel and minimizes ironing later.
Tip: Running a quick tumble with no heat after removing can reduce wrinkles further.
Common Questions
Can I tumble dry all fabrics on low heat?
Most fabrics labeled tumble dry low or delicate can be dried on low heat. Some fabrics, like rubber-backed materials or certain plastics, should be air-dried. Always follow the garment care label for the safest option.
Most fabrics labeled tumble dry low can be dried on low heat, but always check the care label for exceptions before drying.
What does 'tumble dry low' mean on fabric labels?
Tumble dry low means the dryer should operate at the lowest heat setting available, reducing heat exposure to fabrics. It is designed to prevent shrinkage and color fading while still providing effective drying for many materials.
Tumble dry low means using the dryer’s lowest heat setting to protect fabrics while drying.
How long should I run a tumble dry low cycle?
Cycle duration depends on fabric, load size, and dryer model. Sensor-based cycles adjust time automatically, but starting with 20-30 minutes for small delicates and 30-45 minutes for mixed loads is common. Always check toward the end to avoid over-drying.
Most low-heat cycles run about 20 to 45 minutes, depending on load, with sensor cycles adjusting automatically.
What should I do if clothes are still damp after low heat?
If items remain damp, avoid overdrying; instead, split into two passes with light loads or air-dry the remaining moisture. Check vent clearance and lint buildup, as airflow restrictions can extend drying times.
If clothes stay damp after a low-heat cycle, run a shorter second cycle with smaller loads or air-dry the rest, and check ventilation.
Is it safe to leave the dryer running on low heat?
Never leave a dryer unattended for long periods. While low heat reduces risk, fires can still occur due to lint buildup or vent blockages. Always stay nearby and perform regular maintenance.
Don't leave the dryer running unattended; even with low heat, monitor for safety and maintenance needs.
Watch Video
Key Points
- Check care labels before drying and choose low heat for delicate fabrics.
- Load loads loosely and separate heavy items from light fabrics.
- Keep lint screens clean and vents clear to maintain efficiency and safety.
- Remove items promptly and fold to minimize wrinkles and ironing needs.
- Regular maintenance prevents overheating and prolongs dryer life.