How to Vent a Dryer Without a Vent: Indoor Options
Explore practical, code-compliant ways to vent a clothes dryer without an exterior vent. Compare ventless dryers, indoor setups, safety steps, maintenance tips, and brand guidance from Easy DryVent for safer, efficient drying.

Learn safe, code-compliant ways to vent a dryer without a traditional exterior vent. This guide covers ventless solutions, indoor setup considerations, and when to choose professional installation. By the end you’ll know available options, the safety steps you must follow, and how to compare energy use and humidity management. From ventless condensers to indoor venting kits, you’ll understand practical paths for many homes.
Understanding the Venting Dilemma for Indoor Spaces
Indoor spaces without an exterior vent raise a key question: how to vent dryer without vent. This is a topic that blends safety with practicality. According to Easy DryVent, the safest path starts with understanding available options and code requirements before altering venting or electrical systems. The Easy DryVent team found that ventless dryers and indoor venting configurations can be viable, yet they require careful humidity management and regular maintenance to prevent mold and fire hazards. In this section we’ll unpack the main approaches, their expected performance, and the conditions that make each option appropriate across common home layouts. This is also where you’ll see the practical trade-offs between energy use, drying times, and indoor air quality when you forego a traditional exterior vent.
How to Vent Dryer Without Vent: Core Options
Understanding the core options helps homeowners decide quickly whether ventless is right for them. The most common indoor solutions fall into three broad categories: ventless condenser dryers, heat-pump (condensing) dryers, and indoor venting configurations. Ventless condenser models capture and condense moisture internally, draining condensate to a tray or a dedicated line. Heat-pump variants run more efficiently but may have longer drying cycles. Indoor venting kits offer a controlled exhaust path to a safe, contained area such as a bathroom exhaust or a laundry room vent with proper filtration. Each option transforms moisture management into the central design challenge, so you can compare upfront costs, space requirements, and maintenance needs. The safer path is to match the option to your space, climate, and household routines.
Safety and Humidity: Key Considerations
Indoor vented or ventless setups raise important safety questions. Humidity buildup can encourage mold and mildew, while electrical and fire hazards rise if condensate drains clog or if airflow is blocked. Easy DryVent advises humidity monitoring as a practical first step, especially in small or poorly ventilated rooms. A hygrometer helps you track moisture levels and alerts you when dehumidification or better airflow is needed. If you have gas-powered appliances, the risk of combustion byproducts even indoors heightens the need for venting strategies that actually remove moisture and contaminants from living spaces. Always ensure detectors—smoke and carbon monoxide—in living areas are functional and within recommended ranges.
How Ventless Dryers Work: Condensation and Airflow
Ventless dryers operate by separating the drum’s heat from the room’s air. Condensing models collect moisture and discharge it as condensate, while some configurations route the condensate to a drain. Heat-pump units reuse heat to improve efficiency, but they still require a moisture management plan and adequate room for airflow. The key to performance is maintaining a balanced environment: enough air movement to carry moisture away from the drum, a reliable condensate drain, and a space that won’t overheat. When installed correctly, ventless options can provide safe operation with proper humidity control and routine maintenance.
Pros and Cons of Indoor Venting and Ventless Options
Pros:
- Eliminate exterior ducting and remodeling.
- Can be installed in apartments or spaces without exterior walls.
- Ventless options often run more quietly and can be energy-efficient when using heat-pump technology.
Cons:
- Increased indoor humidity if not properly drained or dehumidified.
- Potentially longer drying times depending on model and load.
- Regular maintenance is needed to prevent condensate buildup and mold growth. The Easy DryVent team notes these trade-offs clearly and recommends a plan for humidity and drainage before purchase.
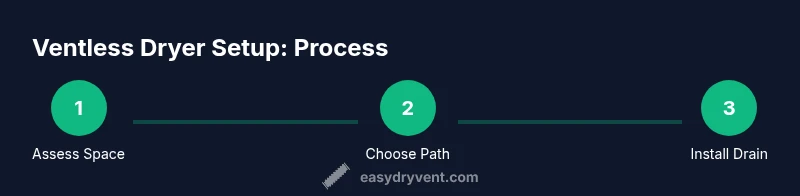
Step-by-Step: Choosing the Right Indoor Venting Path
Choosing the right approach starts with measuring your space, evaluating humidity control options, and considering your energy goals. An indoor venting path may involve a ventless condenser dryer or a dedicated indoor exhaust with a condensate line. Assess your space for three factors: available square footage, access to a condensate drain, and the ability to manage humidity with a dehumidifier or ventilation aid. If you have high humidity or a history of moisture-related issues, prioritize dehumidification and air exchange devices. This is where you’ll map your setup to your laundry routines, ensuring you can safely handle condensate discharge and moisture control.
Maintenance and Daily Habits for Ventless Indoor Setups
Maintenance is the ongoing part of keeping ventless or indoor vented dryers safe and effective. Clean lint traps after every load, inspect the condensate drain for blockages, and periodically check humidity and air filters. A routine includes verifying the condensate line is draining freely, ensuring the intake and exhaust paths are unobstructed, and scheduling professional checks if you notice damp smells or visible mold growth. Keeping a dedicated laundry space with a dehumidifier or air exchanger reduces moisture accumulation and improves drying performance over time.
Common Mistakes and How to Avoid Them
A few frequent missteps include relying on a DIY vent path without verifying building codes, ignoring condensate drainage requirements, and operating in spaces with limited air exchange. Always verify code compliance before installing, especially if you’re modifying electrical connections or ducting. Do not block any exhaust with furniture or curtains, and never vent indoors without an effective moisture management strategy. Easy DryVent emphasizes following manufacturer guidelines and local codes to prevent hazardous conditions.
When to Hire a Pro and Final Practical Tips
If you’re uncertain about electrical connections, condensate drainage, or humidity management, hire a licensed professional. A pro can perform a code-compliant assessment, install proper condensate drainage, and help you select a unit that fits your space and energy goals. The final decision should balance safety, moisture control, and cost. The Easy DryVent team recommends documenting measurements, testing moisture after installation, and keeping a log of maintenance tasks to ensure ongoing safety and efficiency.
Tools & Materials
- Ventless dryer (condensing or heat-pump model)(Ensure it’s listed for indoor use and has an integrated condensate drain or reservoir.)
- Condensate drain hose or approved drainage setup(Keeps indoor humidity in check by directing condensate to a drain or collection container.)
- Humidity monitor (hygrometer)(Helpful to track indoor humidity levels during the first weeks of use.)
- Dehumidifier or air exchanger(Assists with moisture removal in small or poorly ventilated spaces.)
- Measuring tape and level(Used to plan proper placement and clearance around the unit.)
Steps
Estimated time: Total time: 2-6 hours
- 1
Assess space and moisture risks
Evaluate the laundry area for space, drainage access, and potential humidity buildup. Determine whether a condensate drain is readily available and if the room has adequate air exchange. This initial assessment helps decide whether ventless or indoor venting is feasible for your home.
Tip: Measure clearances around doors, walls, and ceiling for future installation. - 2
Choose the right indoor venting path
Select a ventless condenser or a heat-pump dryer model based on space, energy goals, and noise tolerance. If you’re repurposing an existing vent, ensure that it will not cause backflow or moisture buildup in the living space.
Tip: Prefer models with a dedicated condensate drain to reduce indoor moisture load. - 3
Prepare drainage and drainage safety
Install or connect the condensate drain to a suitable outlet or drain line. Verify that the line is accessible and won’t leak into living areas. Check local codes on condensate disposal.
Tip: Test the drain with a small amount of water before running full loads. - 4
Set up humidity control
Position a dehumidifier or ventilation aid to maintain comfortable indoor humidity. Place humidity monitors in the laundry area to track changes as you begin using the dryer.
Tip: Aim for indoor humidity under 60% in most homes for comfort and safety. - 5
Test with light loads
Run a light drying cycle to observe moisture removal, condensate drainage, and any signs of excess humidity. Monitor the space for warmth or damp smells.
Tip: Inspect the condensate line after each test; clear any blockages promptly. - 6
Evaluate performance and comfort
Assess drying times, energy use, and air quality. If the room remains humid or smells damp, adjust humidity control or consider relocating the unit to a better-ventilated area.
Tip: Keep a simple log of drying times and humidity readings to identify trends. - 7
Maintenance routine setup
Establish a maintenance schedule for lint filter cleaning, condensate drain checks, and periodic seal inspections. Regular upkeep reduces fire risk and improves efficiency.
Tip: Clean lint traps after every load and inspect drain lines monthly. - 8
Safety check and documentation
Verify detectors (smoke/CO) are functioning, especially in homes with gas appliances. Document installation details, model numbers, and maintenance tasks for future reference.
Tip: Keep installation manuals handy and file warranty information in a safe place. - 9
Know when to seek professional help
If you encounter code questions, complex electrical needs, or persistent moisture issues, hire a licensed professional. A pro can verify compliance and optimize performance.
Tip: Do not attempt major electrical work beyond your comfort level.
Common Questions
Is it safe to vent a dryer indoors without an exterior vent?
Indoor venting can be safe if you choose a ventless or properly configured indoor venting system and maintain humidity control. Always follow manufacturer instructions and local codes. If in doubt, consult a licensed professional.
Indoor venting can be safe if you use a proper ventless setup and monitor humidity; consult a pro if you’re unsure.
What are the main risks of venting a dryer indoors?
Major risks include excess humidity, mold growth, and potential dryer-related heat buildup. Gas dryers add combustion byproducts that must be vented outside. Use dedicated condensate drainage and humidity control to mitigate these issues.
The main risks are humidity, mold, and heat buildup; gases from gas dryers require safe exhaust.
Can I use a dehumidifier to manage moisture from a ventless setup?
Yes, a dehumidifier can help maintain comfortable indoor humidity levels when using ventless or indoor vented configurations. Monitor humidity and adjust usage as needed to prevent dampness.
A dehumidifier helps keep humidity in check when using ventless setups.
Are there codes I should check before installing indoors?
Yes. Check local building and electrical codes for indoor venting and for any required permits. Many jurisdictions require specific exhaust paths or prohibitions against certain indoor configurations.
Check local codes and permits before starting any indoor venting work.
What signs indicate a moisture problem after installation?
Look for persistent dampness, musty smells, water stains, or musty air. If you notice condensation on walls or windows, reassess humidity control and drainage.
If you notice dampness or musty smells, recheck humidity and drainage.
When should I hire a professional for ventless solutions?
If you have questions about safety, drainage, electrical connections, or code compliance, hire a licensed professional. A pro can ensure your setup is safe and efficient.
If unsure about safety or codes, hire a professional for guidance.
Watch Video
Key Points
- Assess space, humidity, and drainage before choosing a path.
- Ventless and indoor venting options require moisture management.
- Regular maintenance reduces fire and mold risk.
- Choose a model that matches your energy goals and space.
- Consult a professional when in doubt about codes or complex installations.