When Is a Dryer Too Full? Safe Load Guidelines
Learn how to tell when a dryer is too full, why overloads slow drying and raise safety risks, and how to load clothes correctly. Easy DryVent provides practical, step-by-step guidance for safer, more efficient drying.

A dryer is too full when clothes fill the drum so tightly that there’s little space for movement, causing tangling, uneven drying, and longer cycles. Always leave space for tumbling; use about three-quarters of the drum as a general rule, and adjust for bulky items or dense fabrics. This simple check helps protect against wasted energy and fire risk.
What counts as a full load: capacity and safety
Understanding when a dryer is too full starts with respecting the basic principle of air and movement. A properly loaded drum leaves space for clothes to tumble and permit hot air to circulate freely. When clothes are packed tightly, fabric strands intertwine, airflow becomes restricted, and moisture cannot escape efficiently. This not only extends drying times but can also lead to heat buildup. According to Easy DryVent, recognizing safe loading is a practical habit that reduces energy use and lowers the risk of lint buildup and overheating. By prioritizing space to move, homeowners can maintain dryer performance and extend the life of their appliance. The goal is to balance efficient drying with fabric care, avoiding overpacking and frequent re-drying.
Visual cues that the drum is overloaded
spotting an overloaded drum isn’t always obvious at a glance. Look for signs such as clothes bunching in the center, missing spinning motion on start, or bulging items that leave very little room to move. If you notice the door seals feel unusually warm after a cycle or if you hear the drum struggle to rotate, the load is likely too large. Based on Easy DryVent analysis, these cues correlate with longer cycles, increased energy use, and suboptimal fabric care. When in doubt, remove a few items and run a shorter test load to compare results.
How overloading affects drying performance and energy use
Overloading a dryer forces the machine to work harder to circulate hot air, which reduces efficiency and prolongs each cycle. The dryer may require multiple passes to reach the desired dryness, and fabrics may emerge damp or with creases from being pressed together. This not only wastes energy but also increases wear on textiles. Proper loading helps airflow, promotes even tumbling, and minimizes heat buildup. Easy DryVent emphasizes that a well-balanced load dries more evenly, preserves fabric integrity, and delivers better results with less energy consumption.
Safe loading guidelines for fabric types (without model-specific numbers)
Different fabrics respond differently to heat and tumbling. For bulky items like towels and blankets, prioritize a looser arrangement that allows air to move between pieces. For dense fabrics such as jeans or terry, consider smaller, distributed piles rather than a single heavy clump. Lightweight synthetics and activewear should be mixed with other items to prevent air pockets and uneven drying. The general rule remains: give clothes room to tumble, avoid large fabric clumps, and re-distribute items if you notice uneven dryness after a test cycle. These practices help avoid overheating and keep your laundry routine efficient.
Practical test you can perform before starting a cycle
Before starting a full cycle, do a quick load check. Place the items loosely in the drum and attempt to rotate them by hand; if they feel packed or resist movement, reduce the load. A short, low-energy test run can reveal whether the items tumble freely and dry evenly, indicating an appropriate capacity. If parts of the load stay damp after a brief test, re-distribute and rerun a smaller load. This approach minimizes wasted energy and protects clothing from heat damage.
Venting and lint considerations when loads are large
Load size affects more than dryness — it also influences venting. A too-full drum can push more moisture toward the lint screen, potentially accelerating lint buildup in ducts. Regularly cleaning the lint filter before every cycle remains essential, and scheduling occasional vent inspections ensures airflow remains unobstructed. Easy DryVent notes that clean air pathways improve efficiency and reduce the chance of overheating due to restricted airflow.
Maintenance habits to prevent overloads
Create a routine to check loading habits alongside vent cleanliness. Keep a simple checklist: confirm fabrics are distributed evenly, ensure the lint screen is clear, and perform periodic vent cleanings. Keeping these habits steady helps protect your dryer from undue wear and keeps cycles efficient. By integrating these steps into your regular laundry routine, you reinforce safer, smarter drying practices.
Common mistakes to avoid and quick fixes
Avoid stuffing the drum to the brim or mixing vastly different fabric weights in a single load. When in doubt, split large loads into two smaller cycles. If a cycle consistently under-dry, re-balance the load and consider a longer final tumble with a lower heat setting. The Easy DryVent team recommends treating each load with care and adjusting based on observed results rather than guessing capacity.
Tools & Materials
- Dryer owner's manual(Consult model-specific capacity and care instructions)
- Lint brush or vacuum with hose attachment(Use to inspect lint trap and nearby ducts)
- Flashlight(Helpful for inspecting drum edges and vent openings)
- Heat-safe gloves(Use if you handle warm components after a cycle)
- Measuring tape or fabric weights(Optional tools to estimate load distribution)
Steps
Estimated time: 20-30 minutes
- 1
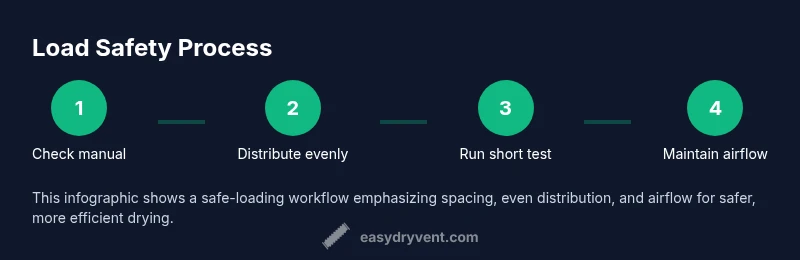
Check the manual for capacity and configuration
Read the manufacturer recommendations for load size and fabric guidance. This helps you establish a baseline so you don’t rely on guesswork when loading.
Tip: Know the approximate drum capacity in real terms (e.g., “about three-quarters full” rather than guessing). - 2
Distribute items evenly around the drum
Place similar items in a balanced, circular layout so they can tumble freely. Avoid piling heavy items in one spot that blocks airflow.
Tip: Light fabrics should fill around heavier items to promote even drying. - 3
Perform a quick hand-rotation test
Gently rotate the drum by hand to ensure items move easily. If they resist, remove a few pieces and try again.
Tip: If a test load moves freely, you’re likely at a safe loading level. - 4
Run a short test cycle with a small portion of the load
Choose a quick drying setting and observe whether moisture escapes evenly. Damp areas indicate uneven distribution or too much load.
Tip: Use a low-heat setting for initial checks to protect fabrics. - 5
Evaluate the dryer's performance and adjust
If the cycle ends quickly and clothes feel warm and dry, the load sizing was appropriate. If you still see damp areas, re-distribute or split the batch.
Tip: Track outcomes across several cycles for better habit formation. - 6
Maintain airflow by cleaning the lint filter and vents
Clean the lint screen before every cycle and inspect vents periodically for obstructions that could impede airflow.
Tip: A clean path improves efficiency regardless of load size. - 7
Adopt a regular maintenance cadence
Incorporate load assessment and vent checks into routine laundry days. Consistency prevents accidental overloads.
Tip: Use a simple weekly checklist to stay on track.
Common Questions
How do I know if my dryer is overloaded?
Signs include clothes that don’t tumble freely, longer drying times, and warmth near the drum after cycles. If you notice these cues, reduce the load and redistribute items for better airflow.
Signs include tangled clothes and longer cycles. If you notice warmth after a cycle, re-distribute the load.
Can I dry bulky items with a full load?
Bulky items should not crowd a full load. Place bulky items in portions or separate cycles to ensure air can flow around every piece.
Bulky items need space. Consider splitting the load for even drying.
What happens if I ignore overload symptoms?
Ignoring overload signs can waste energy, shorten appliance life, and increase fire risk due to heat buildup and lint buildup.
Ignoring signs wastes energy and may be unsafe.
Is it better to run smaller loads more often?
Yes. Smaller, well-distributed loads dry more evenly and efficiently, reducing cycle time and wear on fabrics.
Smaller, even loads dry more efficiently.
How can I save energy when drying large loads?
Optimize load distribution, clean lint filters, and schedule vent maintenance. When in doubt, split the load to maintain airflow.
Distribute loads evenly and keep vents clean to save energy.
Watch Video
Key Points
- Load clothes with space to tumble and air flow.
- Overloading leads to longer cycles and wasted energy.
- Distribute items evenly and perform quick test loads.
- Maintain lint filters and vents to sustain airflow.
- Follow model guidance and develop a regular maintenance routine.