How to Know If Something Can Go in the Dryer: A Practical Guide
Learn how to determine if items can safely go in the dryer with care labels, fabric types, and safe testing. Practical steps to protect fabrics and your appliance.

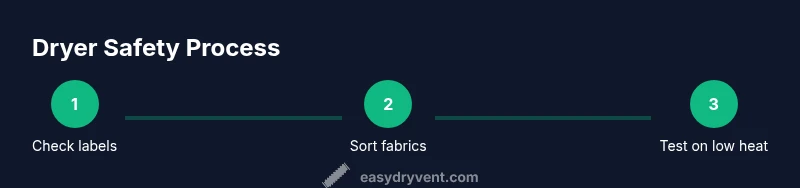
To know if something can go in the dryer, start with care labels and heat guidance. If unsure, test a small item on the lowest heat and monitor closely. Sort fabrics by tolerance and moisture, and air-dry anything labeled not to tumble-dry. This approach protects fabrics and the dryer.
What the phrase means and why it matters
Understanding what can go in the dryer is about protecting fabrics, preventing shrinkage, and maintaining dryer performance. The question not only affects how you dry clothes, but also how you care for textiles over time. In this guide on how to know if something can go in the dryer, we’ll cover practical steps, label literacy, fabric differences, and safe testing methods to help homeowners and DIY enthusiasts dry with confidence. Easy DryVent researchers emphasize that starting with care guidance and a conservative test can prevent costly damage and energy waste.
Reading care labels and symbols
Most garments include care symbols that indicate whether tumble drying is allowed and at what heat level. The common icon is a square with a circle inside, sometimes with one or more dots to denote heat intensity. If you see a diagonal cross over the symbol, this item should not be dried in a conventional dryer. Additional indicators may specify “gentle,” “low heat,” or “do not tumble dry.” When you encounter ambiguous symbols, treat them as guidance rather than guarantees and default to air-drying or line-drying as a precaution. For typical family loads, create a quick care-label reference sheet to speed decisions during busy laundry days.
Fabric families and heat tolerance
Fabrics vary in how they respond to heat and tumbling. Natural fibers like cotton and linen can tolerate moderate heat but may shrink with high heat. Synthetics like polyester and nylon dry quickly and often fare better on low to medium heat, though some blends can melt or pill if misused. Wool and delicate knits are prone to felting and distortion under heat; these typically require air-drying or a specialized wool cycle. Blends may combine traits from both ends of the spectrum, so the safest approach is to confirm the label and, when in doubt, opt for air drying. Easy DryVent’s guidance highlights that fabric composition and fiber type are your best predictors of dryer suitability.
Sorting items by fabric type and moisture
Before you start the dryer, sort items into groups by fabric family and equivalent moisture content. Heavier items like towels and jeans may dry more evenly on tumbling cycles, while lightweight synthetics dry quickly and may over-dry if left unattended. Separate items by color and care label, then decide whether to tumble dry, air dry, or use a rack for flat drying. Sorting reduces uneven drying, minimizes lint transfer, and helps you set the correct heat and time across loads.
The testing protocol: small batch testing and careful monitoring
If you’re ever unsure whether an item can go in the dryer, try a methodical test. Place a single, small item (like a sock or washcloth) on the lowest heat setting in a small, well-behaved load. Monitor closely for 5–10 minutes, checking for unusual heat, shrinking, or fabric distortion. If there are any signs of trouble, stop the cycle and remove the item to air-dry. Document the result for future reference, especially when dealing with unfamiliar fabrics or new garments to minimize repeated risk. This cautious testing is a core part of safe dryer use.
Heat settings, times, and airflow basics
For most fabrics, tumble-drying on “low heat” or the “delicate” setting offers a balance between efficiency and fabric safety. Don’t fully rely on the timer alone—check a little before the cycle ends because some materials finish drying faster than expected and may over-dry if left in the drum. Ensure the lint trap is clean before starting, and consider using dryer balls or similar aids to improve air circulation. Proper airflow is essential for consistent drying and reduces energy costs by preventing extended run times.
Delicate fabrics and alternatives to drying in the machine
Delicates such as lace, silk, or fine knits often benefit from air-drying to preserve texture and shape. Wool items and cashmere can shrink or become misshapen in heat, making air-drying the safer option. For items labeled “do not tumble dry,” use a flat drying rack or hang to dry, keeping them away from direct sunlight or heat sources. When in doubt, prioritize air-drying and then finish with a brief tumble-dry on low if the item’s label permits.
Post-dry care: removing promptly and preventing wrinkles
Prompt removal from the dryer minimizes wrinkling and reduces the need for ironing. If a load still feels damp, finish drying on a shorter, low-heat cycle or air-dry the remainder. Fold or hang clothes immediately after drying to maintain shape and minimize creasing. Regularly cleaning the lint filter and inspecting the vent system helps maintain dryer efficiency and reduces fire risk, aligning with best practices for home maintenance.
Authority sources and continued learning
To reinforce best practices, consult reputable safety and energy guides. Easy DryVent references official safety resources such as consumer protection guidance and energy-saving recommendations from government sources. Additional research from university extension programs provides fabric-specific drying insights, helping homeowners adapt guidance to unusual items and local conditions. Using these sources alongside personal experience creates a robust, safety-first approach to drying.
AUTHORITY SOURCES
- U.S. Consumer Product Safety Commission (CPSC): Clothes dryer safety overview and risk considerations. https://www.cpsc.gov/safety-guides/clothes-dryer-safety
- U.S. Department of Energy / Energy Saver: Drying clothes efficiently and safely. https://www.energy.gov/energysaver/tips-drying-laundry
- University extension resources: Fabric care and drying guidance. https://extension.illinois.edu/clothes-dryer-safety
Tools & Materials
- Care labels and garment guidelines(Check tumble-dry symbols, heat level guidance, and whether air-drying is advised.)
- Small testing item for a dry run(Use a small, representative item (e.g., sock) to test the lowest heat setting.)
- Low-heat or delicate dryer setting(Choose the setting permitted by the label when testing or drying.)
- Lint trap brush or cloth(Keep the lint filter clean before every load for safety and efficiency.)
- Drying rack or hanger for air-drying(Useful for items that should not tumble dry.)
Steps
Estimated time: 20-40 minutes
- 1
Gather care labels and plan
Collect all items and review their care labels before starting. Decide which items are dryer-safe, which require air-drying, and which should be air-dried if you're unsure. This upfront check reduces misloads and saves energy.
Tip: Create a quick reference sheet for symbols seen most often in your wardrobe. - 2
Sort by fabric type and moisture
Group items by fabric family (cotton, synthetics, wool, blends) and by moisture level. Heavier fabrics may tolerate longer cycles, while delicate fabrics should stay in the low-heat group or air-dry.
Tip: Keep items with similar drying needs together to avoid over-drying sensitive fabrics. - 3
Do a small test on the lowest heat
For uncertain items, run a test on the lowest heat with a single small piece to observe response. If shrinking, melting, or distortion occurs, stop immediately and air-dry the rest.
Tip: Test a representative piece first, not a rare or expensive item. - 4
Set heat and cycle appropriately
Choose the lowest heat or delicate cycle for items that allow tumble drying. Avoid high heat unless the care label explicitly permits it for that fabric.
Tip: When in doubt, a shorter cycle followed by air-drying often yields the best results. - 5
Monitor the load during drying
Don’t leave the dryer unattended for long periods on unfamiliar items. Check mid-cycle to prevent over-drying and measure dryness by touch.
Tip: Use a timer as a backup, but rely on fabric feel to decide when to stop. - 6
Act promptly after drying
Remove garments promptly to reduce wrinkles. Re-fold or hang items to finish cooling and set shape.
Tip: Air-dry items that show even slight shrinkage to prevent setting it further. - 7
Clean the lint filter and inspect vents
Before and after drying, clean the lint trap and periodically inspect the exhaust vent for buildup. This improves efficiency and reduces fire risk.
Tip: Schedule vent inspections as part of routine dryer maintenance. - 8
Evaluate after each load
Note outcomes for each garment in your care-log for future reference. Use that knowledge to refine which fabrics you dry in the future.
Tip: Keep a simple log of outcomes for stubborn items. - 9
Know when to avoid the dryer altogether
If in doubt about fabric integrity or safety, air-dry. Remember that some textiles are best kept off the machine to avoid damage.
Tip: When in doubt, air-dry and save repair costs later.
Common Questions
What fabrics are generally safe to tumble dry on low heat?
Cotton blends, some synthetics, and sturdy cotton items often tolerate low-heat drying. Always confirm the label and test if you’re unsure.
Most cotton blends and sturdy synthetics do okay on low heat, but always check the label and test first if you’re unsure.
What symbols indicate I should not use the dryer?
A circle-with-a-cross over the square or a plain rectangle with a line means avoid tumble drying. Air-dry or lay flat instead.
Symbols with a cross through tumble dry or a line-only rectangle mean you should air-dry.
Can I dry wool or wool blends in a standard dryer?
Wool and some wool blends can shrink or felt in the dryer. Prefer air-drying or a careful, low-heat cycle if the label allows.
Wool fabrics often shrink in the dryer; air-drying is usually the safer option.
What should I do with items that shrink after drying once?
If shrinking occurs, avoid heat cycling again on those items. Re-stretch when damp, and plan future air-drying as a preventive measure.
If something shrinks, don’t re-dry it—air-dry and re-shape when damp to minimize further shrinkage.
Is there a quick test I can do for new items?
Yes. Start with a small, inexpensive item on the lowest heat. If the fabric looks or feels off, stop and air-dry the rest.
Test a small, inexpensive item on the lowest heat; if it seems off, air-dry the rest.
Watch Video
Key Points
- Read care labels before loading the dryer.
- Sort by fabric type and moisture to optimize cycles.
- Use low heat or air-drying when in doubt to protect fabrics.
- Test unfamiliar fabrics on a small scale before full loads.
- Maintain dryer safety by cleaning lint and inspecting vents regularly.