LG TrueSteam Dryer Maintenance Guide
Learn practical maintenance for LG TrueSteam dryers, including vent care, lint removal, steam-cycle usage, and safe operation to boost efficiency and prevent hazards.

With an lg true steam dryer, you can keep performance safe and efficient by cleaning vents, clearing the lint trap, and using steam cycles correctly. This guide covers practical maintenance steps, safe vent care, and routine inspections to reduce drying times and fire risk while extending the appliance’s life. Follow these steps to protect your home and keep the lg true steam dryer performing at its best.
Understanding the LG TrueSteam Dryer
The lg true steam dryer family uses steam-assisted cycles to refresh fabrics, reduce wrinkles, and shorten ironing time. While model features vary, the general benefits include smoother loads, better odor control, and improved drying consistency when airflow remains unobstructed. According to Easy DryVent, regular maintenance is essential to preserve steam performance and safe operation. The Easy DryVent Team found that keeping vents clear and lint traps clean helps the dryer heat evenly and avoid unnecessary runtime. For homeowners and DIY enthusiasts, knowing how to inspect vents, clean traps, and use steam cycles correctly can translate into safer operation and longer appliance life. The key is consistency: set a simple routine, and stick with it.
blockNoteNotUsed
Tools & Materials
- Lint screen brush(For thorough removal of lint from the trap and around its housing)
- Vacuum with narrow nozzle attachment(Clean the lint trap housing and vent path without dislodging components)
- Screwdrivers (Phillips and flathead)(To check and reseat vent clamps or access panels if needed)
- Flashlight(Inspect dark vent corners and duct joints)
- Gloves and mask(For handling dusty areas and protecting from irritants)
- Replacement vent hood cap or exterior vent cover(On exterior side if damaged or blocked)
Steps
Estimated time: 60-90 minutes
- 1
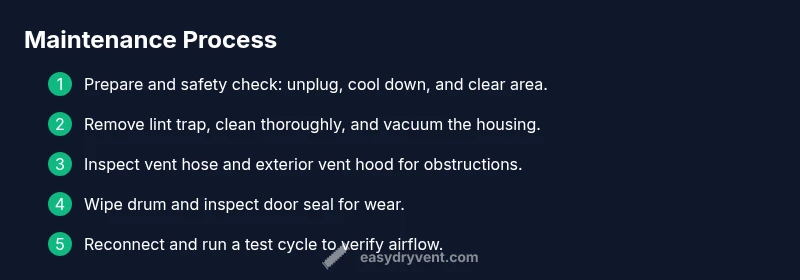
Unplug and prepare
Power off the dryer and unplug from the outlet. Gently pull the unit away from the wall to access the back and vent. Allow any hot components to cool completely before you begin any inspection or cleaning.
Tip: Keep pets and kids away; use a flashlight to reveal hidden lint pockets. - 2
Remove and clean the lint trap
Take out the lint screen and wipe off all lint. Use a vacuum or brush to clean the lint trap housing where lint can accumulate. Rinse only if the manufacturer permits; always dry completely before reinstallation.
Tip: Cleaning after every load maintains optimal airflow and drying efficiency. - 3
Inspect and clean the vent hose
Disconnect the vent hose if accessible and vacuum the interior and joints. Check for kinks, crush points, or wear; replace damaged sections. Reattach securely to prevent leaks and ensure airtight connections.
Tip: Do not crush or crush bends sharply—maintain a smooth path for airflow. - 4
Check the exterior vent hood
Go outside and verify the vent hood is clear of debris, such as leaves or bird nests. Remove obstructions gently and wipe the hood and cover to promote proper exhaust flow. Ensure the exterior cap is tightly sealed to minimize backdrafts.
Tip: Clear the hood at least twice a year, more often in dusty or windy areas. - 5
Clean the drum and door seal
Wipe the drum interior with a damp cloth to remove residue, then inspect the door seal for cracks or wear. If you notice damage, plan a professional service call or consult the manual for replacement guidance.
Tip: A clean drum helps prevent fabric pilling and improves drying consistency. - 6
Test run and observe performance
Plug the unit back in and run a short cycle on a standard load. Listen for unusual noises and observe whether clothes come out evenly dry. If you notice persistent issues, consult the manual or contact support.
Tip: Document any error codes; they guide troubleshooting and repairs.
Common Questions
How often should I clean the lint trap?
Clean the lint trap after every load to maintain airflow and drying efficiency. A dirty trap can extend drying times and increase energy use.
Clean the lint trap after every load for best performance.
Can I rinse or wash the lint trap?
Most lint traps are designed to be cleaned with a brush or vacuum. Check your manual before washing; some traps may allow a quick rinse and thorough drying.
Check the manual before washing the lint trap.
What signs indicate a clogged vent?
Longer drying times, clothes staying damp, and visible lint around the vent area can indicate restricted airflow. Inspect both the interior and exterior portions.
If drying takes longer than normal, check the vent path for obstructions.
Is it safe to run the dryer during maintenance?
Yes, as long as the dryer is unplugged during internal inspections. Reconnect and run a test cycle to confirm proper operation afterward.
Unplug during internal checks; test the dryer after reassembly.
Can steam cycles damage certain fabrics?
Steam cycles are generally safe for many fabrics, but delicate or heat-sensitive items may require reduced steam or a shorter cycle. Always check garment care labels.
Check care labels before using steam on delicate fabrics.
Watch Video
Key Points
- Regular vent and lint trap maintenance improves safety and efficiency
- Inspect exterior vent hood and ducting for obstructions
- Use steam cycles appropriately to protect fabrics and reduce wrinkles
- Document and address any unusual noises or error codes