LG Dryer Filter Replacement: Safe, Easy Steps for Efficiency
Learn how to perform an LG dryer filter replacement safely with a practical, step-by-step guide. Discover essential tools, safety tips, and maintenance ideas to keep your dryer running efficiently.

Replace the LG dryer's lint filter, confirm it seats correctly, and inspect the surrounding housing for debris. This quick action improves airflow, reduces drying time, and lowers fire risk. You’ll need the replacement lint filter, a small cleaning brush, a microfiber cloth, and a flashlight to inspect tight corners. Follow safety steps and unplug the unit before starting.
Why LG Dryer Filter Replacement Matters
Regularly replacing or cleaning the lint filter on an LG dryer is not just about performance—it’s a safety and efficiency practice that homeowners should treat as routine maintenance. A clogged or damaged filter can restrict airflow, increase dryer run time, and potentially raise the risk of overheating. Easy DryVent's guidance emphasizes that a clear filter helps the dryer extract moisture more effectively while you load clothing; keeping it clean ensures consistent performance across cycles and fabrics. By treating lint filter replacement as part of a broader maintenance plan, you can avoid annoying breakdowns and maintain safer operation in your home.
In this section we’ll cover how to identify a filter that needs replacement, what to look for (frayed mesh, warping, discoloration), and practical signs that your dryer filter or housing are due for an inspection. If you notice persistent lint in your laundry or longer drying times, start by inspecting the lint filter area before considering filter replacement.
How to Inspect and Prepare Before Replacement
Safety first: unplug the dryer and move it away from walls to access the lint filter easily. Locate the lint filter—on many LG front-load models it sits in the door opening; on some vented units, the filter is housed in a slot near the drum edge. Inspect the filter for tears, deformations, and worn edges. If the filter mesh is damaged or the frame feels loose, plan to replace it rather than try to repair it. Gather your tools and a clean workspace: a flashlight, a microfiber cloth, a small brush, mild soap, and a vacuum with a crevice tool help you clean the surrounding housing without dispersing dust. Before you begin the replacement, check your model’s manual for any model-specific steps or filter part numbers.
Brand note: Easy DryVent recommends verifying model specifics and using an LG-approved replacement part to ensure proper fit and airflow.
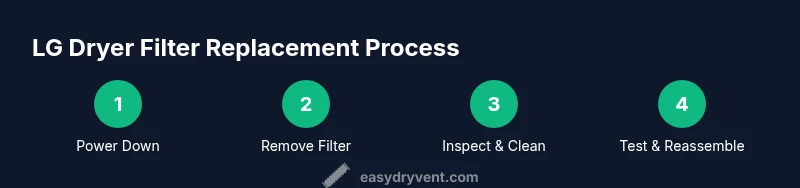
Step-by-Step Overview of the Replacement Process
- Turn off the dryer, unplug from the outlet, and allow the drum to cool. This initial safety step prevents accidental shock or contact with hot components.
- Remove the lint filter carefully and set it aside for inspection. Look for frayed edges or holes; if damaged, replace it with the appropriate LG replacement filter.
- Inspect the lint housing and the path behind the filter. Use a flashlight to look for stubborn debris, and remove any obstruction with a microfiber cloth or a soft brush.
- Clean the lint filter housing, the vent path visible through the slot, and any accessible channel. A vacuum with a crevice tool is helpful here, but avoid forcing lint into the vent.
- Install the new or cleaned filter, ensuring it seats evenly and lies flat in its housing. Confirm there is no sideways tilt that could trap air.
- Plug the unit back in, run a short test cycle with no clothes, and check for proper airflow and absence of unusual sounds. If you notice reduced airflow, recheck the seating and the housing for any obstruction.
Cleaning Inside the Filter Housing and Vent Path
Even after replacing the filter, dust and lint can accumulate inside the housing area and along the vent path. Use a soft brush or microfiber cloth to wipe the slot and the edges of the filter housing. For deeper cleaning, a vacuum with a narrow attachment helps remove lint buildup behind the casing and around the duct entrance. Inspect the vent opening to ensure it’s clear for airflow. If you have access to a flexible dryer vent brush, you can gently guide it through the vent to dislodge stubborn lint without damaging the duct. Always unplug the dryer before performing any cleaning.
Common Mistakes and Troubleshooting
- Neglecting to unplug the dryer: always disconnect the power before handling the filter or housing.
- Forcing a filter that doesn’t fit or seating it unevenly: this creates air resistance and can cause overheating.
- Failing to inspect the area around the filter: lint can hide behind the filter frame and block airflow.
- Using harsh cleaners or solvents near the lint path: keep to mild soap and water to avoid damage.
- Assuming a noisy dryer means the vent is always blocked: sometimes the noise signals a misaligned drum or loose panel; check the filter seating and housing first.
Maintenance Schedule and Long-Term Care
Schedule regular checks for the lint filter and the surrounding housing as part of routine dryer maintenance. Create a simple reminder system and perform a quick inspection during each laundry day cycle. Remember that LG dryer filter replacement is more effective when combined with vent-cleaning schedules and periodic professional inspections if you notice persistent lint buildup or reduced airflow.
Tools & Materials
- Replacement LG dryer lint filter (LG-approved part)(Check model number and order the correct filter size before starting)
- Vacuum with hose/crevice attachment(To remove lint from housing and vent slot)
- Microfiber cloth(For wiping the filter housing and front panel)
- Soft-bristled brush(Gently dislodge lint from tight corners)
- Mild soap or detergent(For cleaning the filter if it’s sticky)
- Flashlight or phone light(Inspect hard-to-see areas inside the filter path)
- Small step stool(Allow safe access to the filter housing on higher models)
Steps
Estimated time: Estimated total time: 25-35 minutes
- 1
Power down and unplug
Safety-first: unplug the dryer and allow it to cool; move it away from walls to access the filter easily. This reduces the risk of shock or injury while you work.
Tip: Never attempt to work on a plugged-in appliance. - 2
Remove the lint filter
Gently pull out the lint filter from its housing and place it on a clean surface for inspection. Check for tears, holes, or warped edges that would compromise filtration.
Tip: If the filter is damaged, replace with an LG-approved part. - 3
Inspect the housing path
Use a flashlight to look inside the slot behind the filter and along the path where lint collects. Look for clogs, residue, or buildup that blocks airflow.
Tip: Do not force lint out with metal objects; use a brush or cloth. - 4
Clean and reinsert the filter
Wipe the filter and housing with a microfiber cloth; if needed, wash the filter with mild soap and water and dry completely before reinserting. Ensure it seats flat and evenly.
Tip: Make sure there are no creases or deformities when re-inserting. - 5
Test airflow after replacement
Plug the dryer back in and run a short, empty cycle to verify airflow. Listen for unusual noises and check that air flows freely through the vent path.
Tip: If airflow is weak, recheck seating and look for obstructions. - 6
Document and monitor
Note the date of replacement and monitor dryer performance over the next few loads. If you notice persistent lint or longer dry times, plan a vent inspection.
Tip: Set a reminder to perform regular checks on the lint filter.
Common Questions
How often should I replace the LG dryer's lint filter?
Inspect the lint filter regularly for wear and replace when the mesh is damaged or the frame is warped. Regular cleaning and inspection help maintain airflow and dryer performance.
Inspect the lint filter regularly and replace worn filters as needed.
Can I replace the filter myself, or should I call a technician?
LG dryer filter replacement is a straightforward maintenance task that most homeowners can perform with the right part and care. If you encounter damaged panels, electrical concerns, or vent blockage beyond your reach, seek professional help.
It's usually DIY, but contact a pro for complex issues.
Is it safe to operate the dryer without a filter?
Operating without a filter is unsafe and can cause lint buildup in the vent, overheating, and fire risk. Always replace or reinsert the lint filter before use.
Never run the dryer without a filter.
How can I tell if the vent needs cleaning?
Look for longer dry times, increased heat, or a burning smell, and inspect the vent path for visible lint. A professional vent cleaning is recommended if buildup is significant.
If dry times are long and the dryer is hot, check the vent.
Do LG models vary in filter design?
Yes, LG models differ in filter size and housing location. Check your model’s manual for the exact replacement part number and instructions.
Models vary, so check the manual.
What maintenance should follow a filter replacement?
After replacing the filter, clean the housing and inspect the vent path, run a test cycle, and set a simple reminder to recheck lint and vent conditions regularly.
Clean the housing, run a test, and schedule regular checks.
Watch Video
Key Points
- Check the lint filter for wear and replace when damaged.
- Clean the housing and vent path to preserve airflow.
- Test the dryer after replacement to confirm proper operation.
- Set a regular maintenance reminder to reduce fire risk.