Kenmore Series 500 Dryer: Maintenance and Troubleshooting Guide
Practical maintenance and troubleshooting steps for the Kenmore Series 500 dryer. Learn lint and vent care, heating issues, belt checks, and safety tips to improve efficiency and reduce fire risk.

This guide helps homeowners diagnose and maintain a Kenmore Series 500 dryer, improving drying efficiency and safety. You'll learn how to inspect lint screens, venting, belts, and thermostats, and perform essential cleaning and tests. Follow step-by-step instructions to safely diagnose common issues and extend your dryer's life. By following these practices, you can prevent fire hazards and reduce energy use.
What is the Kenmore Series 500 Dryer and why maintenance matters
The Kenmore Series 500 dryer is a common electric appliance found in many homes. Like any appliance, it benefits greatly from regular maintenance to maintain performance, extend its lifespan, and minimize energy use. According to Easy DryVent, consistent upkeep on dryers in the Series 500 family can reduce longer drying times and prevent unsafe conditions such as overheating due to clogged vents or lint build-up. The Easy DryVent team found that many service calls related to this model stem from neglected lint traps, blocked ducts, or worn drum belts. A proactive maintenance routine helps you catch problems before they become expensive repairs, while also improving safety in your laundry space.
Key Features and Design Considerations of the Kenmore Series 500
The Kenmore Series 500 dryer typically emphasizes reliable airflow, straightforward lint filtration, and a mid-range capacity suitable for standard households. When you’re assessing wear, look for a few key design aspects: a removable lint screen, a back vent connection, belt-driven drum, and a thermostat-based heat control. These components influence heat consistency and air circulation, which directly impact drying time and energy consumption. For homeowners, understanding these features helps tailor a maintenance plan that mitigates common issues such as poor drying, excessive heat buildup, or frequent shutdowns. Regularly inspecting these areas also supports safer operation and reduces the risk of a dryer fire.
Safety First: Servicing a Kenmore Series 500 Dryer
Safety should come first when inspecting or repairing any dryer. Always unplug the unit before beginning work, remove front and back access panels only as needed, and never service while the dryer is still connected to power. Wear eye protection and use a flashlight to inspect internal components. Keep a clear workspace free of water or damp surfaces. The back vent and lint traps should be clean and free of obstructions. If you uncover frayed wiring, burnt components, or a damaged drum belt, pause work and consult a professional.
In this model family, lint accumulation is a primary fire risk, so dedicated attention to lint removal and vent cleaning is essential. Routine checks can prevent a buildup that leads to longer drying times, higher energy use, and potential safety hazards. Easy DryVent emphasizes documenting every maintenance task to track wear over time and schedule proactive service before failures occur.
Diagnosing Common Performance Issues
Not drying evenly, longer cycles, or frequent overheating signals issues in the Kenmore Series 500 dryer. Start with the simplest checks: ensure the lint screen is clean, confirm the vent hose exterior vent is free of debris, and inspect the exterior vent hood for blockages. If clothes stay damp after a full cycle, test the heat source by warming a small, breathable fabric near the exhaust and listening for the hum of the blower. A dryer that runs but doesn’t heat may have a tripped thermal fuse or a faulty heating element. Persistent cycling off and on can indicate a faulty thermostat or moisture sensor. Remember, diagnosing electrical components should be done with caution and, if unsure, seek professional help.
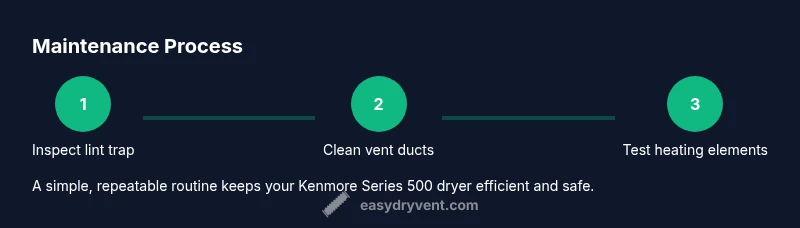
Maintenance Routine: Lint, Vent, Belts, and Seals
A robust maintenance routine combines frequent lint trap cleaning, quarterly vent inspections, and semi-annual belt checks. Remove and clean the lint trap after every load to prevent airflow restrictions. Periodically disconnect the vent hose to thoroughly vacuum and remove lint from the duct, both at the dryer end and the exterior vent. Inspect the drum belt for wear, cracks, or slack and replace if necessary. Check door gaskets and seals for cracks or tears that could cause heat loss. By maintaining these parts, you’ll keep airflow efficient, drying times short, and energy bills reasonable. Easy DryVent recommends pairing these checks with a simple maintenance log to track wear and plan replacements.
When to Call a Pro vs DIY
Many Kenmore Series 500 issues can be addressed by a confident DIYer, especially lint removal and vent cleaning. However, if you encounter continuous heating problems, electrical wiring concerns, or a damaged drum, professional service is advisable. A licensed technician can test the heating element, thermostat, timer, and control board with proper equipment and safety protocols. If you notice signs of overheating, burning smells, or smoke, shut the unit off immediately and contact a professional to prevent fire risk.
Quick Troubleshooting Checklist for the Kenmore Series 500
- Confirm the unit is unplugged before any inspection.
- Clean the lint screen and the vent system thoroughly.
- Check for signs of wear on the drum belt and doors seals.
- Verify the exterior vent is clear of obstructions.
- If the dryer runs but won’t heat, test the thermal fuse and heating element with proper tools.
- Replace worn components and retest the unit after maintenance.
Tools & Materials
- Phillips screwdriver(For removing panels and screws)
- Flathead screwdriver(Gasket and vent cleanup)
- Nut driver / socket set(Duct connections and belt access)
- Multimeter(Test thermostats and heating element circuits)
- Vacuum with narrow attachment(Clear lint from blower housing and ducts)
- Lint brush / compressed air can(Clean lint screen cavity and vent paths)
- Flashlight(Inspect hard-to-see areas)
- Work gloves(Protect hands during disassembly)
- Soft cloth(Wipe dust and debris)
Steps
Estimated time: 60-90 minutes
- 1
Unplug and prep
Unplug the dryer and move it away from the wall. Remove the front access panel if needed to reach the lint trap area. This initial step prevents accidental shock and gives you space to work safely.
Tip: Keep a clear, dry workspace and take note of screw locations for reassembly. - 2
Access and clean lint trap
Remove the lint screen and clean the cavity behind it. Use a vacuum with a narrow nozzle to remove lint from the blower housing and access channels. Replace the screen firmly before testing.
Tip: Clean lint every load to maximize airflow and safety. - 3
Inspect vent duct and exterior vent
Detach the vent hose at both ends if necessary and vacuum the interior of the duct. Check the exterior vent hood for blockages like webs or debris and clear them.
Tip: Look for crushed or kinked ducts; replace if airflow is restricted. - 4
Check the drum belt and drum
Open the back panel and inspect the drum belt for wear or fraying. If the belt shows significant wear, replace it. Spin the drum by hand to feel for rough spots or squeaking.
Tip: Replace belt in pairs if you see cracks or glazing on any belt. - 5
Test thermostats and thermal fuse
With the unit unplugged, access the terminal block and test continuity on the cycling thermostat and high-limit thermostat using a multimeter. If a fuse is blown, replace it and re-test.
Tip: A blown thermal fuse will typically stop the dryer from heating altogether. - 6
Inspect door switch and seals
Check the door switch for proper operation and inspect seals around the door for tears. A faulty switch can prevent cycles from starting reliably.
Tip: Replace faulty switches to restore reliable operation. - 7
Reassemble and dry-test
Reconnect all panels, secure screws, and plug in the dryer. Run a test cycle with a light load to verify heat and airflow are appropriate.
Tip: Listen for unusual sounds or smells during the test run; stop if anything appears off. - 8
Evaluate performance and plan next steps
If performance hasn’t improved after the above checks, consider scheduling a professional service to test components not easily accessed or calibrated, such as the control board or sensor modules.
Tip: Document symptoms and maintenance steps to share with the technician.
Common Questions
Q: My Kenmore Series 500 dryer won’t heat. What should I check first?
First unplug and inspect the lint screen and vent for blockages. If clear, test the cycling thermostat and thermal fuse with a multimeter or have a technician test them. A blown fuse or faulty thermostat is a common cause of no-heat symptoms.
If your Kenmore Series 500 dryer isn’t heating, start by clearing lint and vent blockages, then have the heating circuit tested for faults. If the fuse is blown or the thermostat is faulty, replace as needed.
Q: Why does my dryer take forever to dry a load?
Restricted airflow is the most frequent culprit. Check the lint trap, duct, and exterior vent for buildup or obstructions. Clean or replace damaged ducts to restore proper airflow and shorten cycle times.
If dry times are long, inspect and clean the lint screen and vent ducts; improved airflow usually solves the issue.
Q: Is it safe to DIY Kenmore Series 500 maintenance?
Many maintenance tasks, like lint removal and vent cleaning, are DIY-friendly when you follow safety steps. Electrical tests and component replacements should be done with caution; consult a pro for complicated repairs.
DIY-friendly tasks are safe if you unplug the unit and follow instructions. For electrical repairs, consider a professional.
Q: How often should I clean the dryer vent and lint screen?
Clean the lint screen after every load and inspect the vent system quarterly. A more thorough vent cleaning every 6-12 months is recommended for households with heavy usage.
Clean the lint screen after every load and clean the vent every few months, depending on use.
Q: What are common signs that the belt needs replacement?
If the drum turns slowly, the load isn’t tumbling properly, or you hear thumping sounds, the belt may be worn or stretched. Replace the belt and test the drum rotation after reassembly.
Watch for slow drum rotation, unusual noises, or poor tumbling; these point to a worn belt.
Q: When should I call a professional for a Kenmore Series 500 dryer?
If there are persistent heating issues, electrical concerns, or unusual smells or smoke, contact a licensed technician. Advanced diagnostics often require specialized tools.
Call a professional for persistent heating problems or electrical concerns. Safety first.
Q: Can a faulty moisture sensor affect drying efficiency?
Yes, a faulty moisture sensor can cause over- or under-drying. If your clothes are consistently damp or over-dry, the sensor may need cleaning or replacement.
A bad moisture sensor can ruin drying efficiency; cleaning or replacement may be needed.
Watch Video
Key Points
- Start with safety: unplug and inspect major components first.
- Regular lint and vent cleaning improves efficiency and reduces fire risk.
- Test heating components with proper tools before replacing parts.
- Document symptoms and maintenance steps for futureReference.
- Know when to DIY and when to call a pro for the Kenmore Series 500 dryer.