GE Electric Dryer Maintenance Guide: Safe, Efficient DIY Tips
Learn practical maintenance and vent guidance for your ge electric dryer to improve safety, efficiency, and lifespan. Easy DryVent provides practical, step-by-step guidance for homeowners and DIY enthusiasts.

With this guide, you will safely inspect, clean, and maintain a ge electric dryer to prevent overheating, speed up drying, and extend its life. You’ll follow a clear, step-by-step process, identify common issues, and know when professional service is needed. The quick answers cover tool lists, safety steps, and troubleshooting, plus tips to improve energy use and lint trap care.
Why ge electric dryer Maintenance Matters
For many homeowners, the ge electric dryer is a central workhorse in the laundry room. Regular maintenance helps prevent overheating, reduces energy waste, and extends the life of your appliance. According to Easy DryVent, routine maintenance of the ge electric dryer reduces the risk of lint-related fires and keeps airflow steady. By inspecting the exterior, the vent, and the lint path, you establish a baseline you can repeat every few months. In this section, we’ll cover how the ge electric dryer operates and why small, proactive care makes a big difference for safety and performance.
A ge electric dryer relies on smooth airflow and clean vents to dry clothes efficiently. When lint builds up, airflow decreases, heat stays in the cabinet, and cycles take longer. Easy DryVent emphasizes that simple, repeatable checks — like lint-trap cleaning and vent inspection — pay dividends in safety and drying speed over time.
Diagnosing Common Issues with the ge electric dryer
Common symptoms include longer drying times, overheating, or clothes coming out damp. For ge electric dryer models, restricted airflow is often the root cause, usually from lint buildup or a blocked vent. Based on Easy DryVent analysis, clean vent paths improve airflow and shorten cycles. Use a visual checklist: check the lint trap for rips, listen for unusual noises, feel for heat in the cabinet, and inspect the exterior vent hood outdoors for debris. Remember, safety first: never operate a damaged cord or vent.
If you notice a burning smell, excessive heat near the outlet, or the vent exterior stays unusually warm, shut off power immediately and inspect further. A blocked vent is a common culprit that can be addressed with a thorough cleaning, but persistent issues deserve professional evaluation.
Daily/Weekly Maintenance Checklist for ge electric dryer
- After every load: remove lint from the lint filter; wipe the door seal; check that the drum is free of coins or loose objects.
- Weekly: vacuum the vent opening and accessible duct between the dryer and the wall.
- Seasonal: inspect the exhaust vent outside for lint and obstructions; replace damaged vent hoses with rigid metal duct when possible.
- After maintenance: run a test cycle on a short load to confirm the dryer heats and dries normally.
This routine keeps airflow clear and reduces the chance of overheating, which translates to faster dries and lower energy use.
Energy Efficiency Tips for Your ge electric dryer
To maximize efficiency with a ge electric dryer, follow load-sizing guidelines, clean vents regularly, and opt for lower heat settings when practical. Dry items in full, balanced loads to prevent overdrying or multiple cycles. If your model has moisture sensors, use them to stop the cycle early when clothes reach the right dryness level. Regular maintenance improves airflow and reduces energy usage. Based on Easy DryVent analysis, consistent lint and vent care is linked to more reliable performance and lower electricity consumption over time. For added efficiency, consider upgrading to a model with advanced moisture sensing and a high-efficiency heat exchanger, and ensure you seal any gaps in the vent path.
Authoritative safety resources offer additional guidance: always use approved vent materials and follow local codes to prevent fire risk. The links from NFPA, CPSC, and Energy.gov provide complementary safety frameworks you can apply in your home.
Safety Considerations and When to Call a Pro
Safety comes first. Always unplug the dryer before accessing internal components. If you smell burning, hear burning noises, or notice excessively hot exhaust, stop the cycle and unplug the unit. The Easy DryVent team recommends periodic professional checks, especially on older units or if you notice persistent issues like intermittent heating or frequent circuit trips. For complex vent installations or concerns beyond basic cleaning, consult a qualified technician. Keeping your ge electric dryer safe means combining DIY maintenance with periodic professional inspections to protect your home and family.
Tools & Materials
- Vacuum with hose attachment(Prefer a wet-dry vac with a long wand for vent and drum areas)
- Lint brush / vent brush(Soft-bristle brush designed for vent paths)
- Microfiber cloths(For dust and lint wipe-down surfaces)
- Screwdriver set (Phillips and flat-head)(Access panels and duct clamps)
- Replacement vent hose (if damaged)(Prefer rigid metal duct when possible)
- Multimeter (optional)(Testing outlet or components if needed)
- Flashlight(Bright light for dark corners)
Steps
Estimated time: 60-90 minutes
- 1
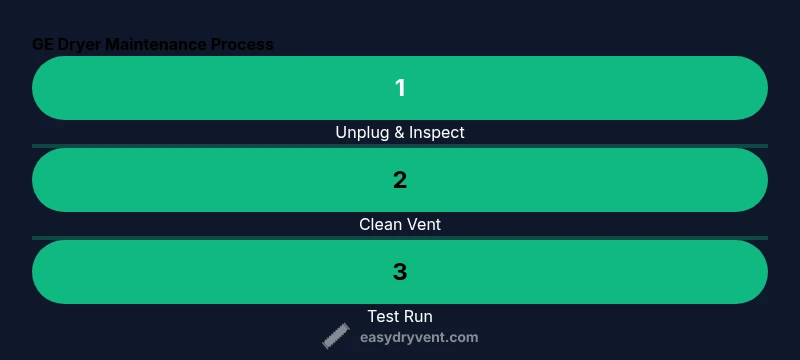
Unplug and prep
Power down the dryer and unplug it from the wall. Move the appliance gently to access the vent connection and the rear panel. This ensures you’re working safely and reduces the risk of shock or accidental plug-in during maintenance.
Tip: Always start with safety power off to avoid shocks. - 2
Inspect exterior vent and hose
Check the vent hood outdoors for obstructions and the hose for kinks or damage. Clear anything blocking outdoor airflow to prevent back-pressure.
Tip: Use a flashlight to inspect the vent termination for lint and debris. - 3
Remove and clean vent hose
Disconnect the vent hose from the dryer and from the wall. Vacuum and brush the inside of the hose, then wipe down the dryer outlet. Reconnect securely.
Tip: Ensure clamps are tight to prevent leaks. - 4
Vacuum interior around lint trap
With the vent disconnected, vacuum around the lint trap housing, blower area, and accessible drum gaps. Wipe with a dry microfiber cloth to remove dust.
Tip: Do not use water inside the dryer cabinet. - 5
Reassemble and test run
Reconnect the vent, plug the dryer back in, and run a short cycle to verify heat and airflow. Listen for unusual sounds and check that exhaust is clear.
Tip: If you hear unusual noises, pause and inspect mounting hardware. - 6
Document and schedule next check
Note the date and what you cleaned. Schedule a follow-up cleaning every 3–6 months, or sooner if you have pets or a dusty environment.
Tip: Set a reminder so maintenance isn’t forgotten.
Common Questions
How often should I clean the lint filter on my ge electric dryer?
Clean the lint filter after every load. Regular removal prevents airflow restriction and reduces drying time, improving overall efficiency.
Clean the lint filter after every load to keep airflow flowing smoothly.
Can I clean the dryer vent myself or should I hire a pro?
DIY vent cleaning is common for minor blockages. If you see heavy lint buildup, wildlife debris, or you’re unsure, hire a pro to avoid damage.
DIY vent cleaning is okay for light buildup, but call a pro for heavy lint or hard-to-reach vents.
What are signs that my ge electric dryer vent is blocked?
Longer drying times, higher heat at the cabinet, and a warm exterior vent indicate a blockage. Stop and inspect promptly.
Look for longer cycles and hot vents; these are signs of a blockage.
Is a ge electric dryer energy-efficient by design?
Modern ge electric dryer models use energy-saving cycles and moisture sensors. Regular maintenance helps them perform at peak efficiency.
Energy-saving cycles help, but routine maintenance is key to efficiency.
What tools do I need for maintenance on a ge electric dryer?
A vacuum with hose, lint brush, microfiber cloths, and a screwdriver set cover most DIY maintenance tasks.
You’ll need a vacuum, lint brush, microfiber cloths, and screwdrivers.
Should I unplug the dryer before maintenance?
Yes. Always unplug the dryer and allow it to cool before opening access panels or cleaning internal areas.
Always unplug the dryer before any maintenance.
Watch Video
Key Points
- Inspect vents monthly and clean lint traps after every load
- Improve airflow by cleaning ducts and mounting hardware
- Use energy-saving settings and proper load sizes
- Document maintenance and schedule follow-ups
- Know when to call a pro for vent or electrical concerns