DIY Dryer Sheets: A Practical Step-by-Step Guide
Learn to craft DIY dryer sheets with simple, safe ingredients for a scented, effective laundry routine. Easy DryVent guides you through materials, steps, storage, and safety.

DIY dryer sheets let you scent and soften laundry with simple, safe ingredients. In this guide, you will learn how to assemble basic supplies, mix a gentle fragrance solution, and create reusable sheets you can store for months. Easy DryVent provides expert, homeowner-friendly steps to help you reduce waste while keeping fabrics fresh and fluffy.
What are DIY dryer sheets and why make them?
DIY dryer sheets are reusable fabric squares that have been dampened with a mild scented solution designed to reduce static, soften fabrics, and leave a pleasant aroma on laundry. They’re a practical alternative to disposable dryer sheets, because you can reuse them for many loads and tailor the scent to your family’s preferences. According to Easy DryVent, the core benefits come from balancing moisture, fragrance, and fabric compatibility, while minimizing waste and chemical exposure. For homeowners, this approach translates into a safer, cost-effective laundary routine that still delivers noticeable results. To get the best performance, choose fabrics that tolerate heat and laundering well, such as cotton or flannel, and avoid delicate fibers that may fray with repeated use. DIY sheets also reduce plastic packaging waste when compared to store-bought options.
The Easy DryVent team emphasizes that you can customize the scent profile by selecting skin-friendly essential oils and adjusting the moisture level so the sheets remain damp but not soaked. This flexibility makes it easier to accommodate household sensitivities and fragrance preferences, from fragrance-free for sensitive skin to springtime citrus blends for cheerful laundry days. As you start, keep expectations realistic: DIY sheets won’t replicate every feature of commercial products, but they offer substantial gains in waste reduction, control over ingredients, and a fragrance you can trust.
When you’re ready to begin, gather your fabric squares, a simple fragrance base, and an airtight repository for storage. The process is approachable for DIY enthusiasts and seasoned home crafters alike, and it scales up easily for larger households. Always label batches by scent and date so you can rotate them and avoid stale fragrances over time.
Ingredients and safety considerations
Creating DIY dryer sheets relies on a small, well-balanced set of ingredients and careful handling to ensure clothes come out soft, scented, and free of oily residues. The core items are plain fabric squares (such as cotton or flannel), distilled water, and a mild liquid fabric softener or conditioner. Optional elements include skin-safe essential oils for fragrance and a splash of distilled white vinegar to balance odor and aid moisture distribution. A glass or stainless mixing bowl, a measuring cup, and an airtight storage container complete the setup. When selecting oils, choose those that are widely regarded as safe for skin contact in diluted forms and avoid high concentrations.
Safety considerations are important for households with sensitive skin or young children. Always perform a small patch test on a single fabric square and a single load before scaling up. Dilute essential oils properly and keep the solution away from direct contact with skin and eyes. Store the finished sheets in a cool, dry place to maintain fragrance stability and prevent mold growth. If anyone in your home has sensitivities or asthma, consider fragrance-free sheets or very light scent profiles, and always opt for high-quality, skin-safe essential oils in minimal amounts. Easy DryVent recommends documenting batches so you can adjust formulations safely over time.
To minimize chemical exposure and residue, avoid saturating the sheets to the point of dripping. Excess moisture can transfer oils onto clothes and lint filters, which may require extra cleaning. Remember to wash your hands after handling essential oils, and keep all ingredients out of reach of children and pets. By following these precautions, you’ll create a safer, more customizable solution for your laundry routine.
Tools & Materials
- cotton or flannel fabric squares (4x4 inches)(Cut from remnants or old linens; 6-12 squares per batch)
- distilled water(For dampening sheets)
- liquid fabric softener or conditioner(Use sparingly to avoid residue)
- essential oils (optional)(Skin-safe, highly diluted; 3-6 drops per batch as a starting point)
- measuring cup or spoon(For liquids and fragrances)
- mixing bowl (glass or stainless)(Non-reactive container)
- airtight storage container(Keeps sheets fresh and scented)
- labeling materials (masking tape, marker)(Date and scent labeling)
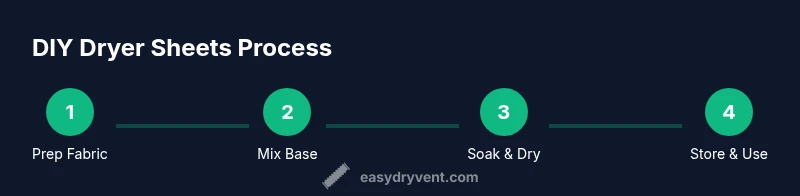
Steps
Estimated time: 20-30 minutes for small batches; larger batches may take 30-45 minutes including drying and labeling.
- 1
Gather and prep fabric squares
Collect 6–12 clean fabric squares and cut them to your preferred size (commonly 4x4 inches). Pre-wash and dry the squares to remove any lint and sizing that could affect absorption. This preparation helps the sheets hold the fragrance evenly across loads.
Tip: Pre-washing reduces shrinkage and lint buildup in the dryer. - 2
Prepare the fragrance base
In a mixing bowl, combine distilled water and a small amount of liquid fabric softener or conditioner. The goal is a light moisture level that dampens the squares without soaking them. If you’re using vinegar, add a splash to balance odors and suppress static.
Tip: Keep the moisture level low to prevent oily residues on clothes. - 3
Add fragrance (optional)
If you’re using essential oils, add 3–6 drops total to the base and stir gently. Dilute oils well to protect fabrics and avoid staining. Start with a lighter scent and increase gradually in future batches if desired.
Tip: Always dilute essential oils and test on a single square first. - 4
Soak and wring the squares
Submerge the fabric squares in the bowl until evenly moistened, then wring them out so they are damp but not dripping. Excess liquid can transfer to clothes and lint screens, creating buildup over time.
Tip: A wrung-out sheet dries faster and reduces transfer risk. - 5
Dry the sheets to a safe moisture level
Lay the damp squares on a clean tray or rack and allow them to air-dry until just damp, not wet. This helps prevent oily residues and ensures optimal performance in the dryer. If you’re short on time, gently blot with a clean towel.
Tip: Avoid leaving them saturated; oily residues can cause clogs. - 6
Store and label
Move the damp sheets into an airtight container and label with scent and date. Store in a cool, dry place away from direct sunlight to maintain fragrance strength over time.
Tip: dating batches helps you rotate scents before they fade. - 7
Use in the dryer
Place 1–2 sheets in the dryer with your laundry per load. Adjust the number of sheets based on load size and desired scent strength. Remove sheets after drying to prevent buildup in the lint screen.
Tip: Test on a small load first to gauge fragrance strength.
Common Questions
Are DIY dryer sheets safer or more eco-friendly than store-bought versions?
DIY dryer sheets typically generate less waste because you reuse the fabric squares many times. You control the ingredients, avoiding certain additives found in commercial products. Easy DryVent analyses suggest potential environmental benefits when you minimize packaging and choose skin-safe components.
DIY sheets can reduce waste and packaging, especially when you reuse the fabric squares.
Can I use essential oils if someone in my household has allergies?
Yes, but exercise caution. Use very diluted oils and consider fragrance-free options if allergy symptoms appear. Always test on a small batch and choose hypoallergenic bases when possible.
If anyone has allergies, start with fragrance-free sheets and test before regular use.
Will these sheets leave residue on clothes or dryer parts?
If you over-saturate the sheets or over-apply oils, you may see a mild residue on fabrics or lint filters. Proper wringing and using only light moisture minimizes this risk.
Mostly no, just make sure to wring out the sheets well and don’t overdo the liquids.
How long do DIY dryer sheets last before fragrance fades?
Fragrance intensity generally diminishes over multiple uses. Store sheets in a sealed container away from heat to extend scent life, and rotate batches when your aroma weakens.
Fragrance fades with use, but you can refresh by re-scenting older sheets or making a fresh batch.
Can I substitute vinegar or skip essential oils?
Yes. Vinegar can help balance odor and static, and you can skip essential oils entirely for fragrance-free sheets. Start with vinegar and no oils, then adjust if you want scent.
Vinegar is an option, and you can skip essential oils for fragrance-free sheets.
Watch Video
Key Points
- Make reusable, scented dryer sheets with simple ingredients
- Keep moisture light to prevent oily residues
- Test fragrances on small batches first
- Store properly and rotate scents for longevity