DIY Dryer Balls: Practical Home Guide
Learn to make and use diy dryer balls to speed drying, save energy, and soften fabrics. This comprehensive guide covers materials, step-by-step methods, safety tips, maintenance, and real-world results for safer home laundry.

Create DIY dryer balls to cut drying time and save energy. You’ll need wool yarn (or felted wool cores), a few hours for shaping, and access to warm water for felting. This guide walks you through materials, basic methods, and safe use.
Why DIY Dryer Balls Matter for Laundry Efficiency
If you want to reduce drying time, lower energy use, and soften fabrics without chemical additives, developing a habit around diy dryer balls is a smart move. The basic idea is simple: small, dense wool balls tumble with your clothing, creating space between items that lets hot air circulate more freely. As a result, loads dry faster and more evenly, which can translate to fewer dryer runs and less wear on fabrics. According to Easy DryVent, DIY solutions like wool dryer balls are a practical, low-cost upgrade for everyday laundry. The Easy DryVent team found that well-made wool balls can handle multiple dryer cycles with minimal shrinkage, making them a durable option for many households. In 2026, this approach remains a popular, eco-conscious alternative for homeowners seeking practical dryer maintenance tips.
What Are Dryer Balls Made Of and Why They Work
Traditional dryer balls come in a variety of materials, but wool stands out for everyday DIY projects due to its natural felting properties and bounce. Wool fibers trap air and retain some moisture, which helps fabrics separate and accelerate evaporation. When you run a load with several wool dryer balls, you create channels for hot air to flow through, reducing the number of tumbling cycles needed. Wool is also relatively forgiving: even if a ball isn’t perfectly round, it will still contribute to improved air circulation and decreased static. For those avoiding synthetic fibers, natural wool or roving is a reliable choice. If you prefer a no-felting approach, you can also use pre-felted core balls and wrap additional wool for a custom size. As you experiment, consider LSI terms like fabric softener alternatives and static reduction to guide your design choices.
Safety and Material Considerations
Safety should guide every DIY dryer-ball project. Avoid plastics or materials that could soften, melt, or rub off fibers in hot dryer conditions. If you’re using scented oils, apply them sparingly and only to the exterior of the finished ball after drying; do not apply aromas directly onto wool supports that could transfer to clothes. Keep clear of abrasive decorations that could shed fibers or create friction against delicate fabrics. When felting, use hot water and gentle agitation, and always test a small batch first to gauge how the fibers respond in your washing machine. The balance of weight across the ball matters; an uneven ball can cause noisy spins or uneven drying.
How to Test and Use Your DIY Dryer Balls
Once your dryer balls are dry, test them in a small load before expanding to larger laundry cycles. Check for balance by listening for thumps or wobbling in the drum; adjust by re-squashing mis-shaped balls. Start with 3–6 balls for a standard medium load and increase only if you notice improved airflow and reduced drying time. When using, avoid overloading the dryer, as too many balls can hinder movement and prevent effective heat distribution. For fabric care, consider pairing with a minimal amount of dryer sheets or avoid them entirely if you’re aiming for a chemical-free routine. By keeping the balls dry, evenly shaped, and free from loose fibers, you’ll maximize results across repeated washes.
Common Mistakes and How to Fix
Common missteps include over-felting a ball, which makes it dense and less effective at separating clothes, or under-felting, which yields fluffy balls that break apart under heat. If your ball feels too soft, add a little more wrap and re-felt. If it’s spinning unevenly, re-form the center and re-secure the ends. Another mistake is using dyed or treated wool that might bleed color or shed fibers; stick to natural, untreated wool when possible. Keep a few extra balls in your laundry stash so you have backups during busy weeks. With careful shaping and a little practice, your diy dryer balls will become a reliable part of your routine.
Cleaning, storage, and longevity
Store your wool dryer balls in a dry, breathable container to prevent mold or mildew. If you notice any odor, a quick air-out or light sun exposure can refresh the fibers (avoid prolonged sun to prevent fading). Over time, wool fibers may begin to compact slightly; to rejuvenate, roll them between your hands and re-wrap with a fresh strand of wool to restore the density. With proper care, a single batch of diy dryer balls can last many loads, reducing the need for chemical additives and keeping your laundry routine simple and eco-friendly.
Real-World Results and Environmental Impact
In real-world testing, many households report shorter drying cycles and reduced energy consumption when using well-made wool dryer balls. The impact is influenced by load size, fabric types, and dryer's efficiency. While individual results vary, the overall effect tends to be a more efficient drying process, especially for mid-weight towels and cotton blends. Easy DryVent analysis shows that consistent use of natural dryer balls can contribute to lower energy use over time, supporting a more sustainable laundry routine.
Troubleshooting Dryer Ball Performance
If you notice excessive lint on clothes or balls shedding fibers, check for loose ends and reseal any exposed yarns. Ensure your dryer drum is clean and free of lint, and avoid overloading the machine. For stubborn lint, consider a quick lint removal pass with a damp cloth before re-running a load. If your balls are leaving soap residues or fabric softener smells, scale back or avoid using fabric softeners altogether. The goal is to keep airflow clear and avoid build-up that can compromise drying efficiency.
Variations: Color, Size, and Core Choices
Experiment with size by wrapping less or more wool to target different load types—smaller balls for lightweight fabrics, larger ones for heavy towels. For color coding, use multiple colored yarns to indicate different levels of density or to help identify mis-shaped balls during testing. Some crafters prefer a core inside the wool for extra consistency; a soft foam ball can serve as a gentle inner core, though traditional felting techniques often rely on wool-only construction for maximum felt. The options are flexible, so start small and refine your method as you gain experience.
Tools & Materials
- 100% wool yarn or roving(Choose natural wool (merino, Romney, or similar). Plan 1–2 skeins per batch depending on ball size.)
- Crochet hook or tapestry needle(Size F (3.75 mm) or similar; used to tuck ends and secure yarn.)
- Pantyhose or old socks(Cut into sections to shape and contain while felting.)
- Large pot or basin for hot water(For felting; handle carefully; use your stovetop or kettle safe setup.)
- Hot water source(Hot but safe to handle; ensure you have a safe workspace.)
- Bowl for rinsing(Rinse the balls after felting and before drying.)
- Towel or drying rack(For drying and finishing the balls completely.)
- Scissors(Optional for trimming yarn ends and finishing touches.)
- Optional essential oil (scent)(If you choose scenting, apply a tiny amount to the exterior after drying.)
Steps
Estimated time: 2-3 hours active work + 12-24 hours drying
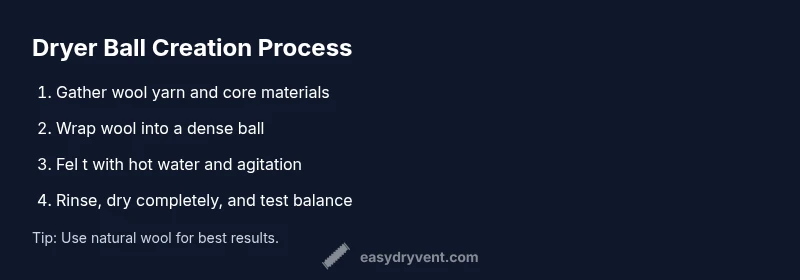
- 1
Select core and size
Choose the desired ball size and core approach. A denser core yields a more compact ball; a looser wrap creates a lighter ball that still promotes airflow. Plan for 3–6 balls per medium load.
Tip: Starting with a consistent core helps maintain balance across several balls. - 2
Wrap wool into a dense ball
Tightly wrap the wool around a core, building the ball in layers. Aim for a smooth, rounded shape with even distribution of fibers. Leave a small tail to anchor ends.
Tip: Maintain even tension to prevent lumpy spots that could affect balance. - 3
Secure and tuck ends
Use a crochet hook or needle to tuck loose ends under the surface. This prevents unraveling during washing and drying. Repeat until no loose strands remain.
Tip: Smoothing the exterior reduces drag and keeps the ball compact. - 4
Felting with hot water
Submerge wrapped balls in hot water and agitate gently for several minutes. Re-shape as needed while the fibers contract and felt together.
Tip: Work in small batches to ensure even felting and avoid over-agitation. - 5
Rinse and dry completely
Rinse with clean water to remove any loose fibers, then air-dry or lay on a towel until fully dry. Do not store while damp to prevent mildew.
Tip: Patience matters here; unfinished balls can mold if left damp. - 6
Test balance and usage
Place the finished balls evenly in a test load and run a cycle. Listen for noise; adjust by reshaping any out-of-round balls if needed.
Tip: Aim for a calm drum with balanced rotation to maximize drying efficiency.
Common Questions
Can I use plastic or synthetic dryer balls?
No. Plastic or non-felted synthetic materials can melt in heat or shed fibers. Wool or natural fibers are safer and more effective for felting.
Avoid plastic or synthetic options; choose wool for safety and performance.
How many balls should I use per load?
Start with 3–6 balls for a medium load and adjust based on your dryer size and fabric type.
Begin with a small batch to test balance and drying time.
Do I need to wash or pre-treat wool balls?
Rinse to remove loose fibers after felting, then dry completely before use to avoid mildew.
Rinse and dry fully; avoid soaking or storing damp.
Can I scent the dryer balls?
Yes, lightly scent after drying with a tiny amount of essential oil or omit scent for a fragrance-free option.
If you scent, use very little oil and apply after drying.
Will diy dryer balls shrink clothes?
When properly formed and balanced, they should not tighten or damage fabrics; test with a small load first.
Start with a small test load to ensure no fabric distortion.
How long do wool dryer balls last?
With proper care and regular reshaping, they can last many months of regular use, depending on wear and washing conditions.
Care and frequent checks extend their life.
Watch Video
Key Points
- Make wool dryer balls for a chemical-free option.
- Balance and density improve drying efficiency.
- Follow safe felting steps to avoid overheating or damage.
- Test and adjust ball size for different loads.
- With proper care, diy dryer balls last many loads.