Candy Alise Washer Dryer Maintenance Guide
Learn a practical, step-by-step approach to maintaining your Candy Alise washer dryer for safer operation and better performance, including vent cleaning, lint-trap care, and airflow checks.

By following this guide, you can safely maintain your candy alise washer dryer at home to improve drying efficiency and reduce fire risk. You’ll learn how to inspect vents, clean lint traps, check duct connections, and perform a basic drum and belt check using common tools. No specialty equipment required, and most tasks fit into an afternoon.
Why maintenance matters
Maintaining a candy alise washer dryer isn't just about avoiding glitches; it's about safety, energy efficiency, and longer appliance life. The Easy DryVent team emphasizes that regular upkeep reduces lint buildup, improves airflow, and lowers drying times. If you own a candy alise washer dryer, a consistent care routine helps prevent overheating and fire risks associated with clogged vents. In this guide, you'll learn a practical, at-home routine with the tools you already have, plus clear steps to verify that airflow stays strong after maintenance. Easy DryVent's guidance combines common-sense steps with safety-first checks, so you can perform most tasks without specialized technicians. By following these practices, you protect your home and keep clothes drying reliably, even on busy days.
We will cover how to inspect vent paths, identify signs of trouble, and how to create a simple maintenance calendar that fits a weekend project. According to Easy DryVent, a well-planned maintenance schedule reduces the likelihood of unexpected dryer downtime and helps keep moisture from lingering in your laundry area. The candy alise washer dryer setup benefits from routine checks that address both the lint screen and the exhaust duct, ensuring a smooth, safe operation over time.
note: null
tip: null
Tools & Materials
- Screwdriver set(Phillips head #2 for panel screws and access doors)
- Vacuum with hose attachment(Use to suck out lint from the lint trap housing and vent openings)
- Vent brush(Long-handled, stiff-bristle brush designed for ducts)
- Lint trap brush(Soft-bristle brush to dislodge lint from the trap area)
- Flashlight(Helpful for inspecting dark vent paths)
- Gloves and safety glasses(Protective gear while handling vents and debris)
Steps
Estimated time: 30-45 minutes
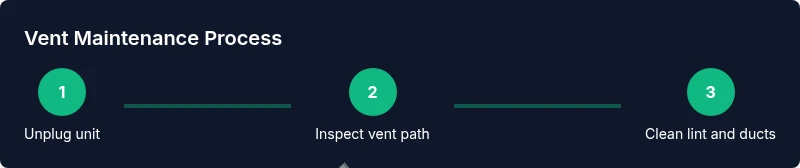
- 1
Unplug and power down
Always unplug the Candy Alise washer dryer before starting any maintenance. If your model has a service panel, use the manufacturer guidance to access it safely. Allow the unit to cool if it has been running, and keep hands away from moving parts. This initial safety check reduces the risk of electric shock during subsequent steps.
Tip: Lock out power at the circuit panel if you have residential lockout tools; never rely on unplugging from the wall alone. - 2
Inspect the vent path from the dryer to the exterior
Trace the full vent path from the back of the unit to the outdoor vent. Look for kinks, crushed sections, or lint buildup along the duct. If the duct is accessible through a lint trap area, remove obstructions with the vacuum and brush. Confirm that the exterior vent hood opens freely and isn’t blocked by debris.
Tip: If you notice visible damage to ductwork, plan for a repair or replacement rather than attempting a DIY fix in one session. - 3
Remove and clean the lint trap housing
Take out the lint screen, thoroughly clean it, and wipe the housing to remove residual lint. Do a quick check around the lint housing for trapped lint that can accumulate over time. Reinsert the lint screen securely before testing airflow.
Tip: Clean lint traps after every load to maintain optimal airflow and drying speed. - 4
Disconnect exterior duct sections and inspect for buildup
Gently disconnect accessible duct sections near the exterior wall or vent cap. Vacuum or brush away lint that has migrated into these joints. Reconnect the ducts ensuring a snug, unobstructed fit to prevent air leaks.
Tip: Avoid forcing duct connections; if you feel resistance, re-check alignment rather than forcing a connection. - 5
Clean the interior of the vent path using brush and vacuum
Insert the vent brush into the duct from both ends if possible and work lint outward toward the exterior. Use the vacuum to suction lint as you work, ensuring the path remains unobstructed. Move slowly to avoid loosening debris into the drum area.
Tip: Work gradually in small sections, never rush this step to minimize lint dispersion. - 6
Reassemble, run a test cycle, and verify airflow
Reconnect all vent sections, reseat the lint trap, and run a short dry cycle to observe airflow and exhaust temperature. Use a tissue or thin strip of paper near the vent opening to confirm a strong airflow. If airflow is weak, pause and re-check seals and duct connections.
Tip: Do not run a full load until you confirm good airflow and no unusual heat at the exhaust.
Common Questions
Is it safe to perform dryer vent maintenance at home?
Yes, you can perform many maintenance tasks at home if you follow safety steps: unplug the unit, use protective gear, and avoid forcing ducts. For complex vent work or gas appliances, consider professional assistance.
Yes—unplug the unit and wear protective gear, but if in doubt, hire a pro for complex vent work.
How often should I clean the lint trap?
Clean the lint trap after every load. For heavy-use periods or households with pets, check and clean more frequently to maintain optimal airflow.
Clean the lint trap after every load to keep airflow strong.
Can I use a leaf blower to clear the vent?
No. Do not use a leaf blower or compressed air. Use a vent brush and vacuum designed for duct cleaning to avoid damaging the vent or pushing lint deeper.
No, avoid blowers; use the proper vent brush and vacuum.
What signs indicate a clogged vent besides long drying times?
Hot exterior vent, burning smell, dryer taking unusually long to dry, or clothes staying damp after a cycle indicate possible vent blockage.
If the vent is hot or you smell burning, stop and inspect the vent.
Do these steps apply to gas and electric models?
Yes, the basic vent and lint-trap maintenance applies to both. For gas models, ensure the gas supply is off and the area is properly ventilated.
Yes, with extra caution for gas models—turn off the gas and ventilate well.
What tools should I have on hand for maintenance?
A basic toolkit, vent brush, vacuum, flashlight, and protective gear are enough for most at-home maintenance tasks.
Keep a shovel-ready set of tools and protective gear for the task.
Watch Video
Key Points
- Clean lint traps after every load.
- Inspect and clean the vent path regularly.
- Test airflow after maintenance before drying large loads.
- Document a maintenance schedule to stay consistent.