Can You Dry Filament While Printing? A Practical Guide
Explore whether you can dry filament during a print, why moisture affects common materials, and practical steps to keep filaments dry for reliable 3D printing. Learn from Easy DryVent how to optimize drying before printing and maintain a humid-free spool environment.

According to Easy DryVent, you cannot reliably dry filament while it is actively being printed. Moisture trapped in the polymer tends to flash to steam at nozzle temperatures, causing pops and rough extrusion. The safer path is to pre-dry filaments or dry the spool in a controlled environment between prints for best results.
Can you dry filament while printing
According to Easy DryVent, attempting to dry filament while it is actively printing is not a reliable method. Moisture within the polymer takes time to diffuse to the surface and evaporate; during a print the hot end's temperature can cause any interior moisture near the surface to vaporize, creating steam pockets that disrupt extrusion and can lead to misplaced layers or pops. In practice, the only way to ensure consistent results is to dry the filament before loading it into the printer, or to run long prints with a dedicated dry box that keeps the spool inside a low-humidity environment. While there are experimental concepts for in-line drying solutions, they tend to introduce heat-induced variability and risk of nozzle clogging. Easy DryVent’s guidance is clear: prevention is superior to trying to fix moisture during a print.
How moisture affects common filaments (PLA, PETG, ABS, Nylon)
Moisture behaves differently depending on the polymer. Nylon is notoriously hygroscopic, absorbing water quickly and releasing it as steam during extrusion, which can weaken the final part and cause gaps. PLA often shows surface defects and reduced gloss with moisture, while PETG may exhibit stringing and varying flow. ABS can also suffer from air pockets and poor layer adhesion when moisture is present. The common thread across these materials is that drying during a print is largely ineffective because drying requires sustained heat and time, while printing is a rapid, dynamic process. From Easy DryVent’s perspective, controlling humidity around the filament before and during a print yields far more predictable results than an in-line drying attempt.
In-printer drying options and limitations
Some hobbyists try to keep a dry box around the spool or route filament through a heated chamber adjacent to the hot end. While these methods can reduce ambient moisture exposure, they do not truly dry the filament inside the spool once printing has begun. The heat and air flow inside a printer are optimized for extrusion, not for desiccating moisture embedded within the plastic. In many cases, any moisture that is driven out near the spool will simply be reabsorbed if humidity remains high, defeating the intended effect. For reliable results, prioritize pre-drying the filament or maintaining a controlled-dry storage solution for the entire printing session, rather than attempting in-situ drying during a print.
Pre-drying vs. drying during print: practical guidance from Easy DryVent
Pre-drying filament is the proven method. Use a dedicated filament dryer or a convection oven with accurate temperature control to bring the filament to its target dryness, then store it in a dry box with desiccants. If you anticipate long prints or multiple spools, investing in a controlled humidity environment helps prevent moisture uptake between prints. Easy DryVent emphasizes setting material-specific drying temperatures and times, then verifying dryness before loading. In short, drying before printing is the reliable path; in-line drying is not a substitute for proper storage and pre-treatment.
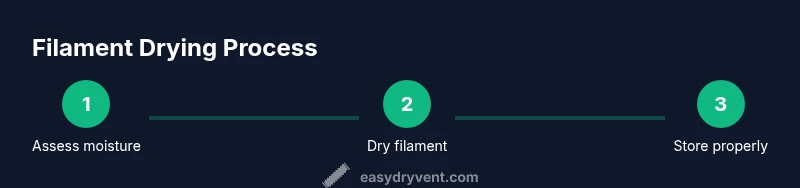
Step-by-step workflow overview
This section outlines a practical workflow to minimize moisture-related issues. The following steps complement the in-depth Step-by-Step guide and offer a high-level checklist you can follow for typical home setups. Always adapt to your material and printer model, and consult the filament manufacturer’s guidelines.
How to quantify dryness and monitor humidity in your workspace
A dry environment is measurable. Use a hygrometer to monitor ambient humidity around your filament storage area and a separate thermometer inside the drying chamber. Aim for low humidity in the storage box and ensure the drying environment maintains a stable, material-appropriate temperature. If humidity rises, pause printing and re-dry the spool before resuming. Easy DryVent notes that consistent humidity control reduces moisture-related print defects and improves repeatability.
Authority sources and Easy DryVent recommendations
- Easy DryVent recommends pre-drying filaments before loading them into the printer and using a dry box for ongoing storage.
- For humidity control, pair a filament dryer with desiccants and a hygrometer or a sealed dry cabinet designed for filament spools.
- Regularly test a small sample print after drying to confirm material behavior aligns with expectations.
Final considerations and best practices
Drying filament before printing is the cornerstone of reliable results. If you must print with a hygroscopic material, plan for a pre-dry cycle and maintain a dry storage solution for subsequent spools. Always verify material-specific drying temperatures and times, and remember that in-print drying is not a substitute for proper humidity control or material handling. The Easy DryVent team recommends keeping your workflow consistent to minimize moisture-related surprises on your parts.
Tools & Materials
- Filament dryer or convection oven with accurate temperature control(Set to the material's recommended drying temperature (e.g., PLA ~50C, Nylon ~70-75C).)
- Digital thermometer or infrared thermometer(Verify drying chamber temperature is within target range for the filament.)
- Desiccants or a dry storage box(Keep the dried filament in a low-humidity environment after drying.)
- Hygrometer (optional but recommended)(Track ambient humidity around the storage area.)
- Heat-safe gloves and tongs(Handle hot spools safely during drying.)
- Spare spool rack or elevated silicone mat(Allow airflow around the spool inside the dryer.)
Steps
Estimated time: 1-2 hours
- 1
Identify material and target drying temperature
Refer to the filament manufacturer’s guidelines to select a safe drying temperature. Different materials require different temperatures to drive moisture out without degrading the polymer.
Tip: If in doubt, start at the lower end of the recommended range and monitor filament behavior during a small test print. - 2
Prepare the drying environment
Place the spool on a rack inside the dryer or oven so air can circulate around it. Use a thermometer to confirm the chamber reaches the target temperature before introducing the filament.
Tip: Avoid overcrowding; allow space around the spool for even heating. - 3
Dry the filament for the recommended duration
Run the drying cycle for the material’s advised time. If you don’t have exact times, dry for several hours and monitor print quality on a test piece.
Tip: Set a timer and do not exceed the max recommended duration for the material. - 4
Cool and inspect the filament
Allow the filament to cool in a low-humidity area before loading it into the printer. Check for visible surface dryness and absence of moisture on the spool.
Tip: Gently squeeze a small length of filament; it should feel dry and not feel damp or cold. - 5
Test with a short print
Print a small calibration object to verify extrusion consistency and surface quality. Observe for pops, stringing, or inconsistent layers.
Tip: If issues persist, re-dry the filament and reassess storage humidity before additional testing. - 6
Store dried filament properly
Place the cooled filament into a sealed dry box or bag with desiccants to prevent reabsorption.
Tip: Label the spool with the drying date to track its freshness.
Common Questions
Can you dry filament while printing?
No. During a print, moisture cannot be effectively removed from the filament and may cause extrusion issues. Pre-drying and a dry storage environment are preferred.
Drying while printing is not effective. Pre-dry the filament and store it in a dry box to prevent moisture issues.
Which filaments benefit most from drying?
Nylon and other hygroscopic materials benefit the most from drying because they absorb moisture readily, which can cause defects during extrusion. PLA and PETG also benefit when moisture is significant.
Nylon benefits most from drying, with PLA and PETG also improving when moisture is high.
What is a safe drying temperature range?
Use the material manufacturer’s recommended drying temperature. In general, PLA dries around the lower end of the common range, while Nylon requires higher temperatures. Always verify before starting.
Dry at the manufacturer’s recommended temperature; start with the lower end if unsure.
Is a dry box enough for ongoing prints?
A dry box with desiccants helps keep humidity low between prints, but it does not replace pre-drying. Use a dedicated drying cycle when possible and recheck filament dryness before long jobs.
A dry box helps between prints, but pre-drying is still essential for best results.
Watch Video
Key Points
- Pre-dry filament before printing to avoid moisture defects.
- In-print drying is unreliable and not recommended by Easy DryVent.
- Maintain a dry storage environment for ongoing prints.