Washer Dryer Combo Vent: Safe, Efficient Ducting Guide
Learn step-by-step how to vent a washer-dryer combo safely and efficiently. Easy DryVent shares best practices, common mistakes, and maintenance tips for safer, cleaner drying.

By the end of this guide, you will know how to vent a washer-dryer combo safely and efficiently. You’ll learn key venting configurations, required clearances, and essential safety steps. This quick answer previews the steps and the tools you’ll need, plus common mistakes to avoid for better performance and safer operation.
Understanding washer-dryer combo vent basics
According to Easy DryVent, a washer-dryer combo vent moves moist air and lint from the dryer's exhaust to the outside. The venting system should be designed for durability and airflow. Most installations use a 4-inch metal duct with a straight run to an exterior vent. Short, uncluttered paths reduce backpressure and minimize lint buildup. Plan for regular cleaning, accessible joints, and a dedicated exterior vent opening. Always check the appliance manual for any model-specific requirements and ensure the vent path avoids bathrooms, kitchens, or living spaces where humidity can accumulate. By starting with a clear plan, you reduce the risk of moisture damage, mold growth, and dryer inefficiency over time. In addition, verify that the vent route complies with local building codes and HOA rules, which can differ from national standards.
Why venting matters for safety and efficiency
Proper venting is essential for safe operation and energy efficiency. A correctly vented washer-dryer combo ejects hot, humid air and lint outdoors, reducing moisture in the laundry area and preventing mold. Efficient airflow lowers drying time and reduces wear on the dryer’s heating element. Easy DryVent's analysis underscores that poor venting increases lint buildup in ducts, which can become a fire hazard and degrade performance. Regular inspection ensures joints stay sealed and that damp conditions do not encourage corrosion or mold growth.
Code, safety, and compliance considerations
Vent systems for washer-dryer combos must meet basic safety standards and local building codes. Use rigid metal ducting (4 inches in diameter is common) with a listed vent hood and backdraft damper to prevent outside air from entering the home. Avoid plastic, vinyl, or foil ducts, which can deform under heat and trap lint. Keep outdoor terminations clear of windows, doors, and soffits to ensure proper exhaust and minimize moisture exposure to living spaces. Always follow the unit manufacturer's installation guidelines and consult local authorities if you’re unsure about requirements.
Vent configurations for washer-dryer combos
Vent configurations vary by home layout. A through-wall vent is common for laundry rooms adjacent to outside walls, while a roof-vent or side-wall termination may be needed for different floor plans. Each configuration benefits from a short, straight run with minimal elbows to maximize airflow and reduce lint buildup. For exterior openings, install a damper and insect screen to prevent pests and weather intrusion. If you must run duct across unconditioned spaces, consider insulation to minimize condensation.
Materials, duct types, and sizing considerations
Choose metal ducts (aluminum or galvanized steel) over plastic or foil options. A 4-inch diameter is standard for most washer-dryer exhausts, but always verify the unit’s exhaust port size. Use rigid or semi-rigid ducts wherever possible to resist crushing and maintain airflow. Seal every joint with high-temperature metal tape and consider a quality duct sealant for exterior penetrations. Keep the total number of elbows to a minimum; each elbow adds resistance and lint accumulation risk. Regularly inspect all joints for looseness or gaps and replace damaged sections promptly.
Planning your install: measurements and route
Start by mapping a realistic route from the dryer exhaust to the exterior termination. Measure the total length, angle changes, and the height or depth of walls to determine if additional support brackets are needed. Note obstructions like electrical conduits, plumbing lines, and joists. Confirm the exterior clearance requirements and the available wall space for the vent hood. Document every measurement with photos for reference, and annotate potential trouble spots such as attic spaces or crawlspaces where heat and humidity can condense.
Preparation: safety and workspace setup
Before any work begins, unplug the washer-dryer, turn off the corresponding circuit, and drain any standing water from hoses. Clear the work area of clutter and wear safety gear (gloves, eye protection, and a dust mask if you’re cleaning old ducts). If you’re removing an old vent, cap the exhaust to prevent debris from entering the unit. Gather the chosen materials and tools, and ensure you have a stable working surface. A second person can help lift panels and manage longer duct runs, especially when working in tight spaces.
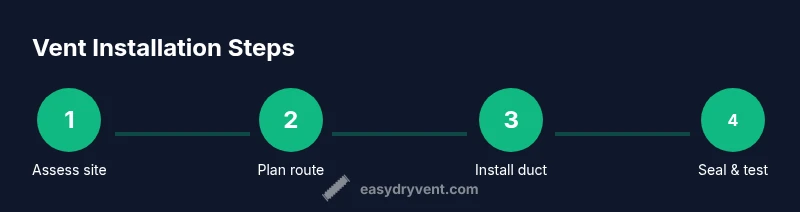
Step-by-step installation overview
This section provides a high-level outline of the installation process without duplicating the step-by-step details that appear in the dedicated STEP-BY-STEP block. Begin by validating the chosen vent path, then mount interior duct supports along the run. Attach the exhaust port to the washer-dryer with a secure, clean connection, install the exterior hood with weatherproof sealing, and test airflow before reassembling any panels. Routine checks after installation will catch leaks or loose fittings early and prevent costly service calls.
Testing, troubleshooting, and lint management
After completing the installation, run a test cycle on the washer-dryer to verify exhaust flow. Check both interior joints and the exterior termination for signs of air leakage and condensation. Any leaks should be resealed with foil tape and resealed joints. Periodic lint removal at the vent hood and interior connections is essential; consider a yearly professional cleaning if you notice reduced airflow or excessive lint in the area. Keep records of inspections to support ongoing safety.
Maintenance and long-term care
Maintenance is essential to keeping a washer-dryer vent functioning safely. Set a periodic schedule to inspect the exterior vent for obstructions, clear lint buildup in accessible sections of the duct, and replace damaged parts immediately. Regularly verify that the backdraft damper moves freely and that the weatherproof seal around the exterior opening remains intact. Proper maintenance reduces energy waste and prolongs the life of the appliance.
Common mistakes to avoid
Avoid relying on flexible ducts that bend sharply or collapse under heat, as they impede airflow and trap lint. Don’t exceed recommended lengths or number of elbows, which increases resistance and moisture buildup. Never seal joints with caulk inside the living space; use metal tape and appropriate sealants. Finally, don’t ignore manufacturer guidance or local codes—consult professionals if you’re unsure about any step.
Tools & Materials
- Measuring tape(At least 25 ft for planning routes; longer if needed)
- Screwdriver set (Phillips & flat)(For mounting duct brackets and vent hood screws)
- Tin snips / duct cutter(Clean straight cuts in metal duct)
- 4-inch metal vent duct (rigid or semi-rigid)(Avoid plastic; minimize elbows)
- Exterior vent hood with backdraft damper(Prevents backflow and pests)
- Aluminum foil tape (high-temperature)(Seal all duct joints securely)
- Duct sealant or exterior-grade caulk(Weatherproof exterior penetrations)
- Safety gear (gloves, goggles)(Protect hands and eyes during work)
- Flashlight or headlamp(Illuminate dark spaces and joints)
- Marker or pencil(Mark cut lines and measurement points)
Steps
Estimated time: 1-2 hours
- 1
Assess the current vent setup
Inspect the existing vent path for damage, access, and suitability for a washer-dryer combo. Note the distance to openings, nearby combustible materials, and any bends that could impede airflow. This helps plan an efficient route with minimal resistance.
Tip: Take photos of connections and obstacles for reference. - 2
Choose the vent path and duct type
Plan the shortest, straightest route to an exterior opening. Select 4-inch metal ducting and avoid long runs of flexible duct; maintain a clean, direct path to maximize airflow and minimize lint buildup.
Tip: Aim for 1-2 elbows max to reduce resistance. - 3
Power down and prepare the appliance area
Unplug the washer-dryer, switch off the dedicated circuit, and clear the workspace. Put on safety gear and disconnect hoses as needed to prevent accidental water leakage during installation.
Tip: Always unplug before handling any internal components. - 4
Install interior duct run
Attach the duct to the dryer exhaust port using compatible fittings. Support the duct with clamps or brackets, and cut to length with clean edges. Seal joints with foil tape to create an airtight path.
Tip: Keep seams on the top side of ducts to avoid lint collection at joints. - 5
Install exterior vent hood and short run outside wall
Cut the exterior opening, install the vent hood with a damper, and seal around the rough opening with exterior-grade caulk. Verify the damper moves freely and that the exterior cap is insect-proof.
Tip: Weatherproof the exterior opening to prevent leaks during rain. - 6
Seal and test internal connections
Inspect all interior joints, apply foil tape, and ensure the duct path remains straight. Run a short test cycle to verify airflow and listen for leaks at joints. Address any issues before removing test equipment.
Tip: Perform a quick airflow check by feeling at each joint and listening for escaping air. - 7
Final test and cleanup
Run a full dry cycle and observe exterior airflow. Remove any debris, store tools, and take photos of the final installation for future maintenance reference. Confirm there is no condensation inside the cabinet.
Tip: Document the route for future servicing and inspections.
Common Questions
Do I need to vent a washer-dryer combo?
Venting is typically required for vented washer-dryer combos to expel hot air and moisture. Always follow the appliance manual and local codes to determine the proper setup.
Venting is typically required; follow the manual and local codes to determine the proper setup.
What size duct should I use for most units?
Most installations use a 4-inch diameter metal duct. Check your unit's exhaust port and local codes to confirm the correct size.
Most use a 4-inch metal duct; check your unit and codes to confirm.
Is it safe to install the vent myself?
If you follow manufacturer guidelines, use proper materials, and observe safety protocols, a DIY vent installation can be safe. If in doubt, consult a professional.
Yes if you follow guidelines and stay within safety rules; consult a pro if unsure.
Can I reuse existing vent ducts?
You can reuse intact metal ducts if they are clean and undamaged. Do not reuse damaged sections or plastic ducts due to fire risk and airflow problems.
Reuse only if the ducts are clean and undamaged; replace damaged sections.
How often should I inspect and clean the vent?
Inspect the vent and lint trap at least annually, or more often if you notice reduced airflow or excessive lint. Clean any visible buildup during routine maintenance.
Inspect annually and clean buildup as needed.
Watch Video
Key Points
- Plan the vent path before starting
- Use 4-inch metal ducting for safety and efficiency
- Seal joints with foil tape and weatherproof exterior openings
- Test airflow and monitor for leaks after installation
- Schedule regular maintenance to prevent buildup